> For the complete documentation index, see [llms.txt](https://docs.keeper.io/llms.txt). Markdown versions of documentation pages are available by appending `.md` to page URLs; this page is available as [Markdown](https://docs.keeper.io/sso-connect-cloud/jp/device-approvals/automator/aws-elastic-container-service-with-ksm-advanced.md).

# KSMを使用したAWS Elastic Container サービス (高度な設定)

<figure><img src="https://1914737032-files.gitbook.io/~/files/v0/b/gitbook-x-prod.appspot.com/o/spaces%2F-Mfd2v-YT48Ljtykb8qm%2Fuploads%2F2S2SKPsFNCCYquvSEGTs%2FKeeper%20Automator.jpg?alt=media&#x26;token=f3a8419c-a119-44cd-abe7-518349eb5ee7" alt=""><figcaption></figcaption></figure>

## 概要

本ガイドでは、Fargate上のAmazon ECSでKeeperオートメーターを起動し、Keeperシークレットマネージャー (KSM) で公開Dockerコンテナのシークレット構成を取得する手順を取り扱います。

## Keeperのセットアップ

このデプロイではKSMが必要なため、オートメーター公開に必要なKeeperボルトとSSL証明書の準備手順を確認します。

### 1. SSL証明書

[カスタムSSL証明書](/sso-connect-cloud/jp/device-approvals/automator/custom-ssl-certificate.md) の手順でSSL証明書を作成します。

この手順が完了すると、`ssl-certificate.pfx`と`ssl-certificate-password.txt`の2つのファイルが作成されます。

### 2. 共有フォルダの作成

ボルトに共有フォルダを作成します。このフォルダは、シークレットマネージャーアプリケーション以外とは共有しません。

### 3. 添付ファイルの追加

共有フォルダにレコードを作成し、レコードUIDをメモします。SSL証明書とSSL証明書パスワードファイルを共有フォルダのレコードにアップロードします。

### 4. オートメータープロパティファイルの追加

以下の内容の `keeper.properties` ファイルをアップロードします。

```
ssl_mode=certificate
ssl_certificate_file=/config/ssl-certificate.pfx
ssl_certificate_file_password=
ssl_certificate_key_password=
automator_host=localhost
automator_port=443
disable_sni_check=true
persist_state=true
```

`disable_sni_check=true` は、マネージドロードバランサー配下でオートメーターを実行する場合に必要です。

共有フォルダとレコードは以下のようになります。

<figure><img src="https://1914737032-files.gitbook.io/~/files/v0/b/gitbook-x-prod.appspot.com/o/spaces%2F-Mfd2v-YT48Ljtykb8qm%2Fuploads%2Fo5XyftM28zwDpBvHCh4p%2FScreenshot%202023-07-12%20at%2011.56.06%20AM.jpg?alt=media&#x26;token=b3bc353b-7628-48d0-85a7-98911aa55fd2" alt=""><figcaption><p>共有フォルダのレコードに3つのファイル</p></figcaption></figure>

### 5. KSMアプリケーションの作成

ボルト内にKeeperシークレットマネージャー (KSM) アプリケーションを作成します。KSMに不慣れな場合は [クイックスタートガイド](/keeperpam/jp/secrets-manager/quick-start-guide.md) をご参照ください。アプリ名は `Automator` で問題ありません。

<figure><img src="https://1914737032-files.gitbook.io/~/files/v0/b/gitbook-x-prod.appspot.com/o/spaces%2F-Mfd2v-YT48Ljtykb8qm%2Fuploads%2FFUInSxMspcSCKpYr9tQd%2FScreenshot%202023-07-12%20at%2012.01.46%20PM.jpg?alt=media&#x26;token=73d568ae-61d2-4d2b-a771-f8546e03af60" alt=""><figcaption><p>KSMアプリケーション</p></figcaption></figure>

### 6. KSMアプリケーションを共有フォルダに添付

共有フォルダを編集し、オートメーターアプリケーションをこのフォルダに追加します。

<figure><img src="https://1914737032-files.gitbook.io/~/files/v0/b/gitbook-x-prod.appspot.com/o/spaces%2F-Mfd2v-YT48Ljtykb8qm%2Fuploads%2FsEjIQeseWlVi7Mw5QZOe%2FScreenshot%202023-07-12%20at%2011.57.47%20AM.jpg?alt=media&#x26;token=dc5380ac-cb06-4ea6-8327-05a0215d4773" alt=""><figcaption><p>共有フォルダにアプリケーションを割り当てる</p></figcaption></figure>

### 7. KSMデバイス設定の作成

シークレットマネージャーアプリを開き、**Devices** タブで **Add Device** をクリックします。**base64** 構成を選び、ダウンロードしてECSタスク定義で使用します。

<figure><img src="https://1914737032-files.gitbook.io/~/files/v0/b/gitbook-x-prod.appspot.com/o/spaces%2F-Mfd2v-YT48Ljtykb8qm%2Fuploads%2FjRVldgzd4pXzagqWPmL6%2FScreenshot%202023-07-12%20at%2012.02.21%20PM.jpg?alt=media&#x26;token=783f47e8-8f34-4e2e-b1ca-d3b6e09adab3" alt=""><figcaption><p>base64設定の作成</p></figcaption></figure>

## AWSのセットアップ

### 1. VPCの作成

VPCが存在しない場合は、複数のサブネット、ルートテーブル、インターネットゲートウェイを持つ基本的なVPCをセットアップする必要があります。こちらの例では、以下のリソースマップに見られるように、インターネットゲートウェイを備えたVPC内に3つのサブネットが含まれています。

<figure><img src="https://1914737032-files.gitbook.io/~/files/v0/b/gitbook-x-prod.appspot.com/o/spaces%2F-Mfd2v-YT48Ljtykb8qm%2Fuploads%2F23HOPBLldMFe5xsO4OFd%2FScreenshot%202023-04-16%20at%2011.48.19%20AM.png?alt=media&#x26;token=fdf571ff-7ff5-4393-97d1-fc6e78e23877" alt=""><figcaption><p>VPCのセットアップ</p></figcaption></figure>

### 2. CloudWatchロググループの作成

**\[CloudWatch]** > \*\*\[ロググループの作成]\*\*に移動します。

ロググループを**automator-logs**と名付けます。

<figure><img src="https://1914737032-files.gitbook.io/~/files/v0/b/gitbook-x-prod.appspot.com/o/spaces%2F-Mfd2v-YT48Ljtykb8qm%2Fuploads%2FwMbeVivBG4jYXo8s1CFB%2FScreenshot%202023-04-16%20at%2012.11.45%20PM.png?alt=media&#x26;token=6786d41e-4663-4b12-8fcc-86410e28ac1b" alt=""><figcaption><p>CloudWatchロググループの作成</p></figcaption></figure>

### 3. タスク実行IAMロールの作成

**IAM** > **Create role** を開きます。

**AWS service** を選択します。

次に、Elastic Container Service を検索して選択します。

**Elastic Container Service Task** を選び、**Next** をクリックします。

<figure><img src="https://1914737032-files.gitbook.io/~/files/v0/b/gitbook-x-prod.appspot.com/o/spaces%2F-Mfd2v-YT48Ljtykb8qm%2Fuploads%2FUkANQS6ugZuUHo9y7x3z%2FScreenshot%202023-04-16%20at%2010.34.41%20AM.png?alt=media&#x26;token=07b6744a-d46f-4382-809c-9991679a3558" alt=""><figcaption></figcaption></figure>

**AmazonECSTaskExecution** ポリシーを追加し、**Next** をクリックします。

<figure><img src="https://1914737032-files.gitbook.io/~/files/v0/b/gitbook-x-prod.appspot.com/o/spaces%2F-Mfd2v-YT48Ljtykb8qm%2Fuploads%2FpFtfP4uSsgu4B1bsJqLa%2FScreenshot%202023-04-16%20at%2010.35.02%20AM.png?alt=media&#x26;token=b0c82d42-f172-4d2a-b6d0-2728130103da" alt=""><figcaption></figcaption></figure>

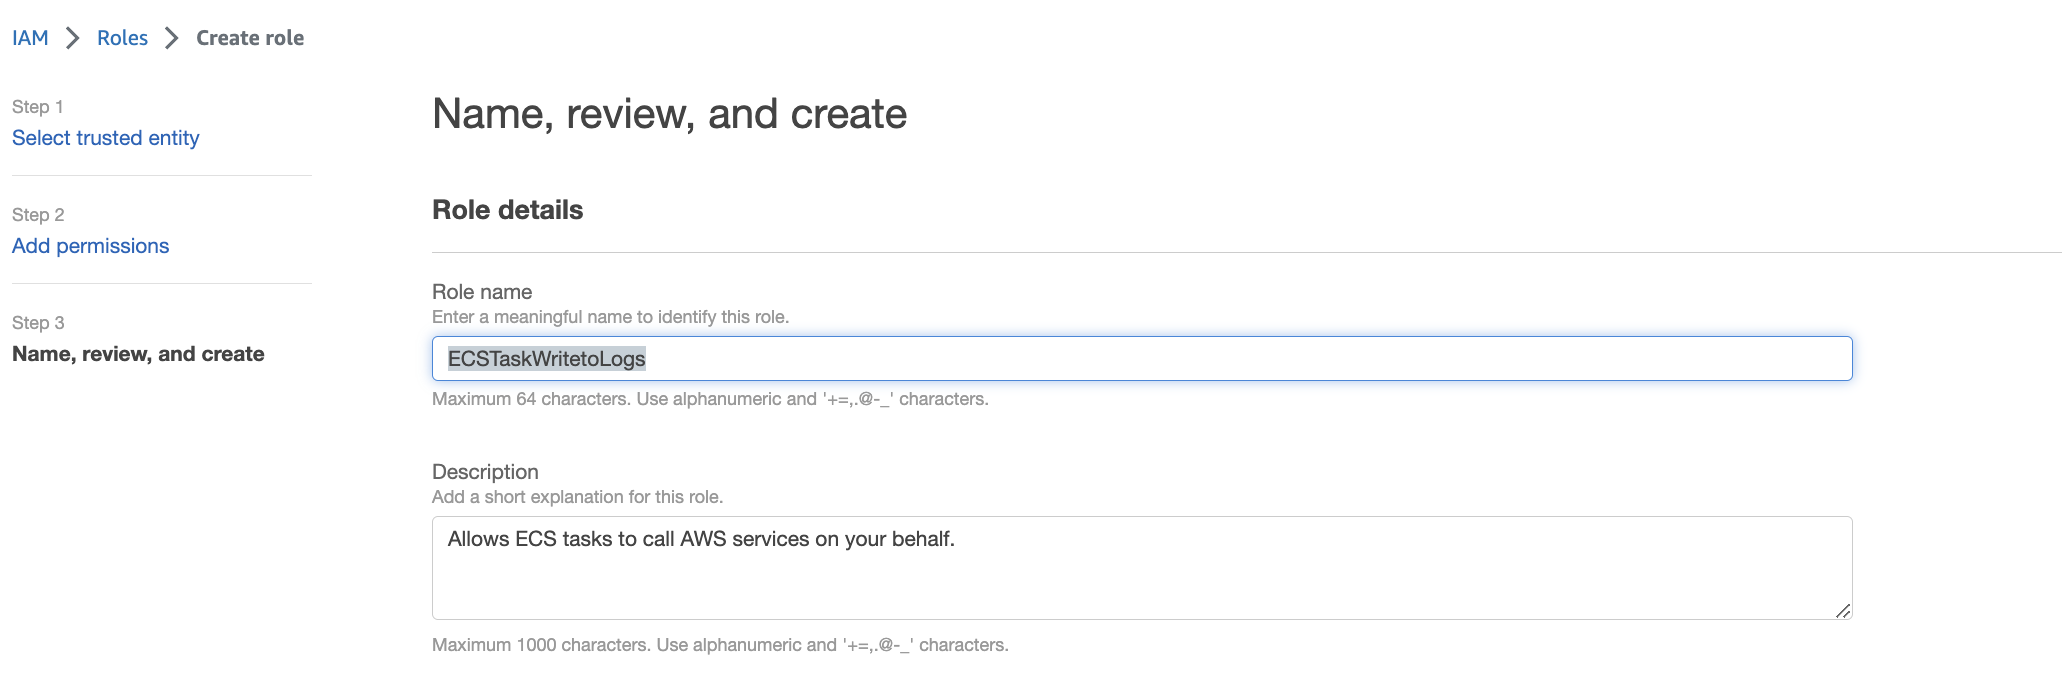
ロール名を **ECSTaskWritetoLogs** に設定して作成します。

<figure><img src="https://1914737032-files.gitbook.io/~/files/v0/b/gitbook-x-prod.appspot.com/o/spaces%2F-Mfd2v-YT48Ljtykb8qm%2Fuploads%2FMThvWhkTVOe18PB6fzT6%2FScreenshot%202023-04-16%20at%2010.35.29%20AM.png?alt=media&#x26;token=5b42c016-50c2-4268-a0ae-74552e15f5af" alt=""><figcaption></figcaption></figure>

このロールのARNをメモして以下の手順で使用できるようにします。

本例では **`arn:aws:iam::373699066757:role/ECSTaskWritetoLogs`** です。

<figure><img src="https://1914737032-files.gitbook.io/~/files/v0/b/gitbook-x-prod.appspot.com/o/spaces%2F-Mfd2v-YT48Ljtykb8qm%2Fuploads%2F6R1BZKhiPy8aQq73jZvy%2FScreenshot%202023-04-16%20at%2012.25.39%20PM.png?alt=media&#x26;token=8d70841b-4b68-44c7-8c71-d97423050a73" alt=""><figcaption><p>ARNをメモ</p></figcaption></figure>

### 4. ECSのセキュリティグループを作成

\*\*\[EC2] > **\[セキュリティ グループ]\*\*\*\*に移動し、**\[セキュリティグループの作成]\*\*をクリックします。

Keeperテナントのリージョンに応じて、Keeperクラウドからの HTTPS ポート 443 を許可する受信ルールを作成します。テナント所在地ごとのIP一覧は [イングレス要件](/sso-connect-cloud/jp/device-approvals/automator/ingress-requirements.md) をご参照ください。以下の例は米国データセンターです。

* テストとトラブルシューティングのため、ワークステーションの外部IPアドレスも追加することを推奨します。

名前を **MyAutomatorService** などに設定し、**Create** をクリックします。

<figure><img src="https://1914737032-files.gitbook.io/~/files/v0/b/gitbook-x-prod.appspot.com/o/spaces%2F-Mfd2v-YT48Ljtykb8qm%2Fuploads%2F7GHCjypfwelEfkH3E9HJ%2FScreenshot%202023-04-15%20at%208.45.19%20AM.png?alt=media&#x26;token=d9614861-d1a0-40a2-a9c0-5e517f77dfc1" alt=""><figcaption><p>ECSセキュリティグループの作成</p></figcaption></figure>

| Keeperテナント地域 | IP1              | IP2               |
| ------------ | ---------------- | ----------------- |
| US           | 54.208.20.102/32 | 34.203.159.189/32 |
| US GovCloud  | 18.252.135.74/32 | 18.253.212.59/32  |
| EU           | 52.210.163.45/32 | 54.246.185.95/32  |
| AU           | 3.106.40.41/32   | 54.206.208.132/32 |
| CA           | 35.182.216.11/32 | 15.223.136.134/32 |
| JP           | 54.150.11.204/32 | 52.68.53.105/32   |

セキュリティグループ保存後、受信ルールを再度編集し、HTTPS ポート 443 を追加してドロップダウンからセキュリティグループを選択します。ロードバランサーがヘルス状態を監視し、トラフィックを分散できます。

### 5. EFS用セキュリティグループの作成

クラスターからEFSへのNFSアクセスを制御する別のセキュリティグループを作成します。

\*\*\[EC2] > **\[セキュリティ グループ]\*\*\*\*に移動し、**\[セキュリティグループの作成]\*\*をクリックします。

**MyAutomatorEFS**のように名前を設定します。

Typeを**NFS**、Source を**Custom**に設定し、ECSクラスター用に前の手順で作成したセキュリティグループを選択します。

\*\*\[セキュリティグループの作成]\*\*をクリックします。

<figure><img src="https://1914737032-files.gitbook.io/~/files/v0/b/gitbook-x-prod.appspot.com/o/spaces%2F-Mfd2v-YT48Ljtykb8qm%2Fuploads%2FFKtuEGb6geSPS3ozbmvb%2FScreenshot%202023-04-16%20at%2011.56.02%20AM.png?alt=media&#x26;token=63f848c3-6cff-44c8-9026-7b8feea3777a" alt=""><figcaption></figcaption></figure>

以下の手順のためにセキュリティグループIDを控えます。本例では `sgr-089fea5e4738f3898` です。

### 6. 2つのElastic File Systemボリュームを作成

オートメーターは2つの異なるフォルダへのアクセスが必要です。本セットアップ例では、SSL証明書とSSLパスフレーズファイルを保存するために1つのボリュームを作成しています。2つ目のボリュームには、オートメーターサービスのプロパティファイルが保存されます。これら3つのファイルはKeeperのレコードに含まれています。

**\[AWS]** > \*\*\[Elastic File System]**に移動し、**\[ファイルシステムの作成]\*\*をクリックします。

**automator\_config**と名付けて、\*\*\[作成]\*\*をクリックします。

再び\*\*\[Elastic File System]**に移動し、**\[Create file system]**をクリックします。automator\_settingsと名付けて**\[作成]\*\*をクリックします。

表示されるファイルシステムID (fs-xxxなど) は、ECSタスク定義で使用されます。

1分後、2つのファイルシステムが利用可能になります。各ファイルシステムを開き、**Network** タブで **Manage** をクリックします。

<figure><img src="https://1914737032-files.gitbook.io/~/files/v0/b/gitbook-x-prod.appspot.com/o/spaces%2F-Mfd2v-YT48Ljtykb8qm%2Fuploads%2FMZN1fQnSukLlc4i2jnLn%2FScreenshot%202023-04-16%20at%2012.00.35%20PM.png?alt=media&#x26;token=15dfc38f-f926-45b3-9724-35436d995270" alt=""><figcaption><p>EFSでのネットワークセキュリティグループの管理</p></figcaption></figure>

各サブネットのセキュリティグループを手順 5 の **MyAutomatorEFS** などに変更し、**Save** をクリックします。作成された両方のファイルシステムに同じネットワーク変更を加えます。

<figure><img src="https://1914737032-files.gitbook.io/~/files/v0/b/gitbook-x-prod.appspot.com/o/spaces%2F-Mfd2v-YT48Ljtykb8qm%2Fuploads%2FJFsydQocdAszx2hhgUGu%2FScreenshot%202023-04-16%20at%2012.02.23%20PM.png?alt=media&#x26;token=0a3d7989-97ab-4b67-a431-667dca045f58" alt=""><figcaption><p>EFSでセキュリティグループを変更</p></figcaption></figure>

### 7. Elastic Container Serviceクラスターの作成

Amazon Elastic Container Serviceへ進みます。

\*\*\[クラスターの作成]**を選択し、クラスター名とVPCを割り当てます。 こちらの例では、デフォルトの**\[AWS Fargate (サーバーレス）]\*\*インフラストラクチャを使用しています。

* Default namespace は `automator` で問題ありません
* **Infrastructure** を AWS Fargate (serverless) に設定します
* **Create** をクリックします

<figure><img src="https://1914737032-files.gitbook.io/~/files/v0/b/gitbook-x-prod.appspot.com/o/spaces%2F-Mfd2v-YT48Ljtykb8qm%2Fuploads%2F2y7Dy0ip8CHcZ3nl7A0o%2Fcreatecluster%20(1).JPG?alt=media&#x26;token=b1c16a23-8c21-4701-9c55-530f45921076" alt=""><figcaption><p>AWS FargateでECSクラスターを作成</p></figcaption></figure>

### 8. ECSタスク定義の作成

任意のテキストエディタで、以下のJSONタスク定義ファイルをコピーして保存します。

JSONファイルに以下の変更を加えます。

* 本ガイドの冒頭で作成したKeeperシークレットマネージャーのXXXCONFIGXXX値をBase64設定に変更します。
* 3箇所の `XXXXX` を、KSMが参照する共有フォルダ内レコードのUID (SSL証明書、SSL証明書パスワード、設定ファイルを含む) に置き換えます
* 2つのファイルシステム ID (fs-XXX) を、上記の手順からのものに変更します。
* ロールIDのXXXをAWSロールに固有のものに変更します。
* 2箇所のeu-west-1値を、ECSサービスの地域に変更します。

{% code overflow="wrap" %}

```
{
    "family": "automator",
    "containerDefinitions": [
        {
            "name": "init",
            "image": "keeper/keeper-secrets-manager-writer:latest",
            "cpu": 1024,
            "memory": 1024,
            "portMappings": [],
            "essential": false,
            "environment": [
                {
                    "name": "KSM_CONFIG",
                    "value": "XXXCONFIGXXX"
                },
                {
                    "name": "SECRETS",
                    "value": "XXXXX/file/ssl-certificate.pfx > file:/usr/mybin/config/ssl-certificate.pfx\nXXXXX/file/ssl-certificate-password.txt > file:/usr/mybin/config/ssl-certificate-password.txt\nXXXXX/file/keeper.properties > file:/usr/mybin/settings/keeper.properties"
                }
            ],
            "mountPoints": [
                {
                    "sourceVolume": "automatorconfig",
                    "containerPath": "/usr/mybin/config"
                },
                {
                    "sourceVolume": "automatorsettings",
                    "containerPath": "/usr/mybin/settings"
                }
            ],
            "volumesFrom": [],
            "logConfiguration": {
                "logDriver": "awslogs",
                "options": {
                    "awslogs-group": "automator-logs",
                    "awslogs-region": "eu-west-1",
                    "awslogs-stream-prefix": "container-1"
                }
            }
        },
        {
            "name": "main",
            "image": "keeper/automator:latest",
            "cpu": 1024,
            "memory": 4096,
            "portMappings": [
                {
                    "containerPort": 443,
                    "hostPort": 443,
                    "protocol": "tcp"
                }
            ],
            "essential": true,
            "environment": [],
            "mountPoints": [
                {
                    "sourceVolume": "automatorconfig",
                    "containerPath": "/usr/mybin/config"
                },
                {
                    "sourceVolume": "automatorsettings",
                    "containerPath": "/usr/mybin/settings"
                }
            ],
            "volumesFrom": [],
            "dependsOn": [
                {
                    "containerName": "init",
                    "condition": "SUCCESS"
                }
            ],
            "logConfiguration": {
                "logDriver": "awslogs",
                "options": {
                    "awslogs-group": "automator-logs",
                    "awslogs-region": "eu-west-1",
                    "awslogs-stream-prefix": "container-2"
                }
            }
        }
    ],
    "executionRoleArn": "arn:aws:iam::XXX:role/ECSTaskWritetoLogs",
    "networkMode": "awsvpc",
    "volumes": [
        {
            "name": "automatorconfig",
            "efsVolumeConfiguration": {
                "fileSystemId": "fs-XXX",
                "rootDirectory": "/",
                "transitEncryption": "ENABLED"
            }
        },
        {
            "name": "automatorsettings",
            "efsVolumeConfiguration": {
                "fileSystemId": "fs-XXX",
                "rootDirectory": "/",
                "transitEncryption": "ENABLED"
            }
        }
    ],
    "requiresCompatibilities": [
        "FARGATE"
    ],
    "cpu": "2048",
    "memory": "5120"
}
```

{% endcode %}

**Elastic Container Service** > **Task definitions** > **Create Task from JSON** を開きます。

<figure><img src="https://1914737032-files.gitbook.io/~/files/v0/b/gitbook-x-prod.appspot.com/o/spaces%2F-Mfd2v-YT48Ljtykb8qm%2Fuploads%2F8Rb0hWkpQzsW4xfu52ro%2FScreenshot%202023-04-16%20at%2012.33.12%20PM.png?alt=media&#x26;token=ba9e19d8-96e1-45bc-b9cb-bf2ad21779a0" alt=""><figcaption><p>JSONでタスク定義を作成</p></figcaption></figure>

既存JSONを削除し、編集したJSONを貼り付けて **Create** をクリックします

<figure><img src="https://1914737032-files.gitbook.io/~/files/v0/b/gitbook-x-prod.appspot.com/o/spaces%2F-Mfd2v-YT48Ljtykb8qm%2Fuploads%2FsKosqm3rFGgzzlrHNKRY%2FScreenshot%202023-04-16%20at%208.06.14%20PM.png?alt=media&#x26;token=90406848-0db6-4e18-8b2c-e6066b0ad1a1" alt=""><figcaption><p>タスク定義</p></figcaption></figure>

このタスク定義は、インスタンスのCPU/メモリ要件に応じて変更できます。

### 9. SSL証明書をAWS Certificate Managerにアップロード

AWSのアプリケーションロードバランサーがオートメーターのリクエストに対応するには、SSL証明書が AWS Certificate Managerによって管理されている必要があります。

**AWS Certificate Manager**へ移動し、\*\*\[インポート]\*\*をクリックします。

ご利用のワークステーション上でSSL証明書 (.pfx) ファイルを、 PEMエンコードされた証明書本体、PEMエンコードされた秘密キー、PEMエンコードされた証明書チェーンに変換する必要があります。

.pfxファイルはすでに存在するので以下のopensslコマンドを使用します。ssl-certificate.pfxファイルと証明書パスワードをワークステーションへダウンロードし、以下のコマンドを入力します。

* PEMエンコードされた証明書本体の生成

```
openssl pkcs12 -in ssl-certificate.pfx -out automator-certificate.pem -nodes
openssl x509 -in automator-certificate.pem -out certificate_body.crt
```

* PEMエンコードされた秘密キーの生成

```
openssl pkey -in automator-certificate.pem -out private_key.key
```

* PEMエンコードされた証明書チェーンの生成

{% code overflow="wrap" %}

```
openssl crl2pkcs7 -nocrl -certfile automator-certificate.pem | openssl pkcs7 -print_certs -out certificate_chain.crt
```

{% endcode %}

3つのファイルの内容を画面へコピーします。

```
cat certificate_body.crt | pbcopy
   (証明書本体の箇所へ貼り付け)
   
cat private_key.key | pbcopy
   (証明書秘密キーの箇所へ貼り付け)
   
cat certificate_chain.crt | pbcopy
   (証明書チェーンの箇所へ貼り付け)
```

<figure><img src="https://1914737032-files.gitbook.io/~/files/v0/b/gitbook-x-prod.appspot.com/o/spaces%2F-Mfd2v-YT48Ljtykb8qm%2Fuploads%2FwvxhwJ5wlAdeUEiND4Bk%2FScreenshot%202023-04-16%20at%201.26.03%20PM.png?alt=media&#x26;token=a7cadb00-a60f-4268-bc88-6fc38782db5b" alt=""><figcaption><p>オートメーターサービス用に証明書をインポート</p></figcaption></figure>

### 10. ターゲットグループの作成

**EC2** > **Target Groups** を開き、**Create target group** をクリックします。

* Target type で **IP Addresses** を選択します
* ターゲットグループ名に**automatortargetgroup**または任意の名前を入力します。
* ポート**443**のHTTPプロトコルを選択します。
* ECSクラスターを含むVPC を選択します。
* HTTP1を選択します。
* **Health checks** で Health check protocol を **HTTPS** に設定します
* Health check path に **`/health`** を入力します
* **Next** をクリックします
* まだターゲットを選択せずに\*\*\[ターゲットグループの作成]\*\*をクリックします。

### 11. アプリケーションロードバランサー (ALB) の作成

\*\*\[EC2] > **\[ロードバランサー]** > \*\*\[ロードバランサーの作成]\*\*\*\*に移動します。

\*\*\[Application Load Balancer] > \*\*\[作成]\*\*\*\*を選択します。

* **automarnalb**などの任意の名前を割り当てます。
* スキームはInternet-facingとなります。
* IPアドレスの種類: IPv4
* \*\*\[ネットワークマッピング]\*\*の箇所で、ECSサービスをホストするVPCとサブネットを選択します。
* Security groups で、手順 5 で作成した **MyAutomatorService** を選択します
* \*\*\[リスナーとルーティング]\*\*の箇所でHTTPSポート443を選択し、ターゲットグループで前の手順で作成したターゲットグループ (**automatortargetgroup**) を選択します。
* \*\*\[セキュアリスナー設定]\*\*で、手順9でAWS Certificate ManagerにアップロードしたACMからのSSL証明書を選択します。
* \*\*\[ロードバランサーの作成]\*\*をクリックします。

### 12. ECSサービスの作成

**Elastic Container Service** > **Task definitions** から手順 8 のタスクを選択します

タスク定義画面で **Deploy** > **Create Service** をクリックします

<figure><img src="https://1914737032-files.gitbook.io/~/files/v0/b/gitbook-x-prod.appspot.com/o/spaces%2F-Mfd2v-YT48Ljtykb8qm%2Fuploads%2FGYgmz98Mt7fsALICeSN7%2FScreenshot%202023-04-16%20at%2012.35.25%20PM.png?alt=media&#x26;token=5633db7a-4592-4e89-84c5-ed6986fd0398" alt=""><figcaption><p>サービスを作成</p></figcaption></figure>

* **automator**の既存のクラスターを選択します。
* サービス名に**automatorservice**または任意の名前を割り当てます。
* 必要なタスクの数については、とりあえず1に設定します。設定が完了後に実行したいタスクの数を増やせます。
* **Networking** でVPCとサブネットを選択し、セキュリティグループを手順 5 の **MyAutomatorService** に置き換えます
* **パブリックIP**は**ON**にします。
* **Load balancing** で Load balancer type を **Application Load Balancer** に設定します
* **Existing** load balancer から手順 11 の **automatoralb** を選択します
* **既存の**リスナーを使用し、443:HTTPSリスナーを選択します。
* **既存の**ターゲットグループを使用し、手順10のターゲットグループを選択します。
* **Create** をクリックします。

<figure><img src="https://1914737032-files.gitbook.io/~/files/v0/b/gitbook-x-prod.appspot.com/o/spaces%2F-Mfd2v-YT48Ljtykb8qm%2Fuploads%2F3lrfQyJPlCOT5A9jNXPl%2FScreenshot%202023-04-16%20at%201.45.11%20PM.png?alt=media&#x26;token=fd19206a-e3c3-4b2d-8c19-ee9db8bc1074" alt=""><figcaption><p>ECSサービスの環境部分</p></figcaption></figure>

<figure><img src="https://1914737032-files.gitbook.io/~/files/v0/b/gitbook-x-prod.appspot.com/o/spaces%2F-Mfd2v-YT48Ljtykb8qm%2Fuploads%2Fp9AUdt7UZMsnLY7KBIid%2FScreenshot%202023-04-16%20at%201.45.48%20PM.png?alt=media&#x26;token=a3a30db1-7f67-4d5a-a740-8477ef37b8e3" alt=""><figcaption><p>デプロイ設定</p></figcaption></figure>

<figure><img src="https://1914737032-files.gitbook.io/~/files/v0/b/gitbook-x-prod.appspot.com/o/spaces%2F-Mfd2v-YT48Ljtykb8qm%2Fuploads%2FhwZe1y8Nyt4NMaa29r3b%2FScreenshot%202023-04-16%20at%201.46.33%20PM.png?alt=media&#x26;token=bf33b069-765a-4809-9c72-5a0c05532fa3" alt=""><figcaption><p>ECSサービスのネットワーク部分</p></figcaption></figure>

数分後にサービスが起動します。

### 13. DNSの更新

DNS名がRoute53によってホストおよび管理されていると仮定します。

**Route53** > レコードの**作成**または編集に移動します。

* Aレコードを作成します。
* **エイリアス**として設定します。
* Route traffic to **Alias to Application and Classic Load Balancer** を選択します
* AWS地域を選択します。
* **automatoralb** Application Load Balancer を選択します。
* **Simple Routing** を選択します
* **Save** をクリックします

以下の手順では、タスクを1件だけ実行した状態でKeeperコマンダーを使用してオートメーターを設定します。

### 14. Keeperコマンダーのインストール

この時点ではサービスは実行されていますが、まだKeeperと通信できない状態です。

ワークステーション、サーバー、または任意のコンピュータにKeeperコマンダーCLIをインストールします (初期設定のみ)。手順は [Keeperコマンダーのインストール](/keeperpam/jp/commander-cli/commander-installation-setup.md) をご参照ください。\
\
コマンダーをインストールした後、`keeper shell`と入力してセッションを開いてから`login`コマンドを使用してログインします。オートメーターをセットアップするには、Keeper管理者またはSSOノードを管理する権限を持つ管理者としてログインする必要があります。

```
$ keeper shell

My Vault> login admin@company.com
.
.
My Vault>
```

### 15. コマンダーでの初期設定

[Keeperコマンダー](/keeperpam/jp/commander-cli/overview.md)にログインし、`automator create`で始まる一連のコマンドを使用してオートメーターを有効にします。

```
My Vault> automator create --name="My Automator" --node="Azure Cloud"
```

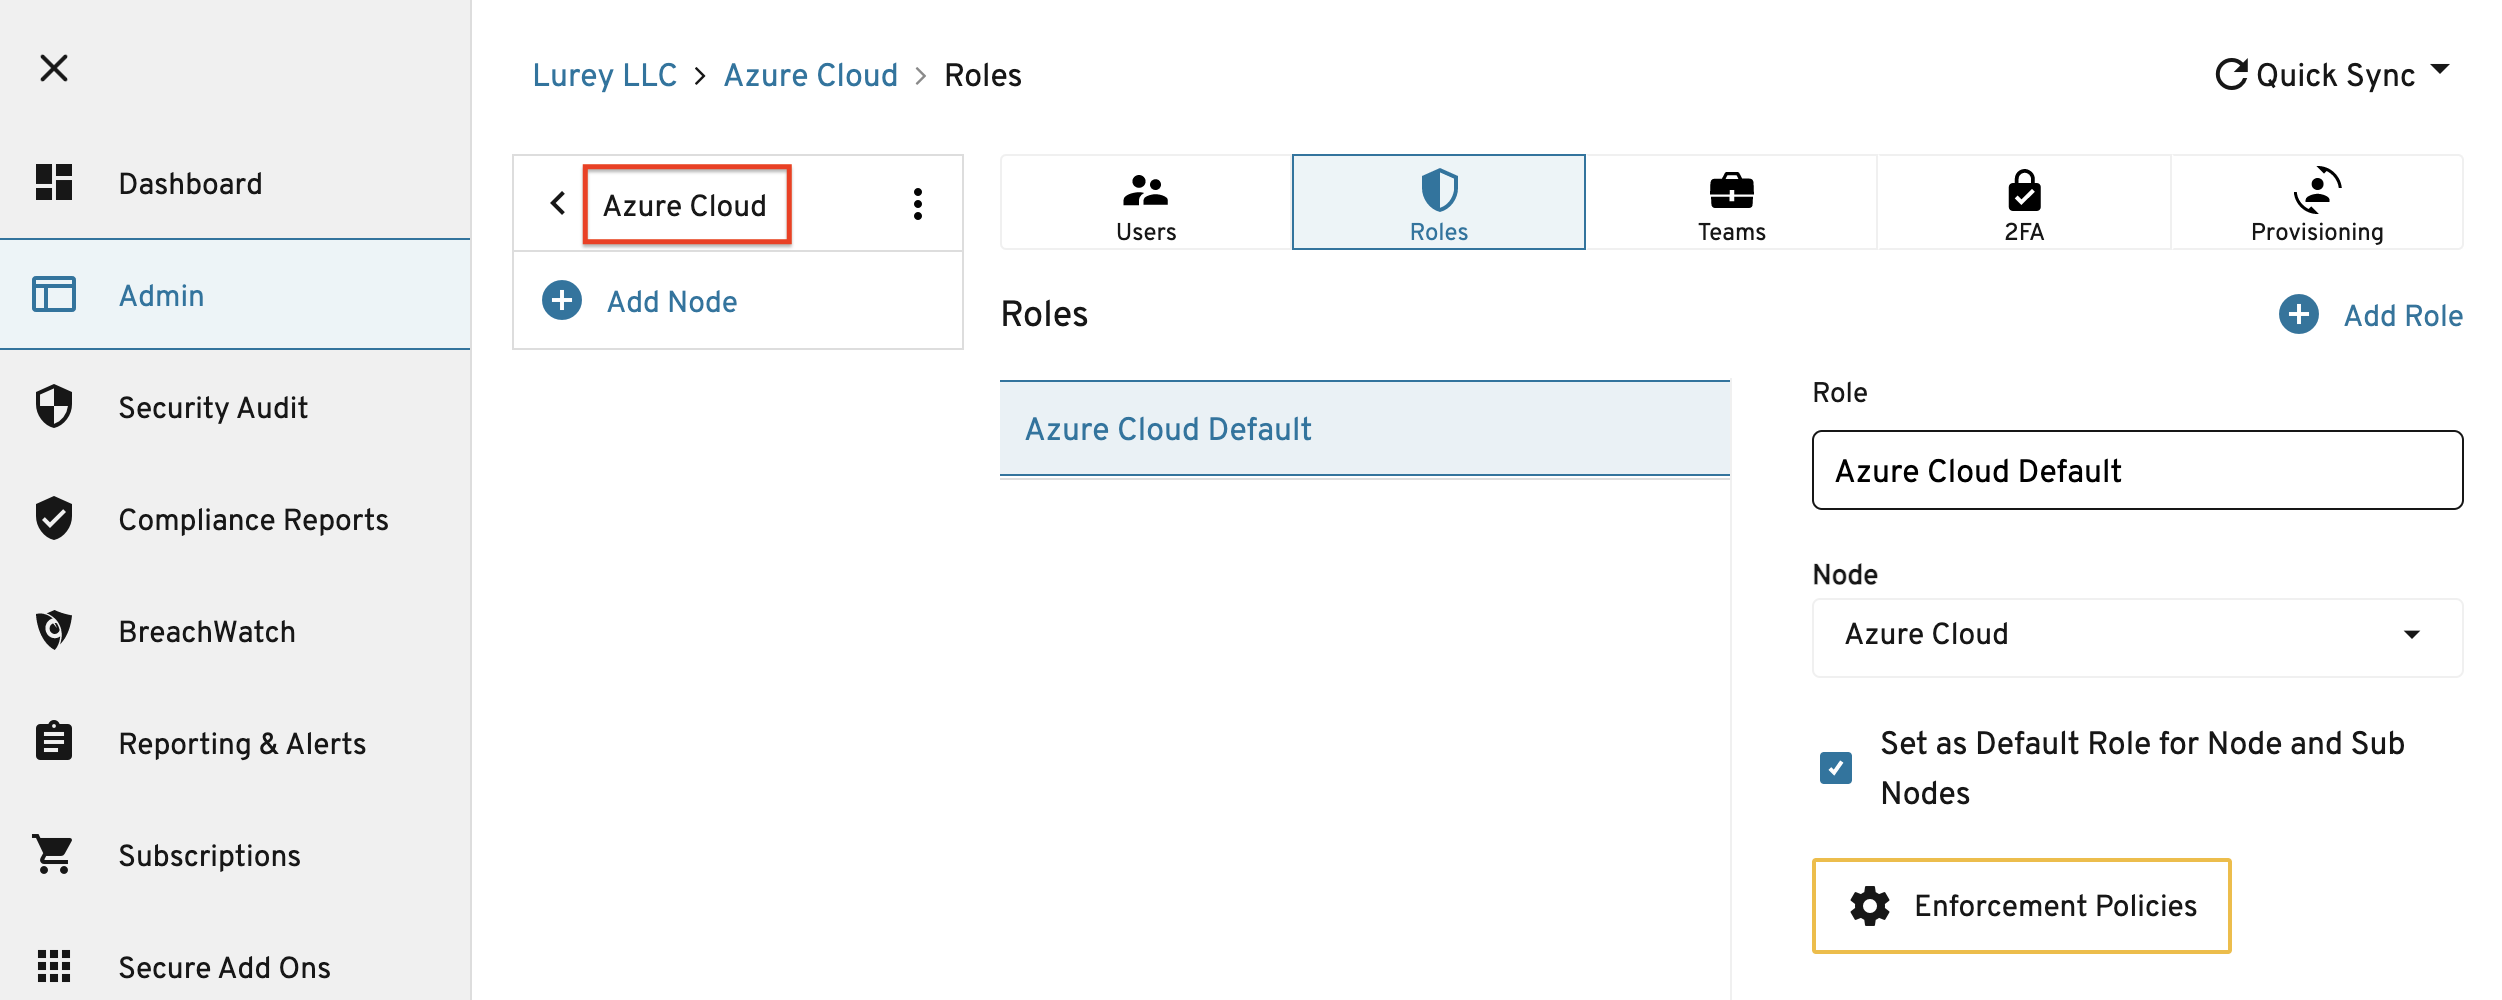
ノード名 (この場合はAzure Cloud) は、以下のように管理コンソールUIから取得します。

<figure><img src="https://1914737032-files.gitbook.io/~/files/v0/b/gitbook-x-prod.appspot.com/o/spaces%2F-Mfd2v-YT48Ljtykb8qm%2Fuploads%2FNdYz9XWKABSVqtIAV5Ff%2FScreen%20Shot%202021-09-10%20at%203.59.58%20PM.png?alt=media&#x26;token=3c897624-3ae2-465e-9749-c4357015dacc" alt=""><figcaption><p>オートメーターの作成</p></figcaption></figure>

コマンドの出力には、IDプロバイダからのメタデータを含むオートメーター設定が表示されます。

```
                    Automator ID: 1477468749950
                            Name: My Automator
                             URL: 
                         Enabled: No
                     Initialized: No
                          Skills: Device Approval
```

以下のようにautomator editコマンドを実行します。これによりURLとスキルが設定されます (`team`、 `team_for_user`、`device`）。

{% code overflow="wrap" %}

```
automator edit --url https://<application URL> --skill=team --skill=team_for_user --skill=device "My Automator"
```

{% endcode %}

次にキーを交換します。オートメーター公開キーで暗号化されたエンタープライズ秘密キーがオートメーターに提供されます。

```
automator setup "My Automator"
```

新しい設定でオートメーターを初期化します。

```
automator init "My Automator"
```

サービスを有効にします。

```
automator enable "My Automator"
```

この時点で設定は完了となります。

自動ヘルスチェックには、以下のURLを使用できます。

https\://\<server>/health

以下は`curl`コマンドを使用した例です。

```
$ curl https://automator.lurey.com/health
OK
```

本セットアップ例では、ロードバランサーがターゲットインスタンスにヘルスチェックを転送します。

### 16. ユーザー体験のテスト

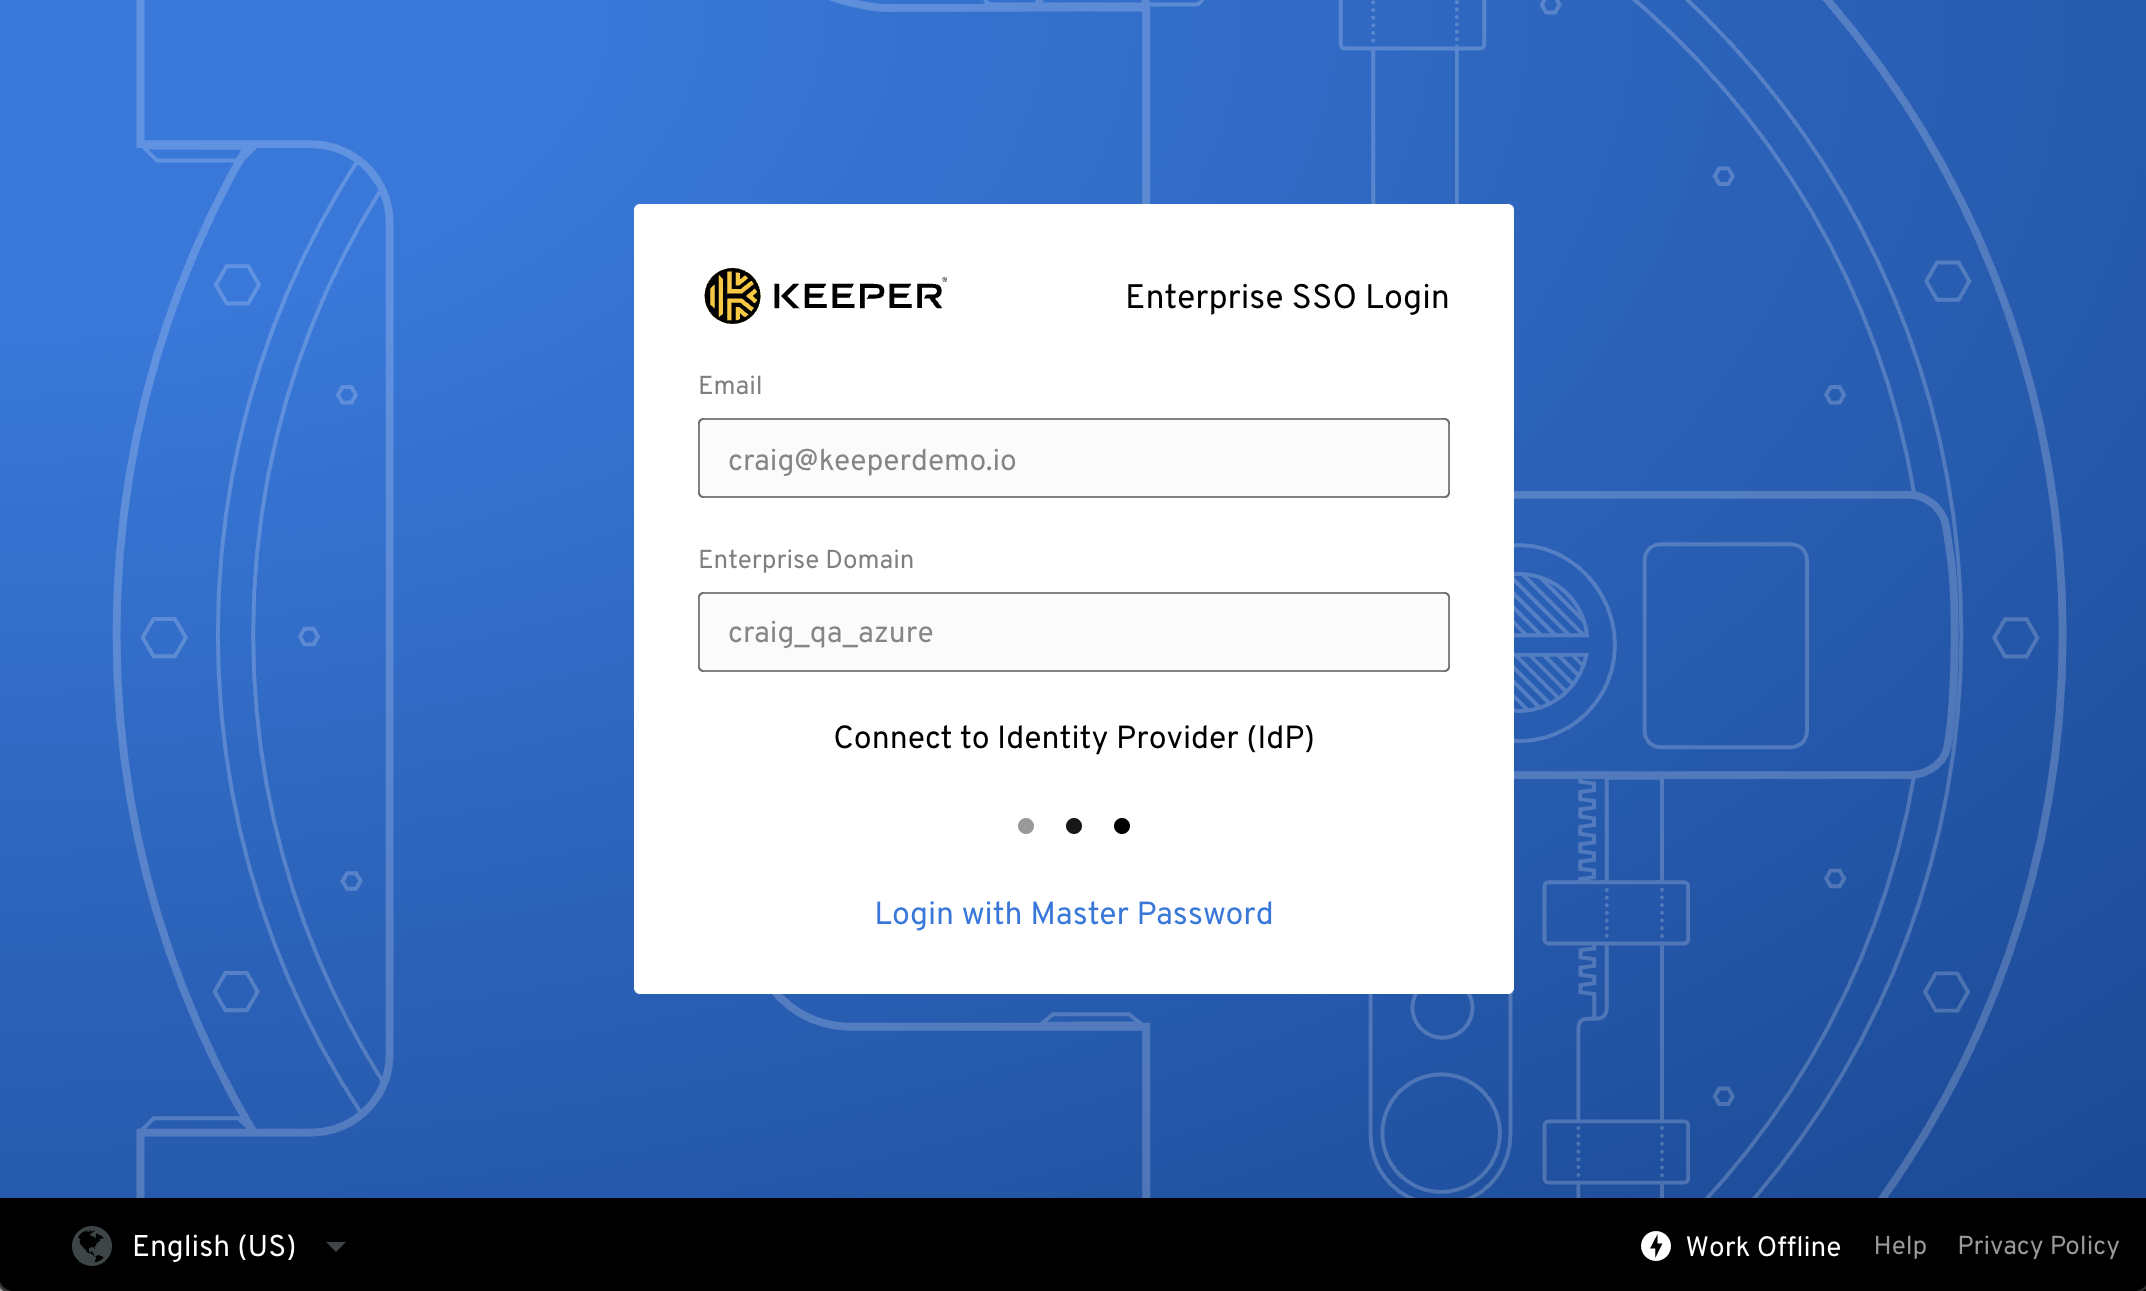
Keeperオートメーターが1件のタスクを実行した状態でデプロイされましたので、エンドユーザーの体験をテストできます。ユーザーがSSO IDプロバイダで認証した後は、承認を求めるプロンプトは必要なくなります。

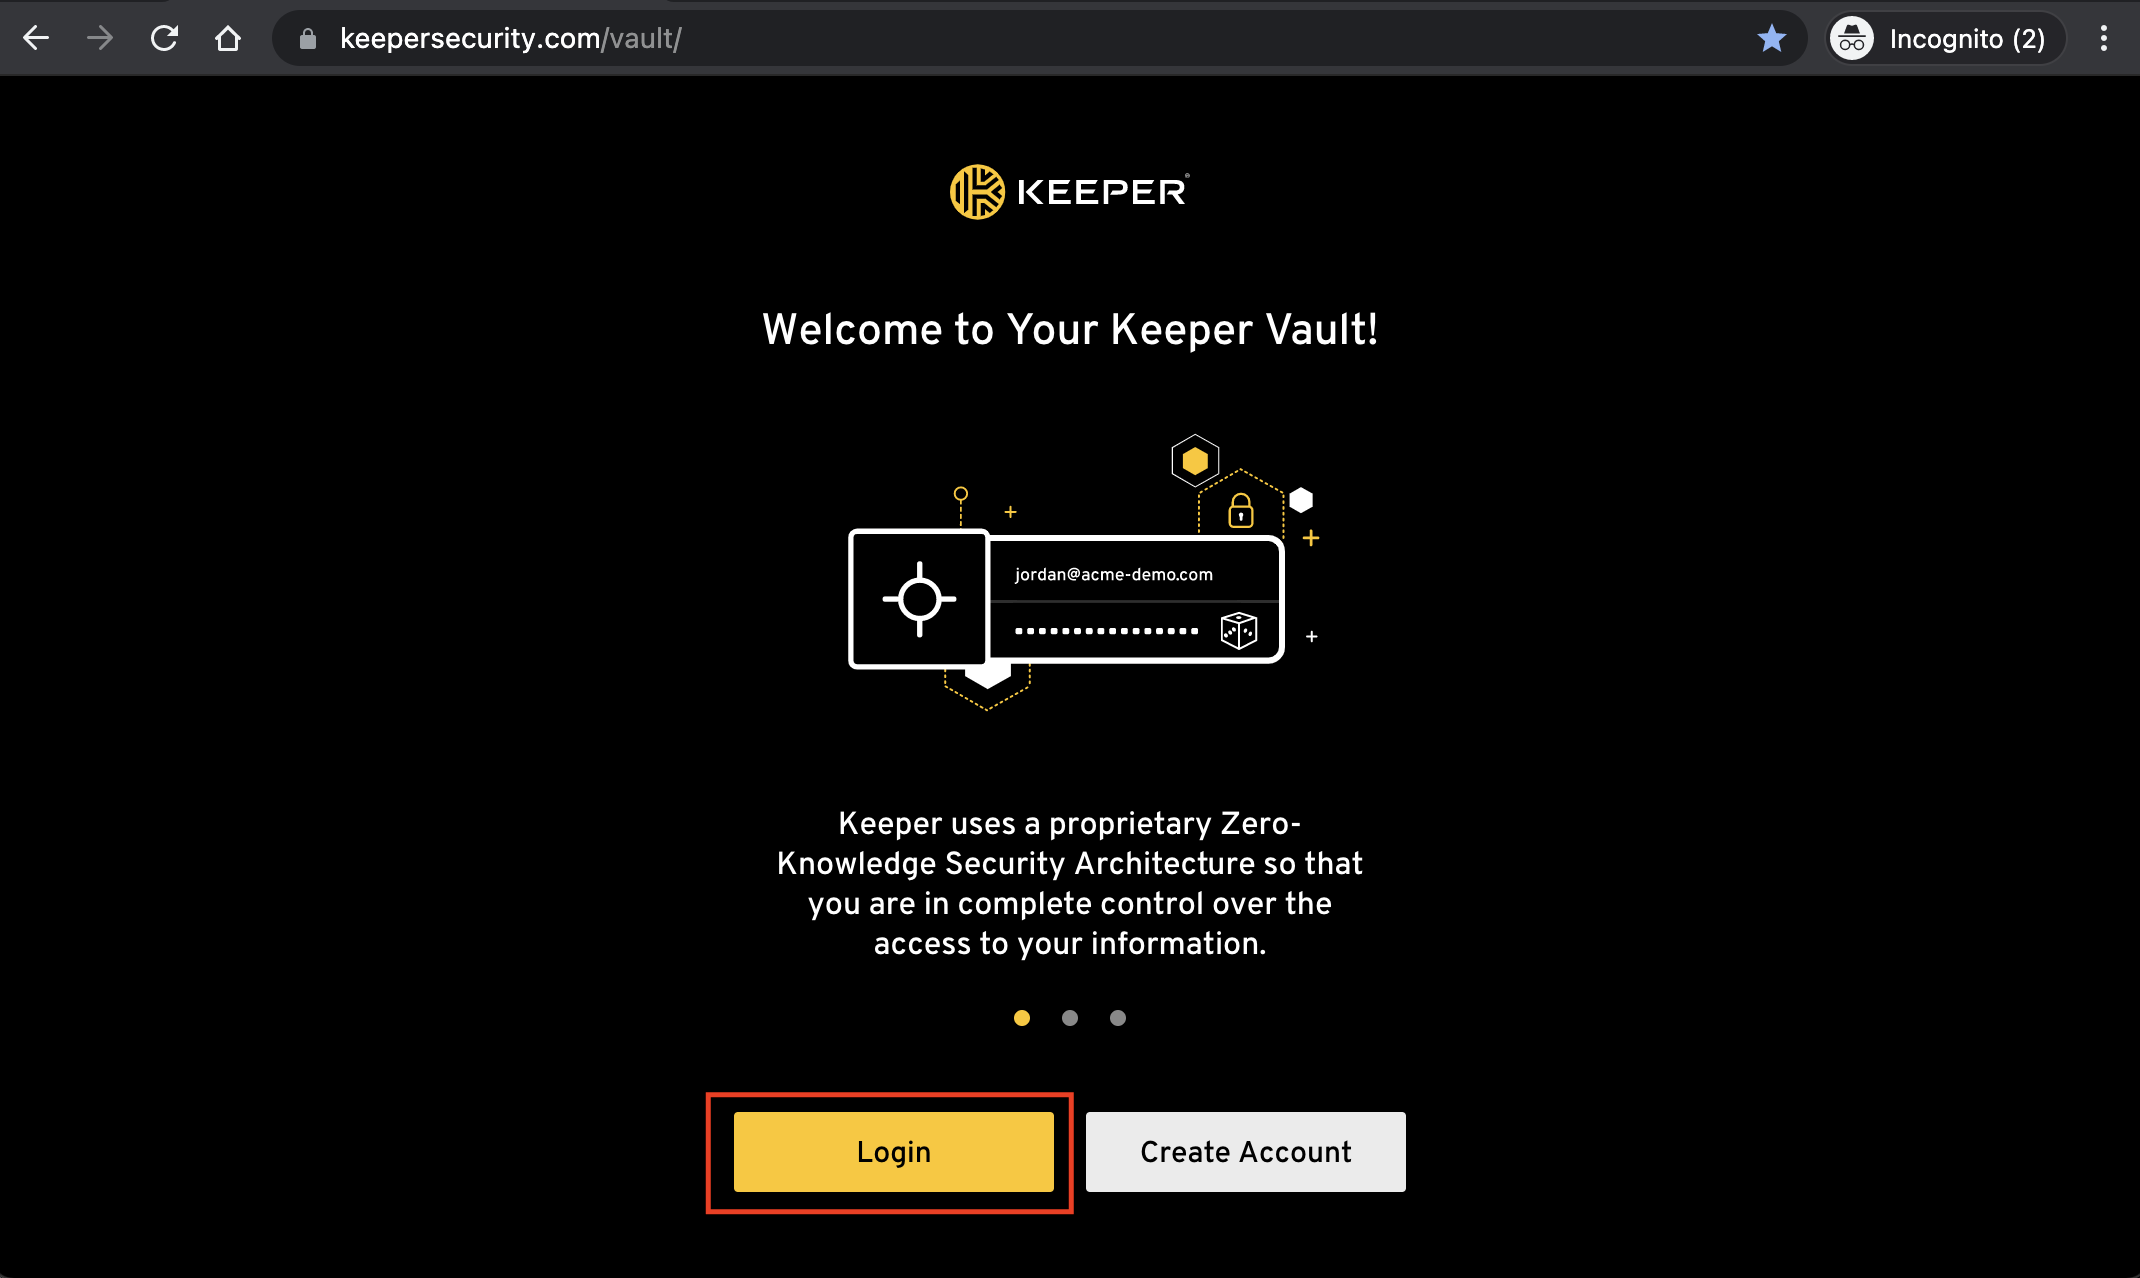
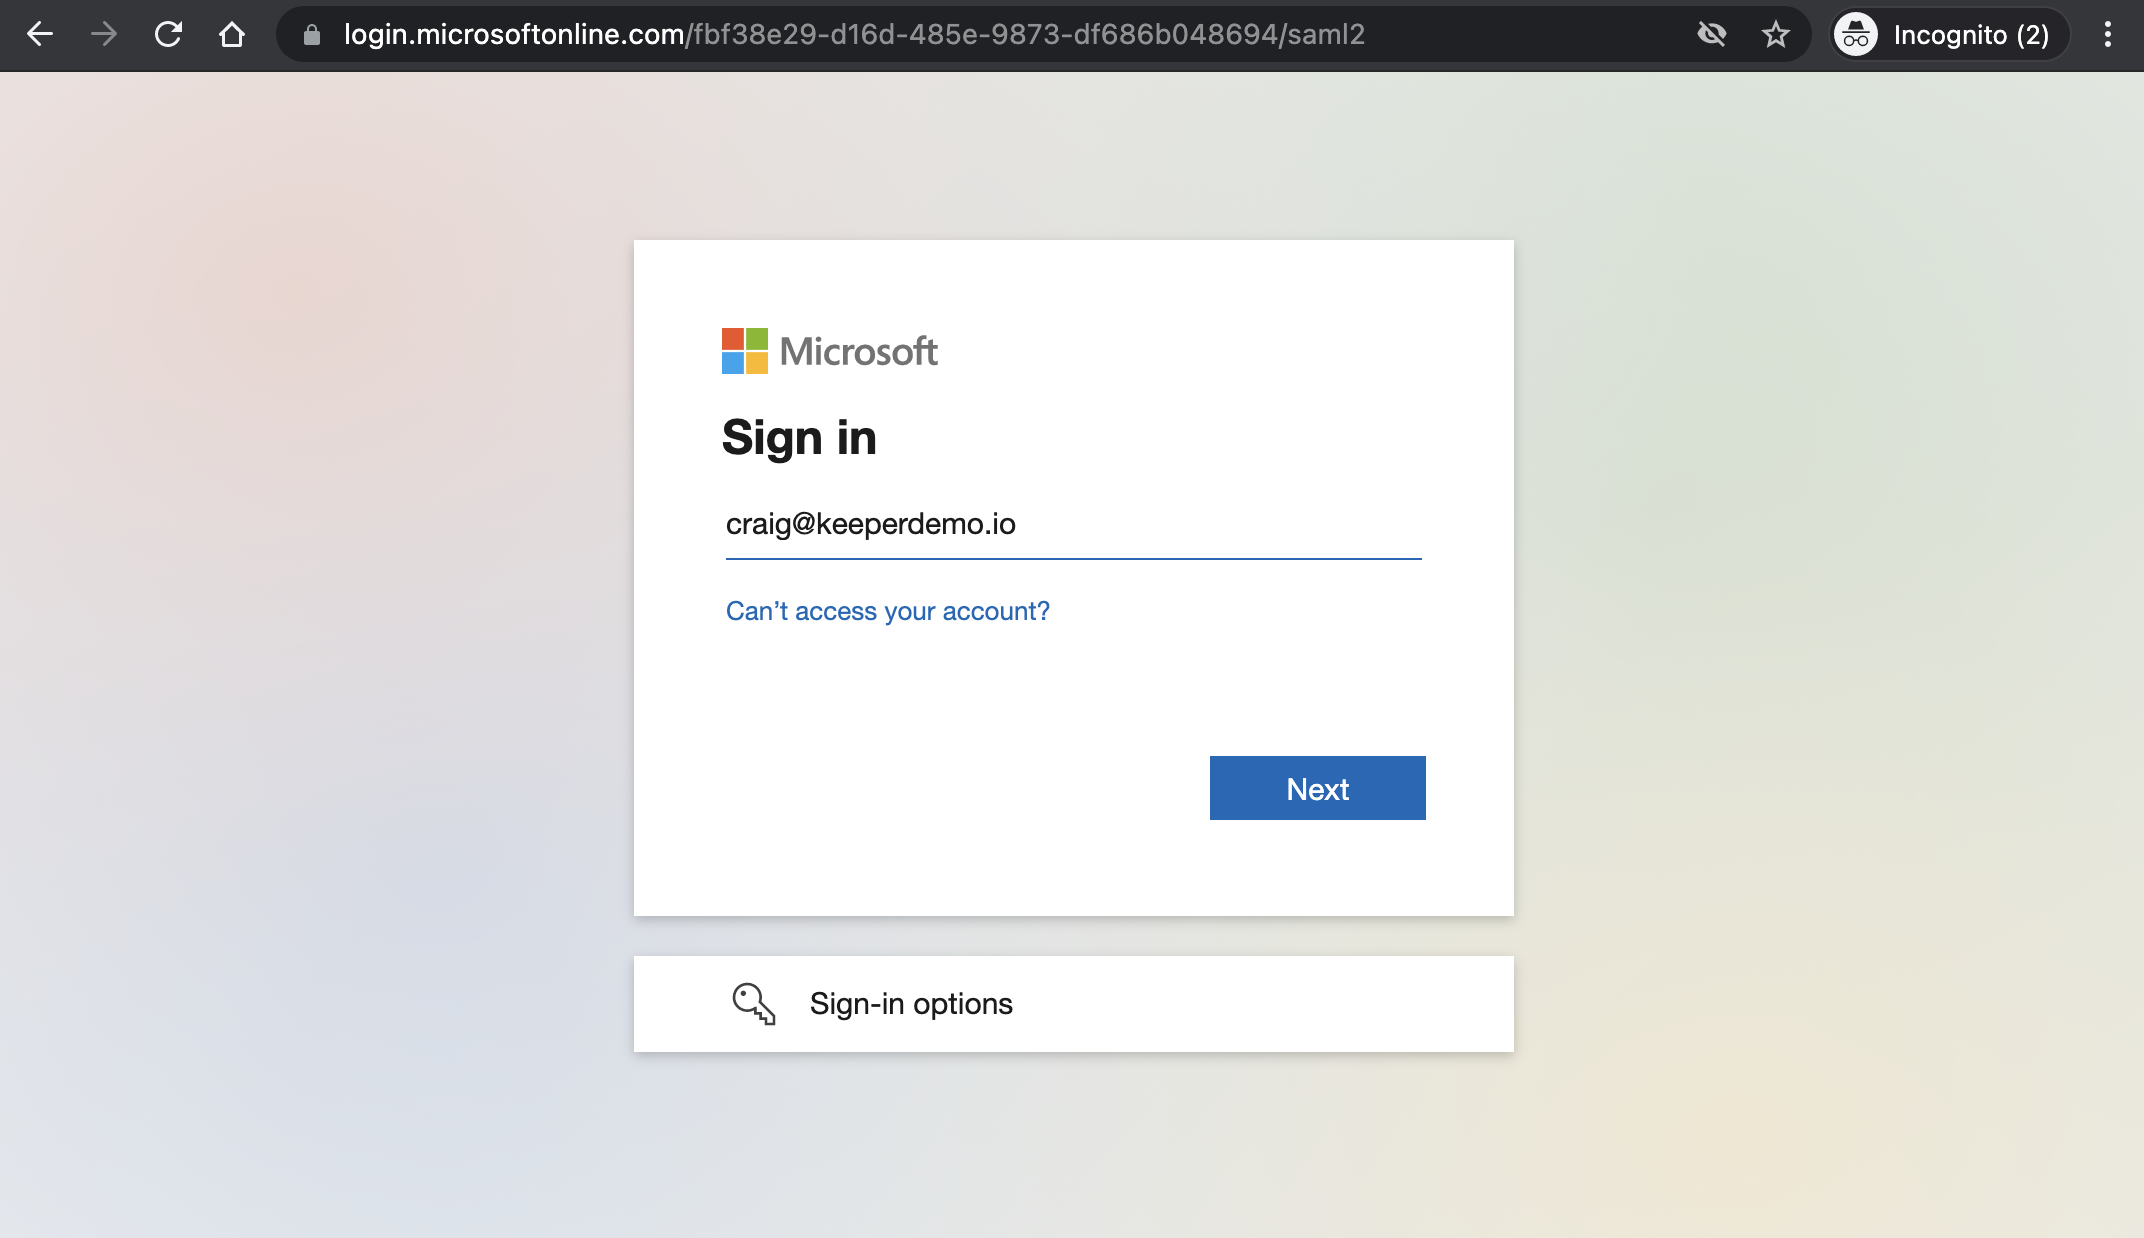
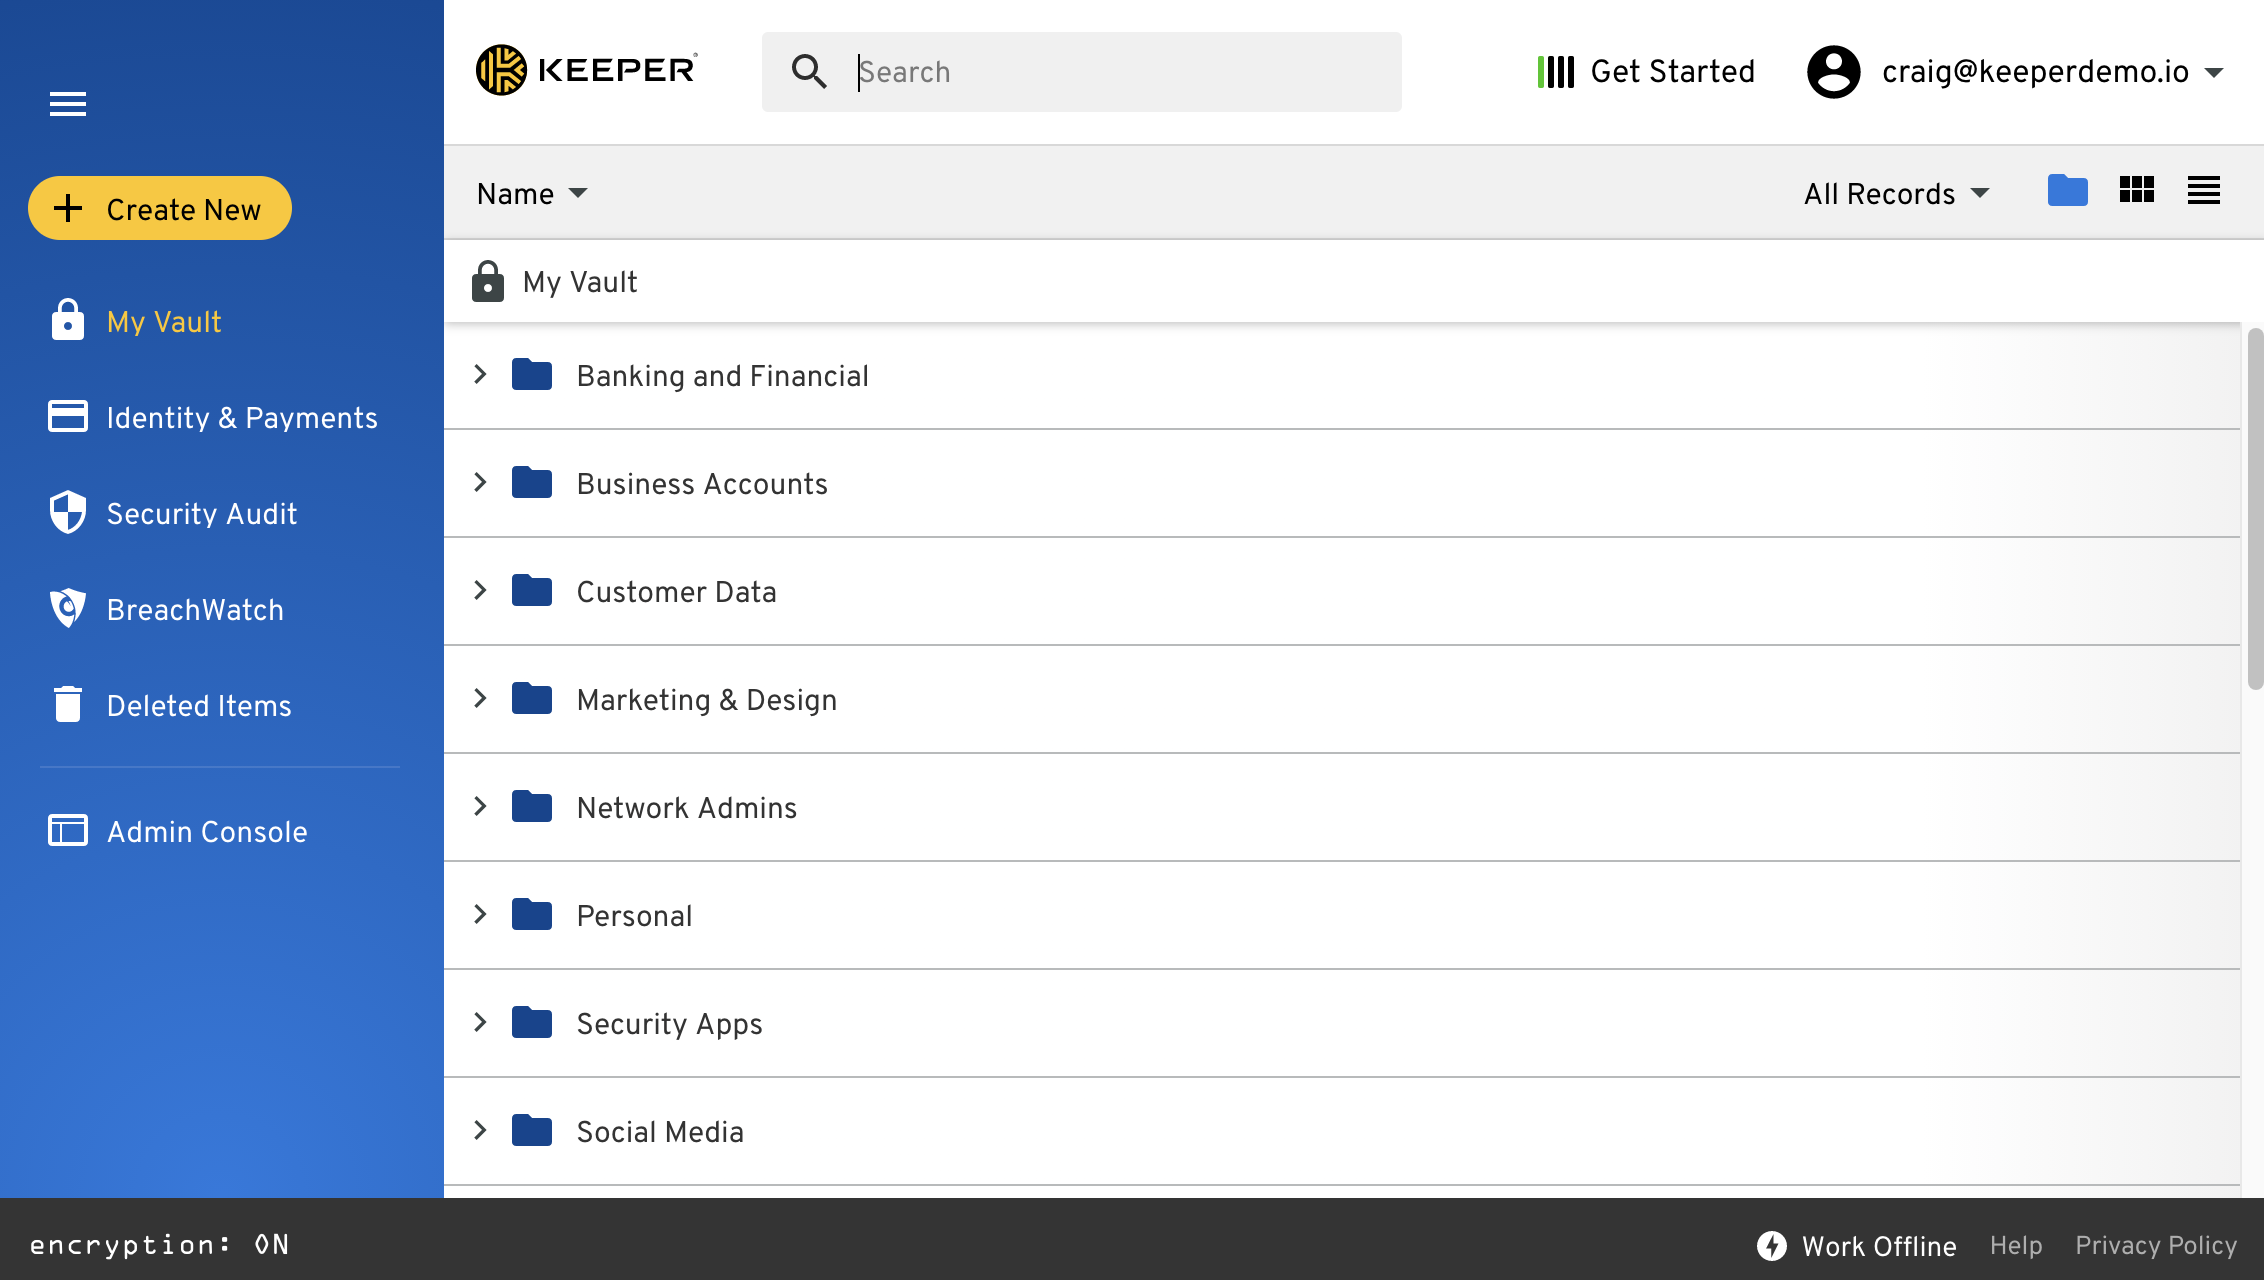
最も簡単な方法は、ブラウザのシークレットモードでKeeperウェブボルトを開き、クラウドSSOコネクトでログインすることです。デバイス承認のプロンプトは表示されません。

<figure><img src="https://1914737032-files.gitbook.io/~/files/v0/b/gitbook-x-prod.appspot.com/o/spaces%2F-Mfd2v-YT48Ljtykb8qm%2Fuploads%2FnAGBNvh99hgIOnNOuJdv%2FScreen%20Shot%202021-09-10%20at%205.17.42%20PM.png?alt=media&#x26;token=e8222ad6-49b4-4b22-9e5b-bde5fd35beb0" alt=""><figcaption><p>ボルトへのログイン</p></figcaption></figure>

<figure><img src="https://1914737032-files.gitbook.io/~/files/v0/b/gitbook-x-prod.appspot.com/o/spaces%2F-Mfd2v-YT48Ljtykb8qm%2Fuploads%2FbqTOKRYMbSo5HTGpHTQX%2FScreen%20Shot%202021-09-10%20at%205.18.15%20PM.png?alt=media&#x26;token=73817b67-9c8b-4e42-b585-3e73d0a6b437" alt=""><figcaption><p>SSOログイン</p></figcaption></figure>

<figure><img src="https://1914737032-files.gitbook.io/~/files/v0/b/gitbook-x-prod.appspot.com/o/spaces%2F-Mfd2v-YT48Ljtykb8qm%2Fuploads%2F2ePvTbVgjp70enV5sTmc%2FScreen%20Shot%202021-09-10%20at%205.30.15%20PM.png?alt=media&#x26;token=ed4aff69-cdc9-494c-bcc3-29523f8cc65a" alt=""><figcaption><p>自動承認</p></figcaption></figure>

<figure><img src="https://1914737032-files.gitbook.io/~/files/v0/b/gitbook-x-prod.appspot.com/o/spaces%2F-Mfd2v-YT48Ljtykb8qm%2Fuploads%2FhKfNZnzP0MelaFgtnj7s%2FScreen%20Shot%202021-09-10%20at%205.32.12%20PM.png?alt=media&#x26;token=7fb689ee-343e-4117-825b-beaeff2e9409" alt=""><figcaption><p>ボルトの復号化</p></figcaption></figure>

承認が機能しましたので、実行するタスクの数を増やせます。

### 17. タスク定義の更新

ECS画面でオートメーターサービスを開き、**Update Service** をクリックし、実行タスク数を設定します

<figure><img src="https://1914737032-files.gitbook.io/~/files/v0/b/gitbook-x-prod.appspot.com/o/spaces%2F-Mfd2v-YT48Ljtykb8qm%2Fuploads%2F9XKNEoyMJmHGSSwJhwxc%2FScreenshot%202023-07-12%20at%2012.22.23%20PM.jpg?alt=media&#x26;token=a5d0feb3-13cf-4c2e-82f9-86a28b38c454" alt=""><figcaption><p>サービスの更新</p></figcaption></figure>

<figure><img src="https://1914737032-files.gitbook.io/~/files/v0/b/gitbook-x-prod.appspot.com/o/spaces%2F-Mfd2v-YT48Ljtykb8qm%2Fuploads%2F3H4wEmFacmJrvFgx5Hky%2FScreenshot%202023-07-12%20at%2012.22.32%20PM.jpg?alt=media&#x26;token=90744f49-4e5b-4295-8825-9b724894fad5" alt=""><figcaption><p>必要なタスク数を設定</p></figcaption></figure>

### ログと監視

オートメーターログは、ECSサービスの **Logs** タブまたはCloudWatchで確認できます。

<figure><img src="https://1914737032-files.gitbook.io/~/files/v0/b/gitbook-x-prod.appspot.com/o/spaces%2F-Mfd2v-YT48Ljtykb8qm%2Fuploads%2FYRH2Gt1hYu8RWUXveut1%2FScreenshot%202023-07-12%20at%2012.42.07%20PM.jpg?alt=media&#x26;token=d3f9d5e2-fc29-4085-9222-411d710e4c5b" alt=""><figcaption><p>ログと監視</p></figcaption></figure>


---

# Agent Instructions
This documentation is published with GitBook. GitBook is the documentation platform designed so that both humans and AI agents can read, navigate, and reason over technical content effectively. Learn more at gitbook.com.

## Querying This Documentation
If you need additional information that is not directly available in this page, you can query the documentation dynamically by asking a question.

Perform an HTTP GET request on the current page URL with the `ask` query parameter, and the optional `goal` query parameter:

```
GET https://docs.keeper.io/sso-connect-cloud/jp/device-approvals/automator/aws-elastic-container-service-with-ksm-advanced.md?ask=<question>&goal=<endgoal>
```

`ask` is the immediate question: it should be specific, self-contained, and written in natural language.
`goal` is optional and describes the broader end goal you are ultimately trying to accomplish on behalf of the user. GitBook uses it to tailor the answer towards what is most useful for that goal.

The response will contain a direct answer to the question and relevant excerpts and sources from the documentation.

Use this mechanism when the answer is not explicitly present in the current page, you need clarification or additional context, or you want to retrieve related documentation sections.