> For the complete documentation index, see [llms.txt](https://docs.keeper.io/llms.txt). Markdown versions of documentation pages are available by appending `.md` to page URLs; this page is available as [Markdown](https://docs.keeper.io/sso-connect-cloud/jp/device-approvals/automator/azure-app-gateway-advanced.md).

# Azure App Gateway (高度な設定)

<div data-full-width="true"><figure><img src="https://1914737032-files.gitbook.io/~/files/v0/b/gitbook-x-prod.appspot.com/o/spaces%2F-Mfd2v-YT48Ljtykb8qm%2Fuploads%2Fz8OxTvYgVGNFlKs7mBGw%2FAzure%20Container%20Service.jpg?alt=media&#x26;token=4b089185-96f2-4117-ac64-cd5ecbc763b9" alt=""><figcaption></figcaption></figure></div>

## 概要

本ガイドでは、Azure Application Gatewayを使い、セキュアなVNet上でKeeperオートメーターを公開する手順を取り扱います。Azure App Gatewayや暗号化SAMLリクエストが不要な場合は、[Azure Container App](/sso-connect-cloud/jp/device-approvals/automator/azure-container-app.md) の手順を使用してください。

この方式では、SSL証明書を事前に用意してください。未作成の場合は [カスタムSSL証明書](/sso-connect-cloud/jp/device-approvals/automator/custom-ssl-certificate.md) の手順をご参照ください。

## 手順 <a href="#prerequisites" id="prerequisites"></a>

1. **Azureクラウドシェルを開く**

portal.azure.com にログインし、Cloud Shell アイコンをクリックします。

<figure><img src="https://1914737032-files.gitbook.io/~/files/v0/b/gitbook-x-prod.appspot.com/o/spaces%2F-Mfd2v-YT48Ljtykb8qm%2Fuploads%2FzF8Bky4JB8EVN4VPh2Cx%2Faz%20cloudshell.png?alt=media&#x26;token=70b95ce4-34eb-44ee-b1d1-5636b6233df7" alt=""><figcaption><p>クラウドシェルを起動</p></figcaption></figure>

2. **ご希望の地域でリソースグループを作成**

Azureにリソースグループがない場合は作成します。例では `eastus` を使用していますが、ご利用のリージョンに置き換えてください。

```
az group create --name keeper_automator_rg --location eastus
```

#### 3. ストレージアカウントの作成

ストレージアカウントがない場合は作成します。正しいリージョン (例: eastus) と上記リソースグループ名を使用してください。**`keeperautomatorstorage` を置き換える名前は、Azure全体で一意である必要があります。**

<pre data-overflow="wrap"><code>az storage account create -n <a data-footnote-ref href="#user-content-fn-1">keeperautomatorstorage </a>-g keeper_automator_rg -l eastus --sku Standard_LRS
</code></pre>

#### 4. ファイルシェアの作成

ファイルシェアが存在しない場合は作成します。

<pre data-overflow="wrap"><code>az storage share create --account-name <a data-footnote-ref href="#user-content-fn-2">keeperautomatorstorage </a>--name keeperautomatorfileshare
</code></pre>

現在のファイルシェアを一覧表示します。

<pre><code>az storage share list --account-name <a data-footnote-ref href="#user-content-fn-2">keeperautomatorstorage</a>
</code></pre>

5. **コンテナ用のVNetとサブネットを作成**

{% code overflow="wrap" %}

```
az network vnet create --address-prefixes 10.100.0.0/16 --name keeper_automator_vnet --resource-group keeper_automator_rg --subnet-name keeper_automator_subnet --subnet-prefixes 10.100.2.0/24
```

{% endcode %}

6. **バーチャルネットワークをサービスエンドポイントで更新**

{% code overflow="wrap" %}

```
az network vnet subnet update -g keeper_automator_rg -n keeper_automator_subnet --vnet-name keeper_automator_vnet --service-endpoints Microsoft.Storage --delegations Microsoft.ContainerInstance/containerGroups
```

{% endcode %}

#### 7. ストレージキーの取得

ストレージキーは以下のコマンドで取得します。ストレージアカウント名は実際の名前に置き換えてください。

<pre data-overflow="wrap"><code>az storage account keys list --resource-group keeper_automator_rg --account-name <a data-footnote-ref href="#user-content-fn-2">keeperautomatorstorage</a>
</code></pre>

出力の key1 値をコピーします。

```powershell
"value": "zuVgm9xnQNnxCQzY=5n4Ec6kxhDn2xMZSfpwZnTeqsyGaHd5Abn584mpAP3xamg3rGns4=Fd7FeFsaR6AgtnqW=="
```

8. **サブネットIDの取得**

サブネットIDを見つけるには以下のコマンドを実行します。

{% code overflow="wrap" %}

```
az network vnet subnet list --resource-group keeper_automator_rg --vnet-name keeper_automator_vnet | grep "id"
```

{% endcode %}

サブネットIDは `_subnet` で終わるフルパスをコピーします。例:

{% code overflow="wrap" %}

```powershell
"id": "/subscriptions/abc123-abc123-abc-123/resourceGroups/keeper_automator_rg/providers/Microsoft.Network/virtualNetworks/keeper_automator_vnet/subnets/keeperautomator_appgw_subnet"
```

{% endcode %}

#### 9. YAMLコンテナファイルの作成

ローカルに `automator` などの名前でフォルダを作成します。

任意のエディタで、そのフォルダ内に **automator.yml** を作成し、以下の内容を記述します。

<pre data-title="automator.yml" data-overflow="wrap"><code><strong>apiVersion: '2021-07-01'
</strong>location: eastus
name: keeperautomatorcontainer
properties:
  containers:
  - name: keeperautomatorcontainer
    properties:
      image: keeper/automator:latest
      ports:
      - port: 443
        protocol: TCP
      resources:
        requests:
          cpu: 1.0
          memoryInGB: 1.5
      volumeMounts:
        - name: automatorvolume
          mountPath: /usr/mybin/config
  osType: Linux
  restartPolicy: Always
  sku: Standard
  volumes:
  - name: automatorvolume
    azureFile:
      shareName: keeperautomatorfileshare
      readOnly: false
      storageAccountName: <a data-footnote-ref href="#user-content-fn-3">keeperautomatorstorage</a>
      storageAccountKey: <a data-footnote-ref href="#user-content-fn-4">XXX-YOUR-KEY-XXX</a>
  subnetids:
    - id: /subscriptions/<a data-footnote-ref href="#user-content-fn-5">XXX-YOUR-SUBNET</a>/path/to/subnets/keeper_automator_subnet
      name: keeper_automator_subnet
tags: null
type: Microsoft.ContainerInstance/containerGroups
</code></pre>

以下の値は、前の手順の構成に合わせて置き換えてください。

* **subnet ID:** 手順 8 で取得したフルパスと一致させる
* **storageAccountName:** 手順 3 の値と一致させる
* **storageAccountKey:** 手順 7 の値と一致させる

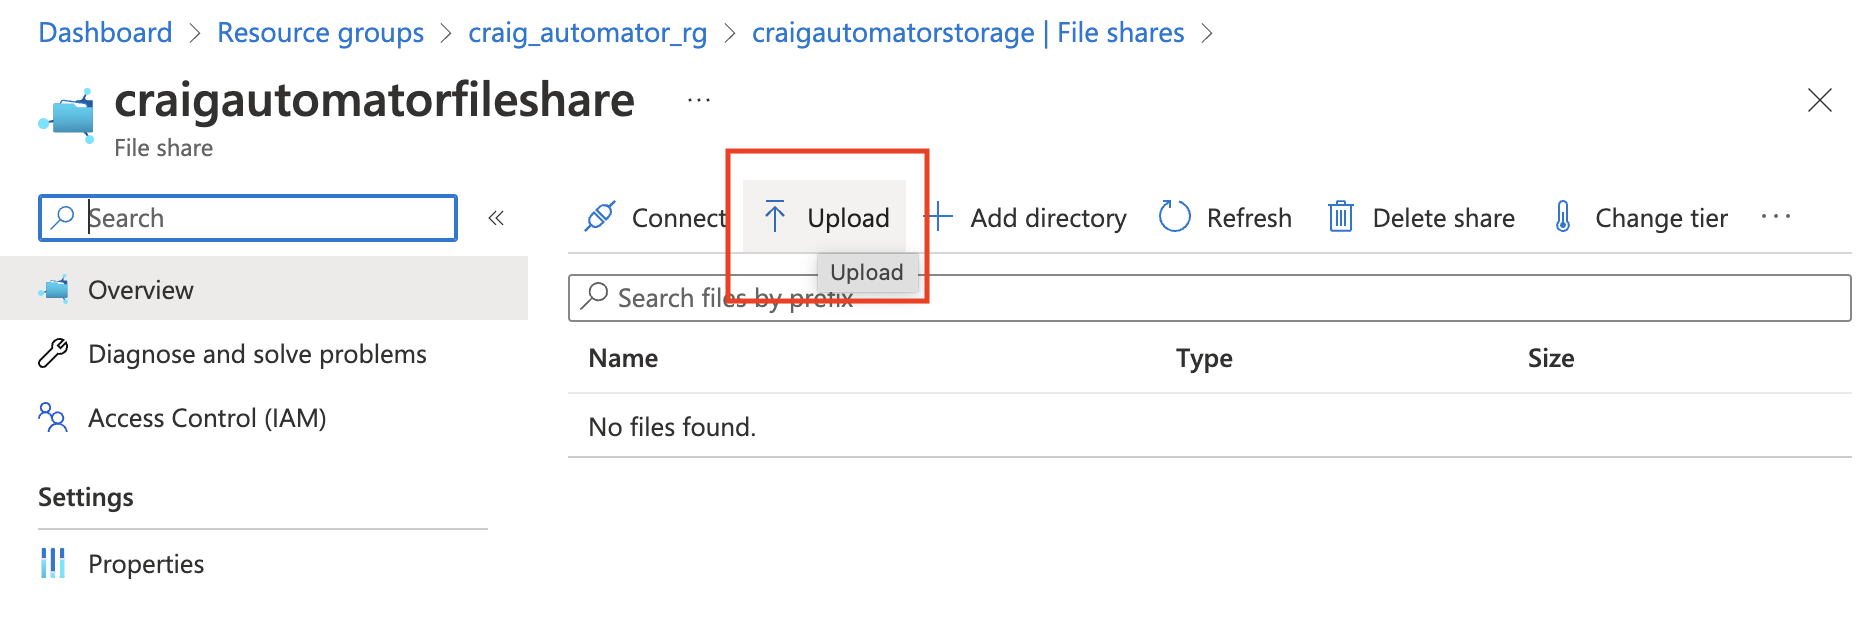
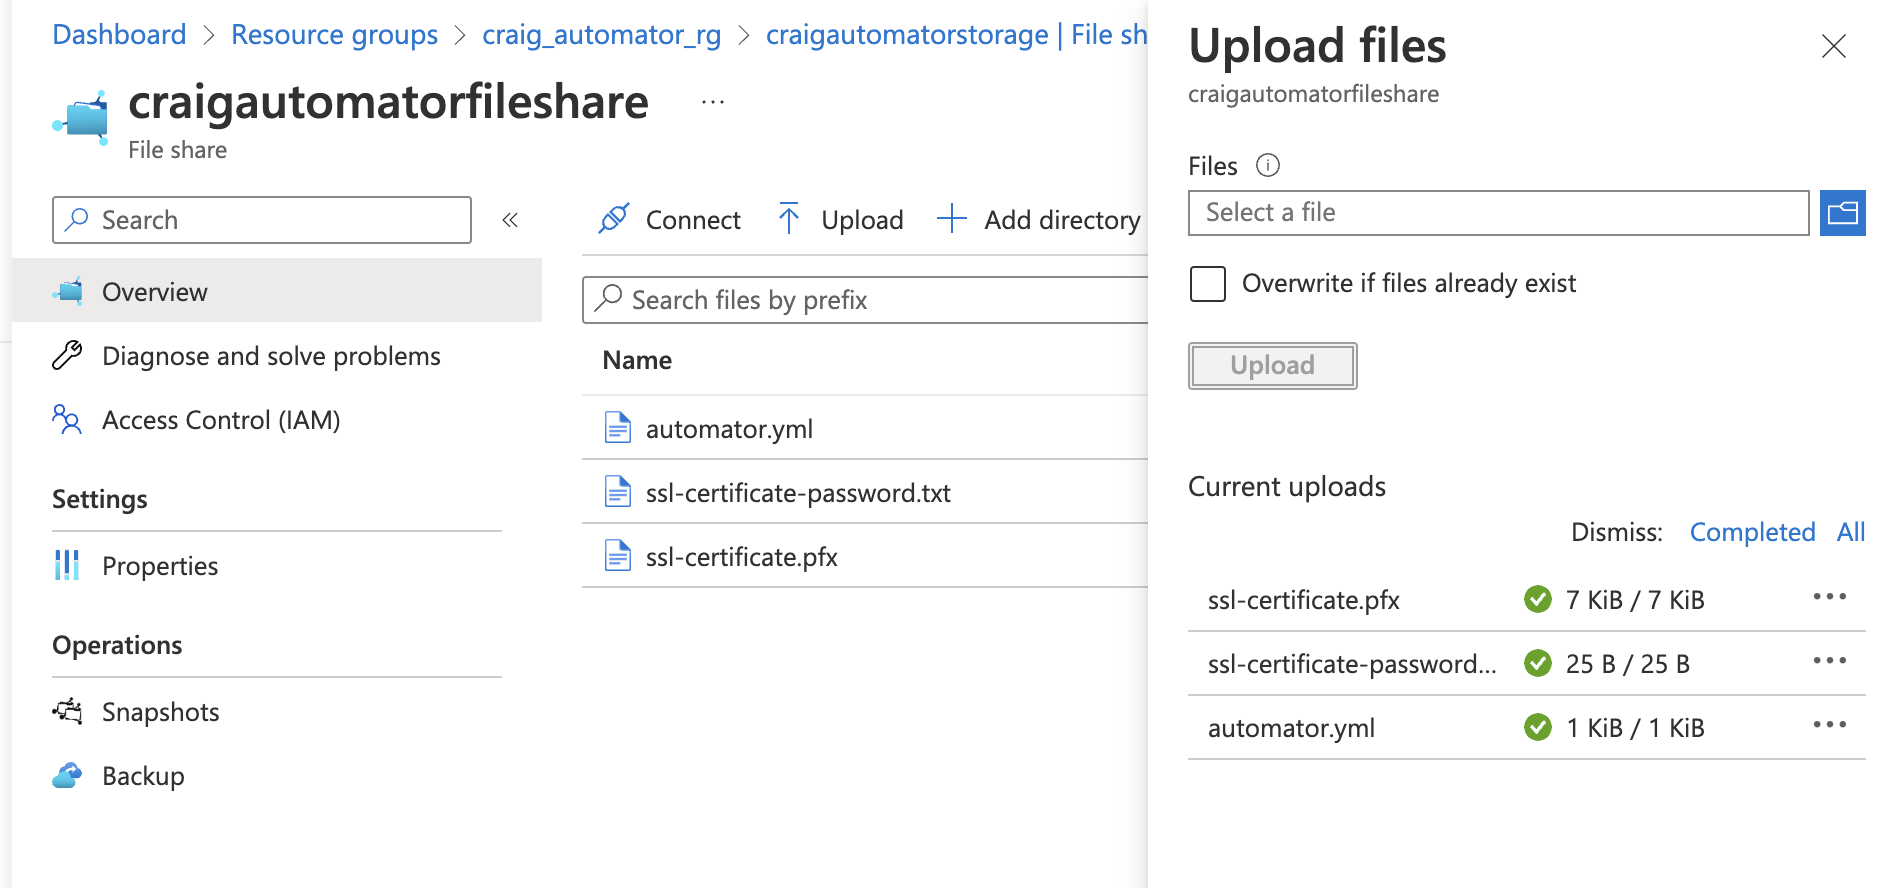
10. SSL証明書とSSLパスワードファイルのアップロード

Azureポータルで **Resource Group** > **Storage Account** > **File Share** を開き、作成したオートメーターファイルシェアに `automator.yml`、SSL証明書、SSL証明書パスワードファイルをアップロードします。

{% hint style="info" %}
ファイル名は `automator.yml`、`ssl-certificate.pfx`、`ssl-certificate-password.txt` であることを確認してください。
{% endhint %}

<figure><img src="https://1914737032-files.gitbook.io/~/files/v0/b/gitbook-x-prod.appspot.com/o/spaces%2F-Mfd2v-YT48Ljtykb8qm%2Fuploads%2FcvlNeJtARKj7ASAJq2mU%2FScreenshot%202022-11-11%20at%204.03.20%20PM.png?alt=media&#x26;token=ac47734a-781e-4808-9775-1759adfc5a46" alt=""><figcaption><p>ファイルのアップロード</p></figcaption></figure>

<figure><img src="https://1914737032-files.gitbook.io/~/files/v0/b/gitbook-x-prod.appspot.com/o/spaces%2F-Mfd2v-YT48Ljtykb8qm%2Fuploads%2FWWMhLO4wBI8tG1bGuP7l%2FScreenshot%202022-11-11%20at%204.05.11%20PM.png?alt=media&#x26;token=680fe886-afaf-453b-a465-6b13195e5a6a" alt=""><figcaption></figcaption></figure>

11. **3つのファイルをCLIワークスペースにコピー**

{% code overflow="wrap" %}

```
az storage copy -s https://keeperautomatorstorage.file.core.windows.net/keeperautomatorfileshare/automator.yml -d .

az storage copy -s https://keeperautomatorstorage.file.core.windows.net/keeperautomatorfileshare/ssl-certificate.pfx -d .

az storage copy -s https://keeperautomatorstorage.file.core.windows.net/keeperautomatorfileshare/ssl-certificate-password.txt -d .
```

{% endcode %}

12. **コンテナーインスタンスの作成**

`automator.yml`の設定を使用してコンテナーを作成します。

```
az container create -g keeper_automator_rg -f automator.yml
```

応答からコンテナの **Internal IP** を取得します。

<pre data-overflow="wrap"><code><strong>az container show --name keeperautomatorcontainer --resource-group keeper_automator_rg --query ipAddress.ip --output tsv
</strong></code></pre>

後続手順用に、このIPの変数を設定します。例:

{% tabs %}
{% tab title="PowerShell" %}

<pre><code><strong>$aciPrivateIp=10.100.2.4
</strong></code></pre>

{% endtab %}

{% tab title="Bash" %}

<pre><code><strong>aciPrivateIp=10.100.2.4
</strong></code></pre>

{% endtab %}
{% endtabs %}

13. **アプリケーションゲートウェイサブネットの作成**

<pre data-overflow="wrap"><code><strong>az network vnet subnet create --name keeperautomator_appgw_subnet --resource-group keeper_automator_rg --vnet-name keeper_automator_vnet --address-prefix 10.100.1.0/24
</strong></code></pre>

14. **アプリケーションゲートウェイの作成**

<pre data-overflow="wrap"><code>az network application-gateway create --name KeeperAutomatorAppGateway --location eastus --resource-group keeper_automator_rg --sku Standard_v2 --public-ip-address AGPublicIPAddress --cert-file ssl-certificate.pfx --cert-password <a data-footnote-ref href="#user-content-fn-6">XXXXXX </a>--vnet-name keeper_automator_vnet --subnet keeperautomator_appgw_subnet --frontend-port 443 --http-settings-port 443 --http-settings-protocol Https --servers 10.100.2.4 --priority 100
</code></pre>

`XXXXXX` をSSL証明書のパスワードに置き換えていることを確認してください。

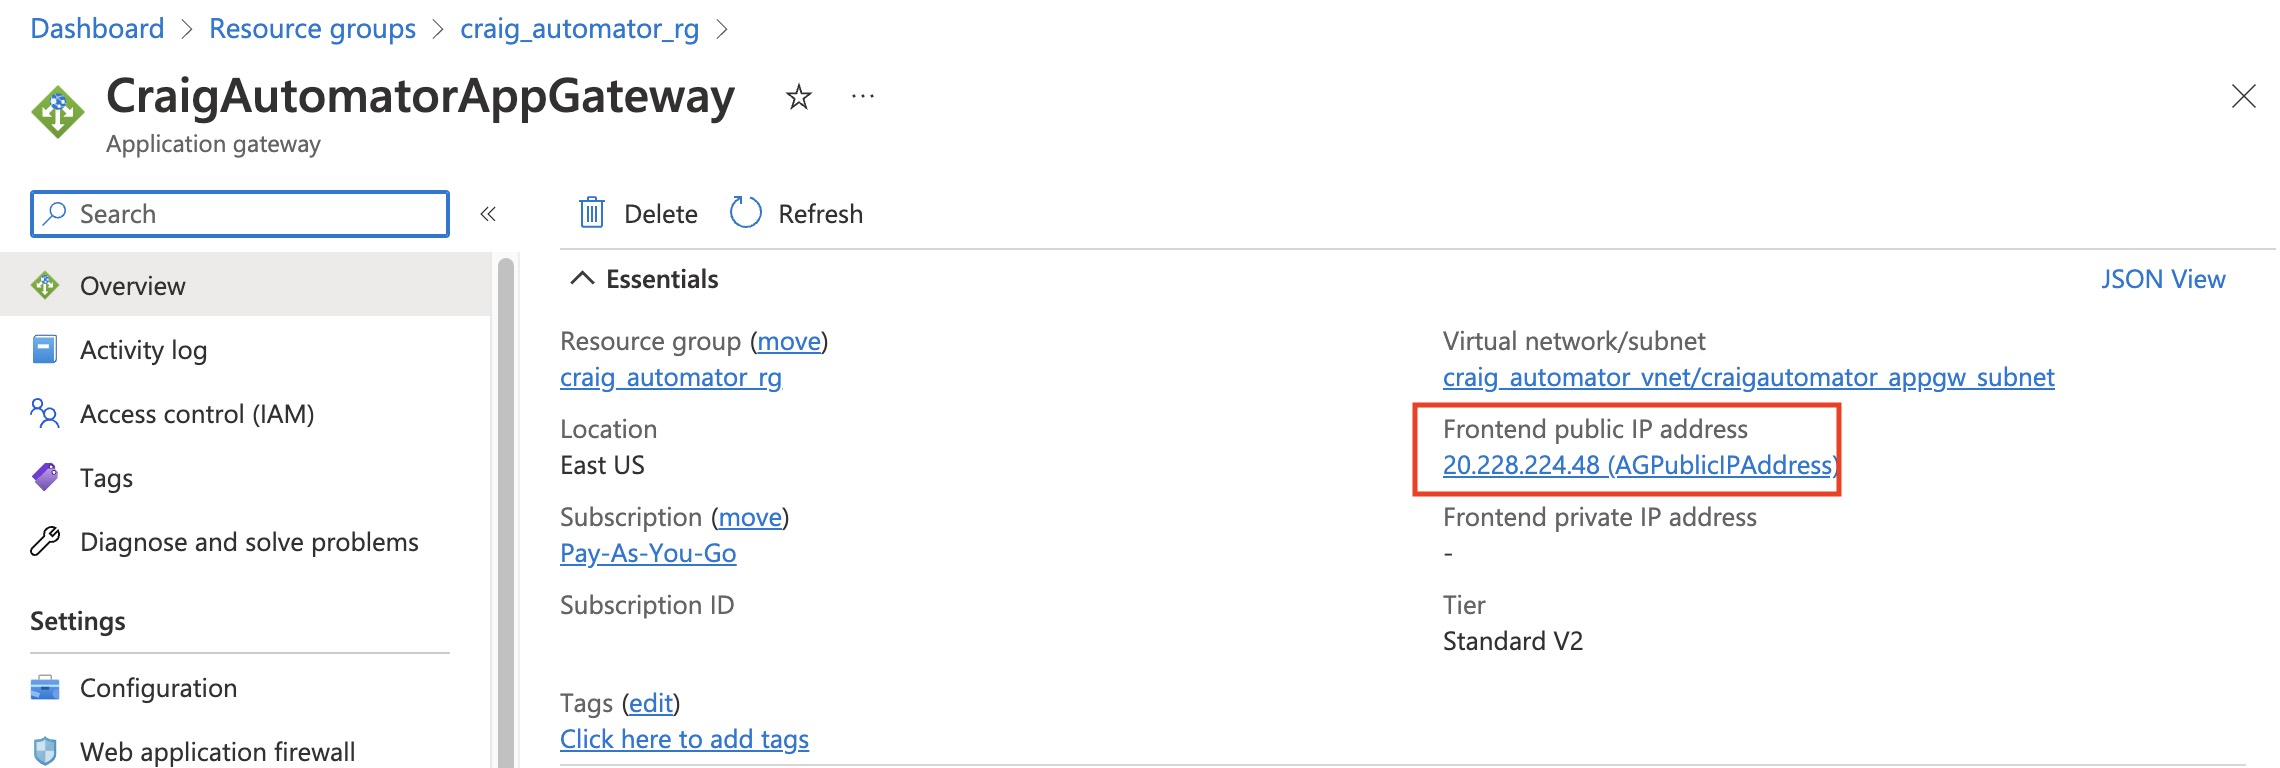
15. **パブリックIPを見つける**

Azureポータルで **Resource Group** > **App Gateway** を開き、パブリックIPアドレスを控えます。

<figure><img src="https://1914737032-files.gitbook.io/~/files/v0/b/gitbook-x-prod.appspot.com/o/spaces%2F-Mfd2v-YT48Ljtykb8qm%2Fuploads%2FerUygxz7f6d7OO1OkCwE%2Fpublic_ip.jpg?alt=media&#x26;token=d7a6f9dc-16a6-4344-95bc-d53de1a65e6d" alt=""><figcaption><p>パブリックIPを取得</p></figcaption></figure>

16. **DNSのルーティング**

オートメーターのDNS (例: automator.company.com) が、手順 15 で取得したIPアドレスを指していることを確認してください。

{% hint style="warning" %}
DNS名はSSL証明書のサブジェクト名と一致する必要があります。一致しない場合、リクエストは失敗します。
{% endhint %}

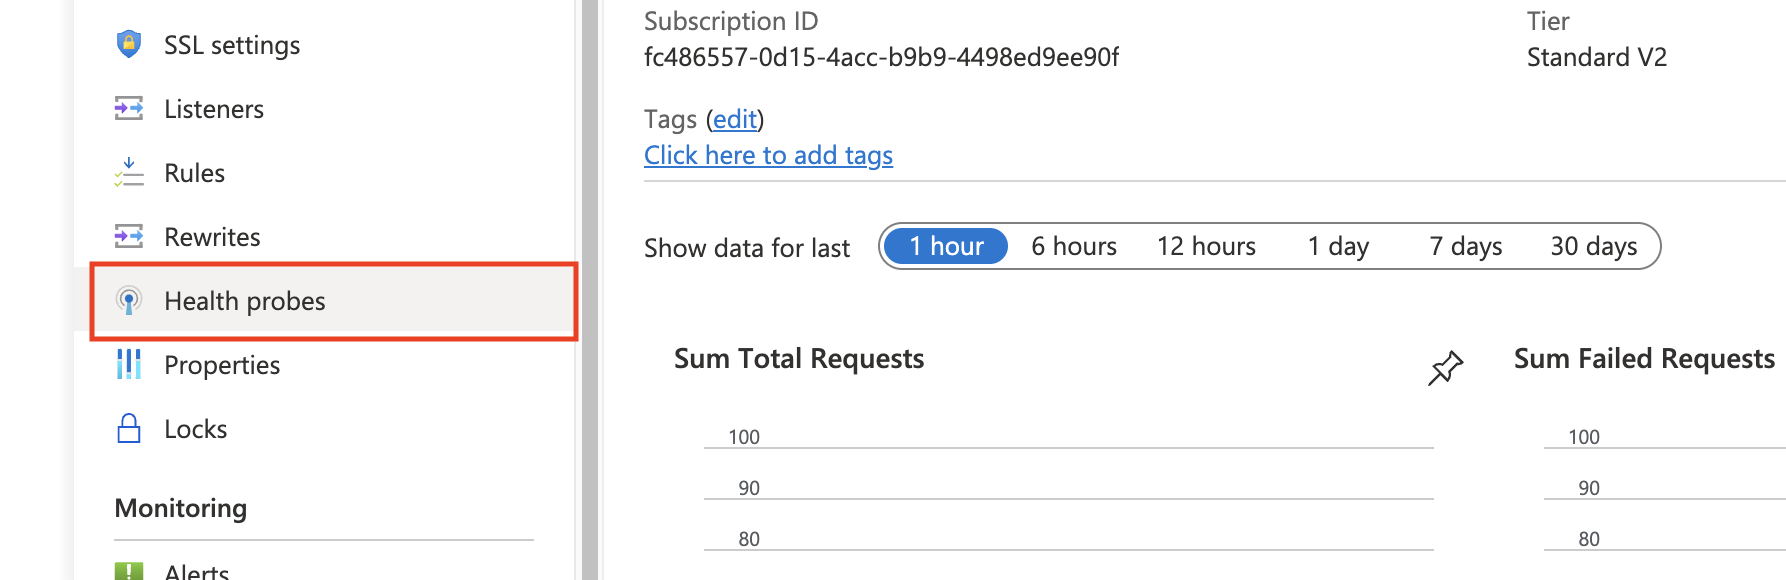
17. **正常性プローブの作成**

正常性プローブは、App Gatewayにオートメーターの稼働状態を通知します。AzureポータルでオートメーターApp Gatewayを開き、左メニューの **Health probes** をクリックします。

<figure><img src="https://1914737032-files.gitbook.io/~/files/v0/b/gitbook-x-prod.appspot.com/o/spaces%2F-Mfd2v-YT48Ljtykb8qm%2Fuploads%2F1QFA3XvfeFMFrIFX6WZo%2FScreenshot%202022-11-11%20at%205.15.20%20PM.png?alt=media&#x26;token=d008b79e-bf7a-4d4f-aac9-dc557c697078" alt=""><figcaption><p>正常性プローブ</p></figcaption></figure>

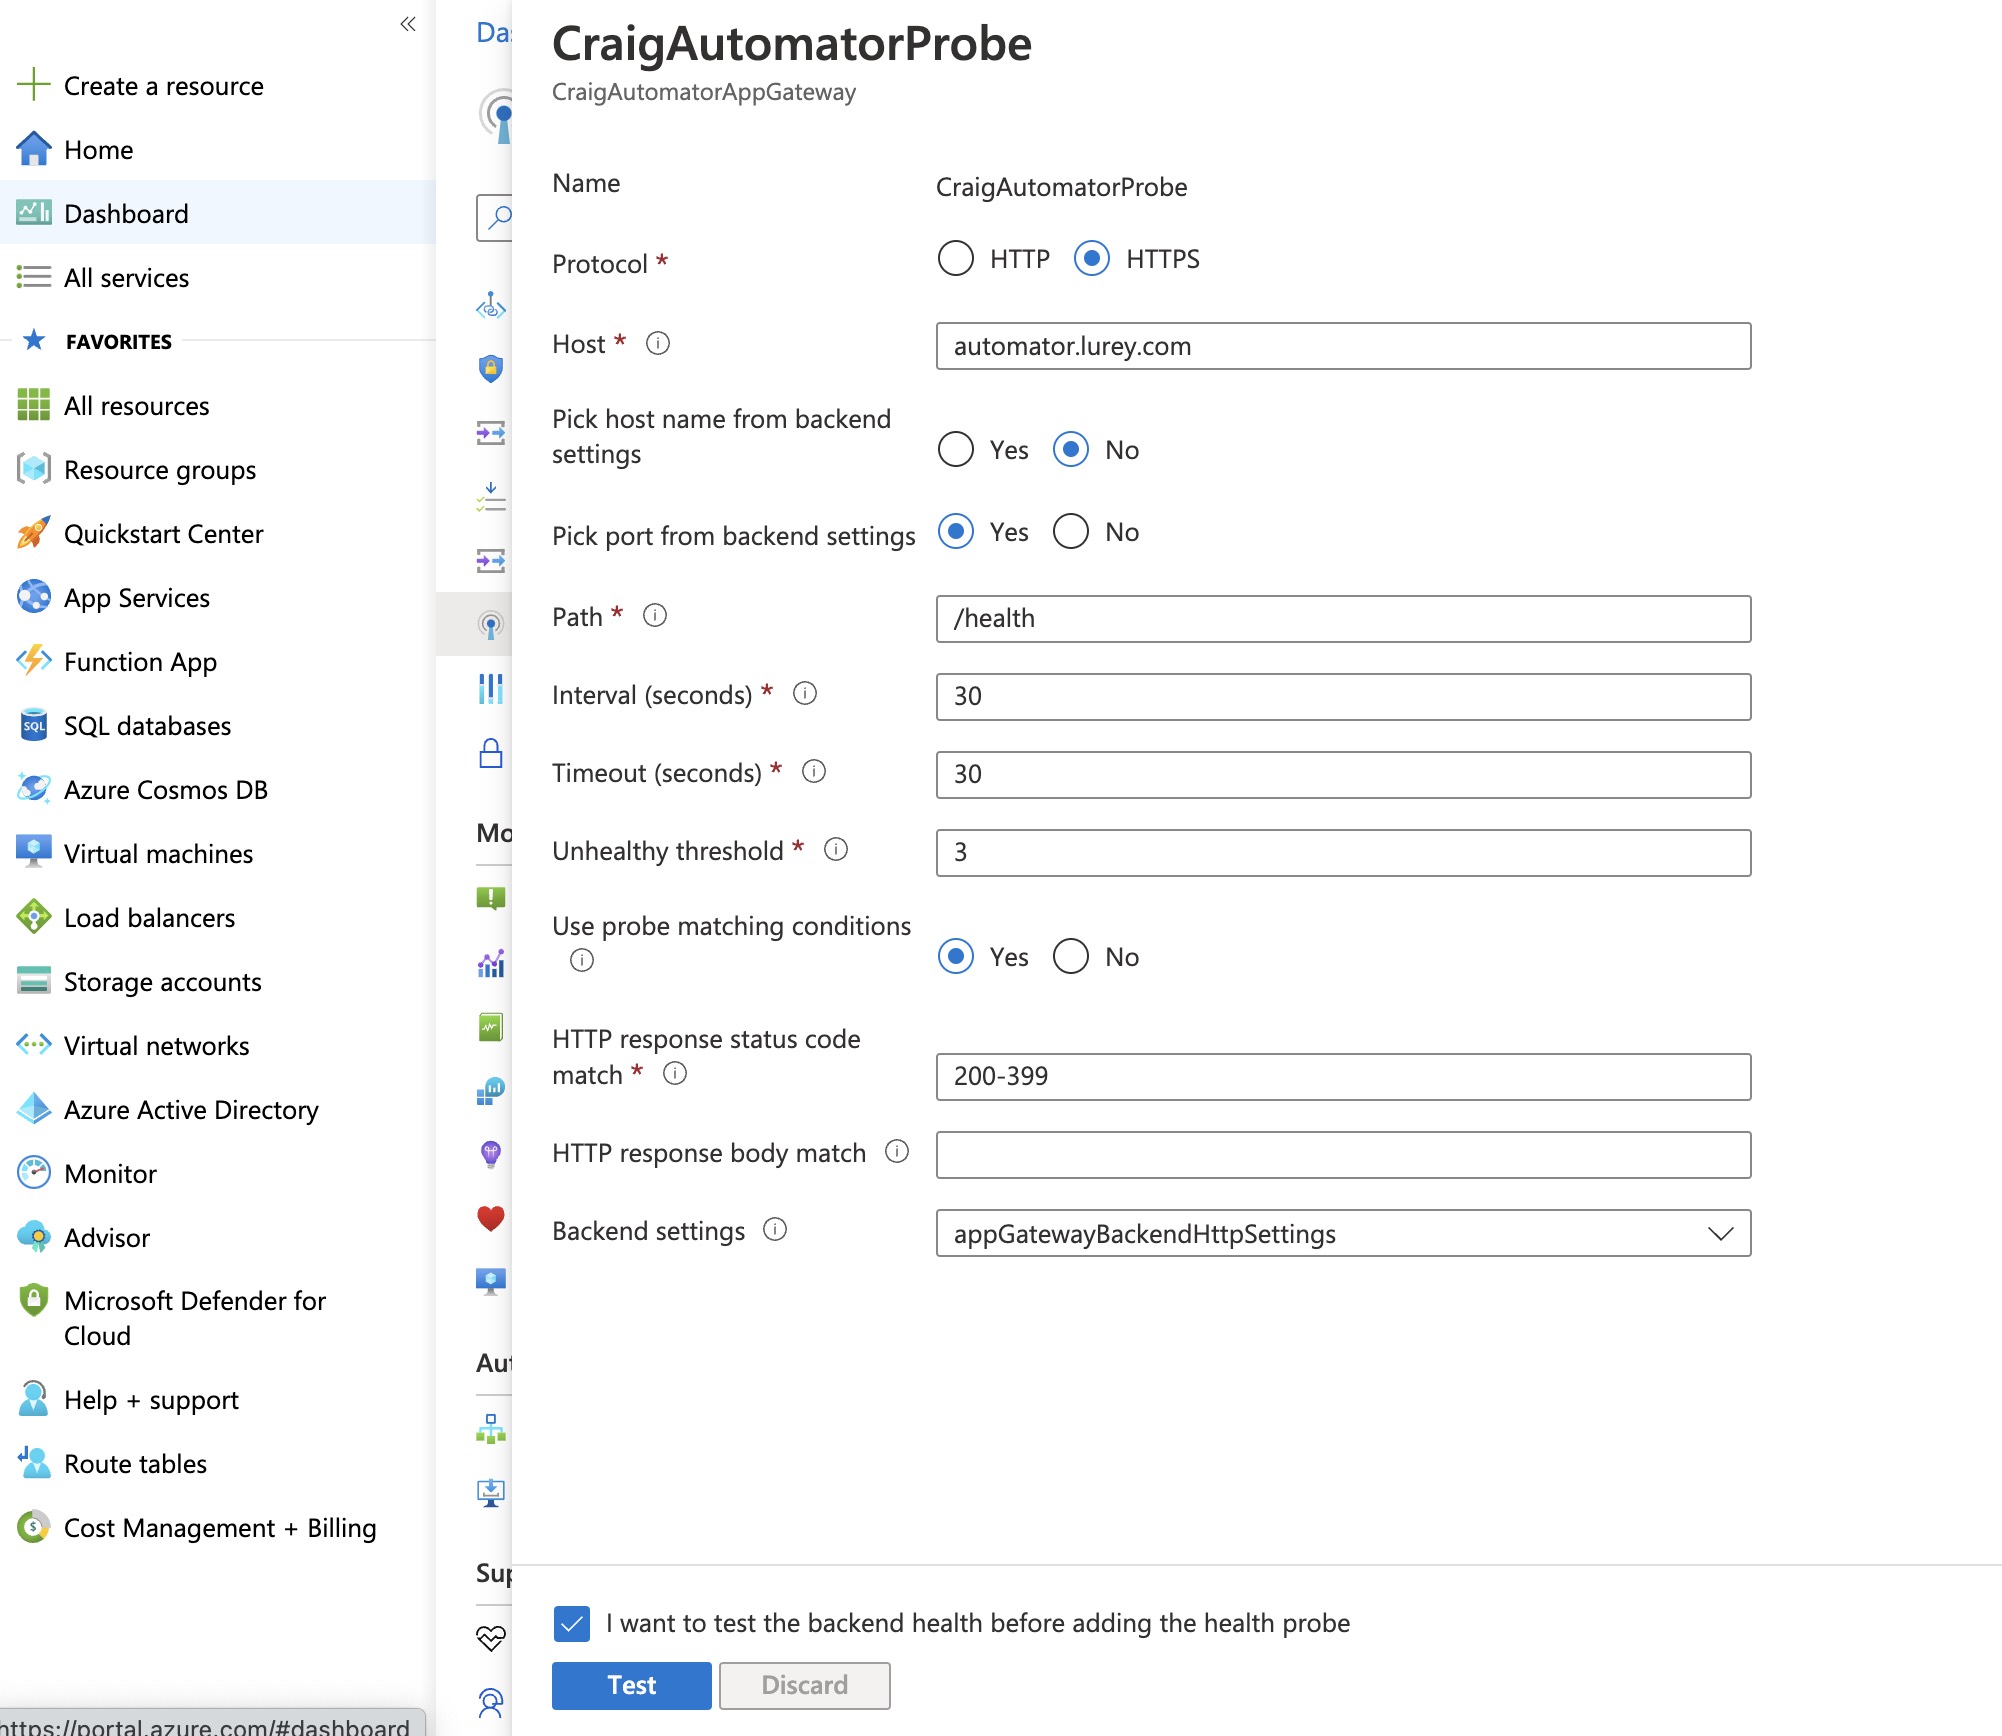
スクリーンショットの設定で新しい正常性プローブを作成します。Host は手順 16 のFQDNに置き換えてください。

<figure><img src="https://1914737032-files.gitbook.io/~/files/v0/b/gitbook-x-prod.appspot.com/o/spaces%2F-Mfd2v-YT48Ljtykb8qm%2Fuploads%2FdLCwh2FuwKxYYetPcEjJ%2FScreenshot%202022-11-11%20at%205.17.29%20PM.jpg?alt=media&#x26;token=e369cf64-51b0-48ab-872a-fb6a40a85347" alt=""><figcaption><p>正常性プローブの設定</p></figcaption></figure>

**Test** をクリックしてプローブを追加します。コンテナIPがホスト名に正しく解決されていれば、テストは成功します。

18. **ウェブアプリケーションファイアウォールの設定**

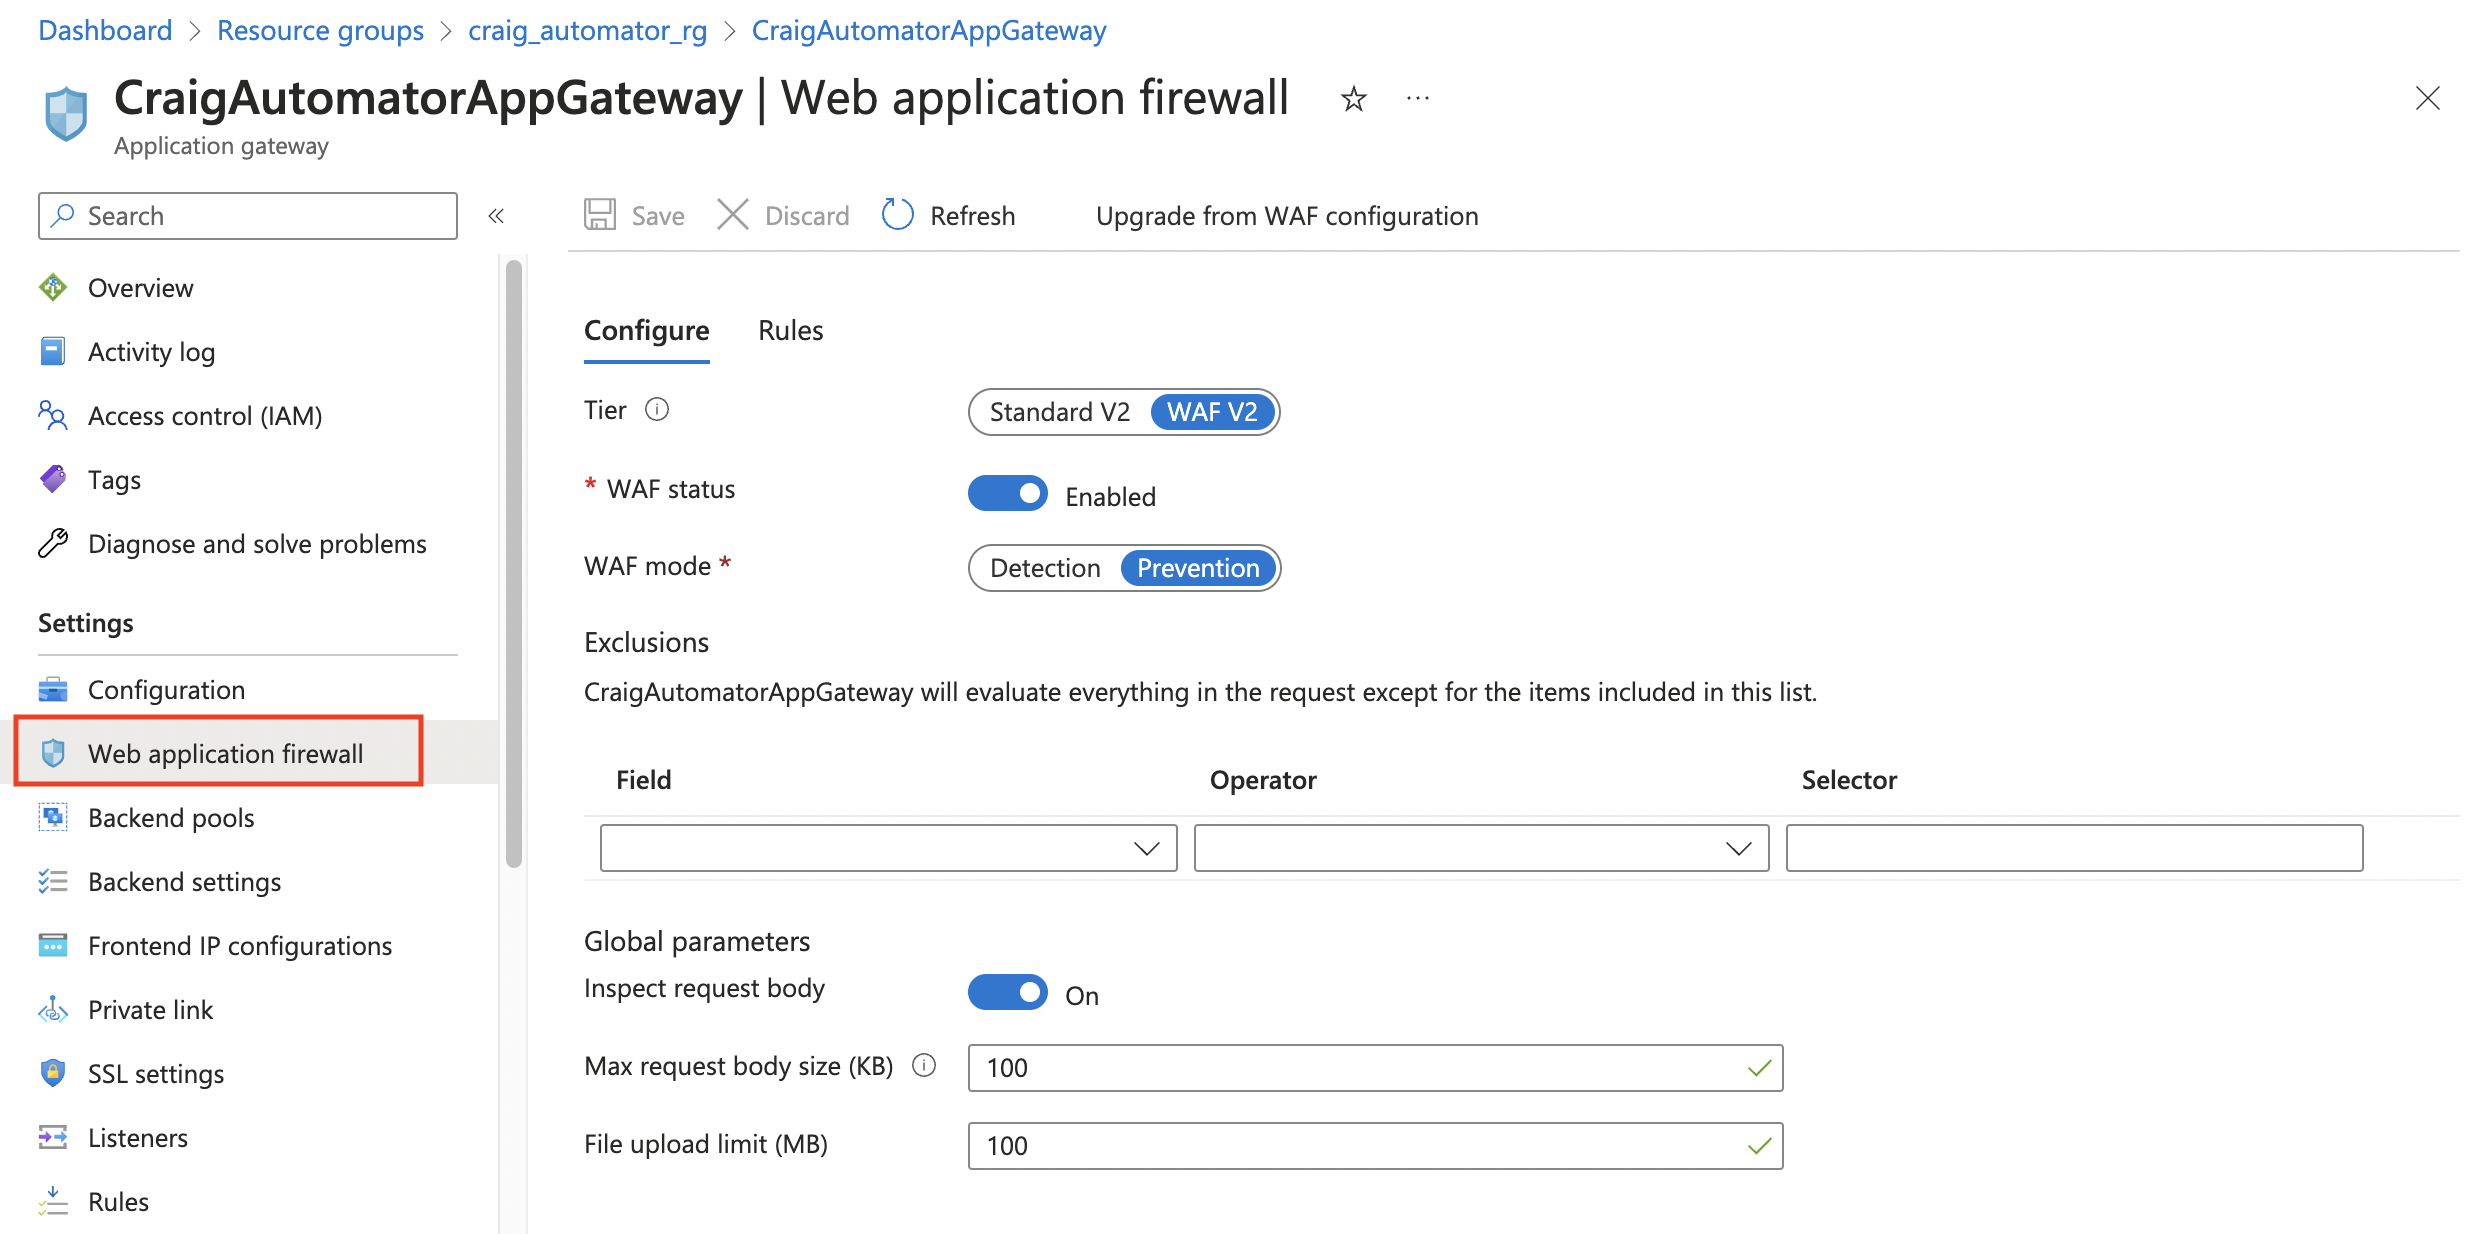
AzureポータルでオートメーターApp Gatewayを開き、左メニューの **Web application firewall** をクリックします。WAF V2を有効にし、画面どおりに設定します。

<figure><img src="https://1914737032-files.gitbook.io/~/files/v0/b/gitbook-x-prod.appspot.com/o/spaces%2F-Mfd2v-YT48Ljtykb8qm%2Fuploads%2FceDRggjr6vfKIUJ5BOIZ%2FScreen%20Shot%202023-02-28%20at%202.31.27%20PM.png?alt=media&#x26;token=6e1a415f-23e2-440f-9fe1-13a4a1797032" alt=""><figcaption><p>ウェブアプリケーションファイアウォールの設定</p></figcaption></figure>

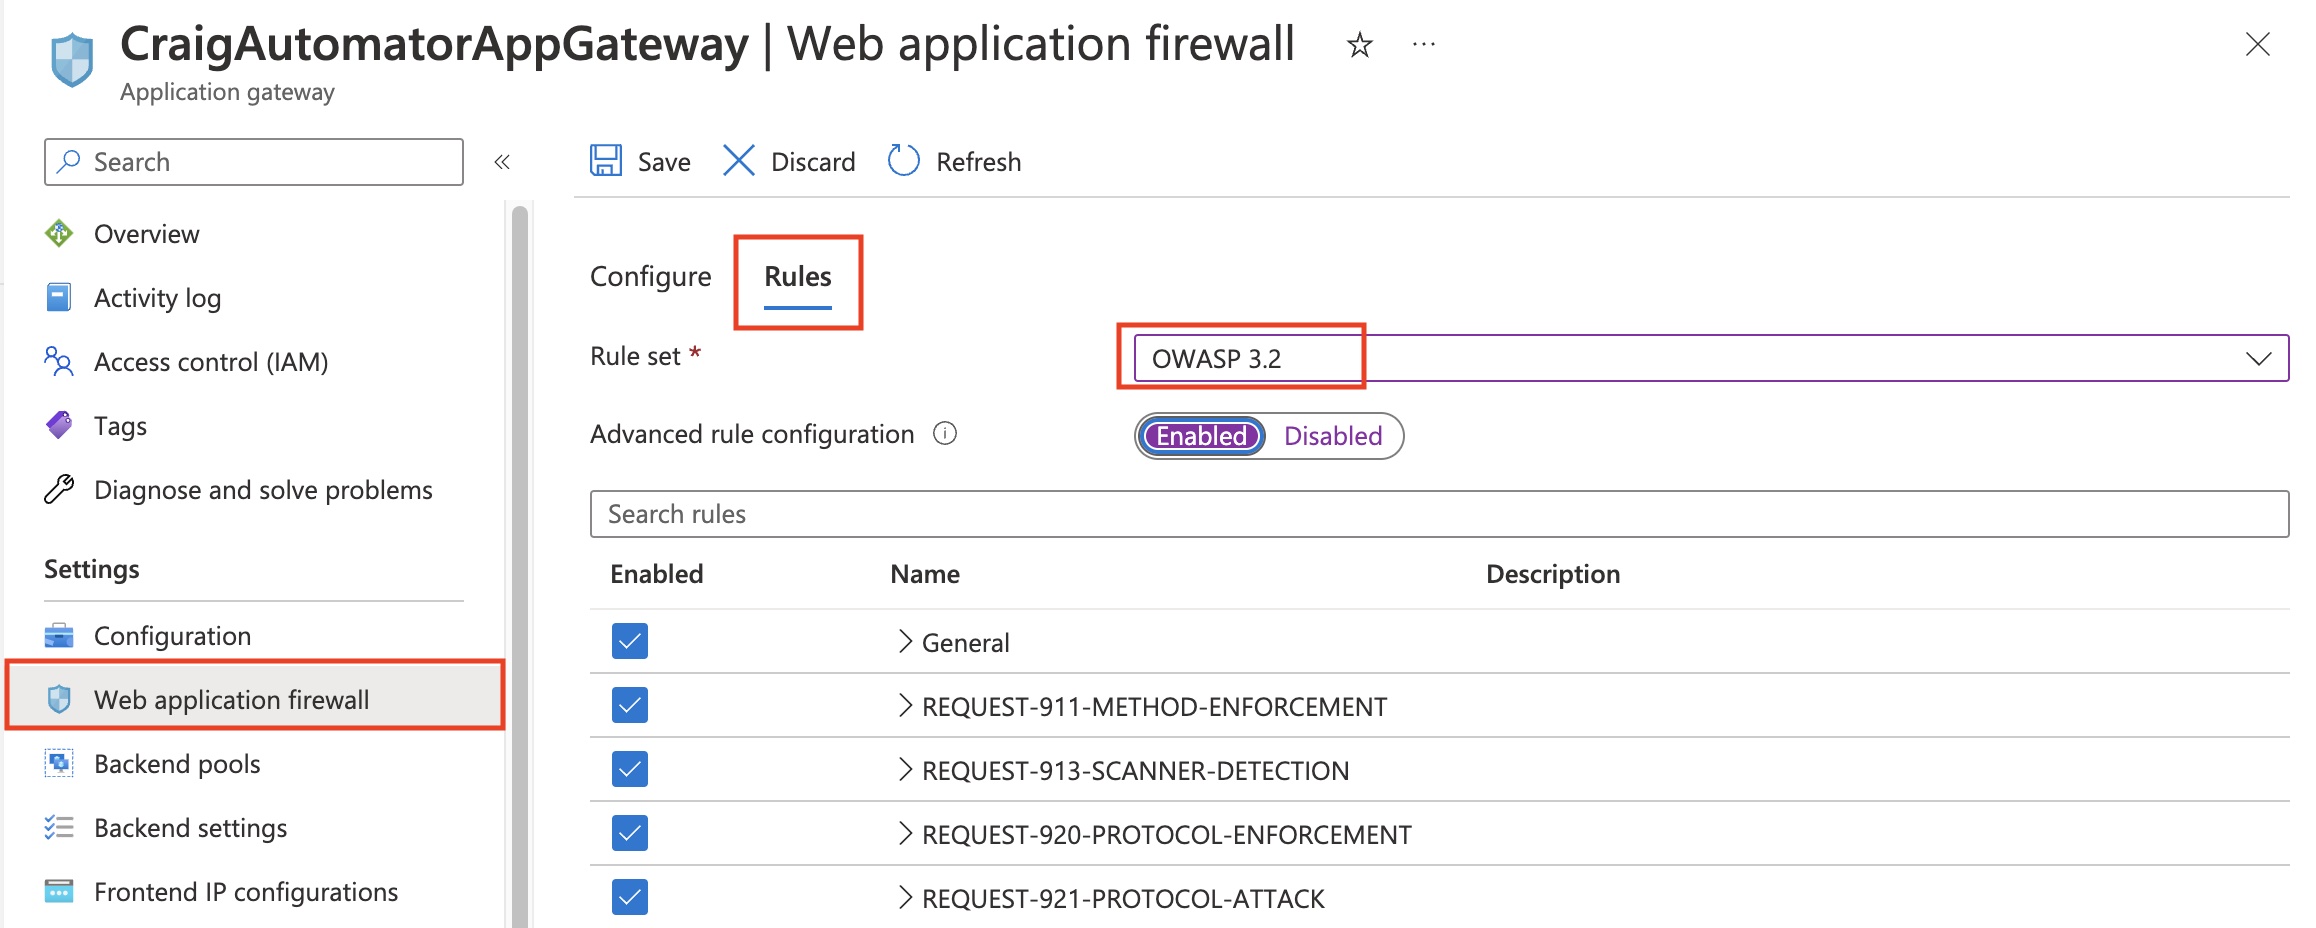
**Rules** タブでルールセット **OWASP 3.2** を選び、**Enabled** と **Save** をクリックします (重要な手順です)。

<figure><img src="https://1914737032-files.gitbook.io/~/files/v0/b/gitbook-x-prod.appspot.com/o/spaces%2F-Mfd2v-YT48Ljtykb8qm%2Fuploads%2FOJt2sCgbJtYVPccL6qMY%2Ffirewall2.jpg?alt=media&#x26;token=d47e2459-f4bc-4944-9e27-4ef757904746" alt=""><figcaption><p>ファイアウォールルールの設定</p></figcaption></figure>

:tada: Azure上のインストールは完了です。

最後にKeeperコマンダーを使ってオートメーターの設定を行います。

19. **Keeperコマンダーのインストール**

この時点でサービスは稼働していますが、Keeperとはまだ通信できません。

ワークステーション、サーバー、または任意のコンピュータにKeeperコマンダーCLIをインストールします (初期設定のみ)。手順は [Keeperコマンダーのインストール](/keeperpam/jp/commander-cli/commander-installation-setup.md) をご参照ください。\
コマンダーを開き、`login` コマンドでログインします。Keeper管理者、またはSSOノードを管理できる管理者としてログインしてください。

```
My Vault> login admin@company.com
```

20. **コマンダーでの初期設定**

Keeperコマンダーにログインし、`automator create`で始まる一連のコマンドを使用してオートメーターを有効にします。

```
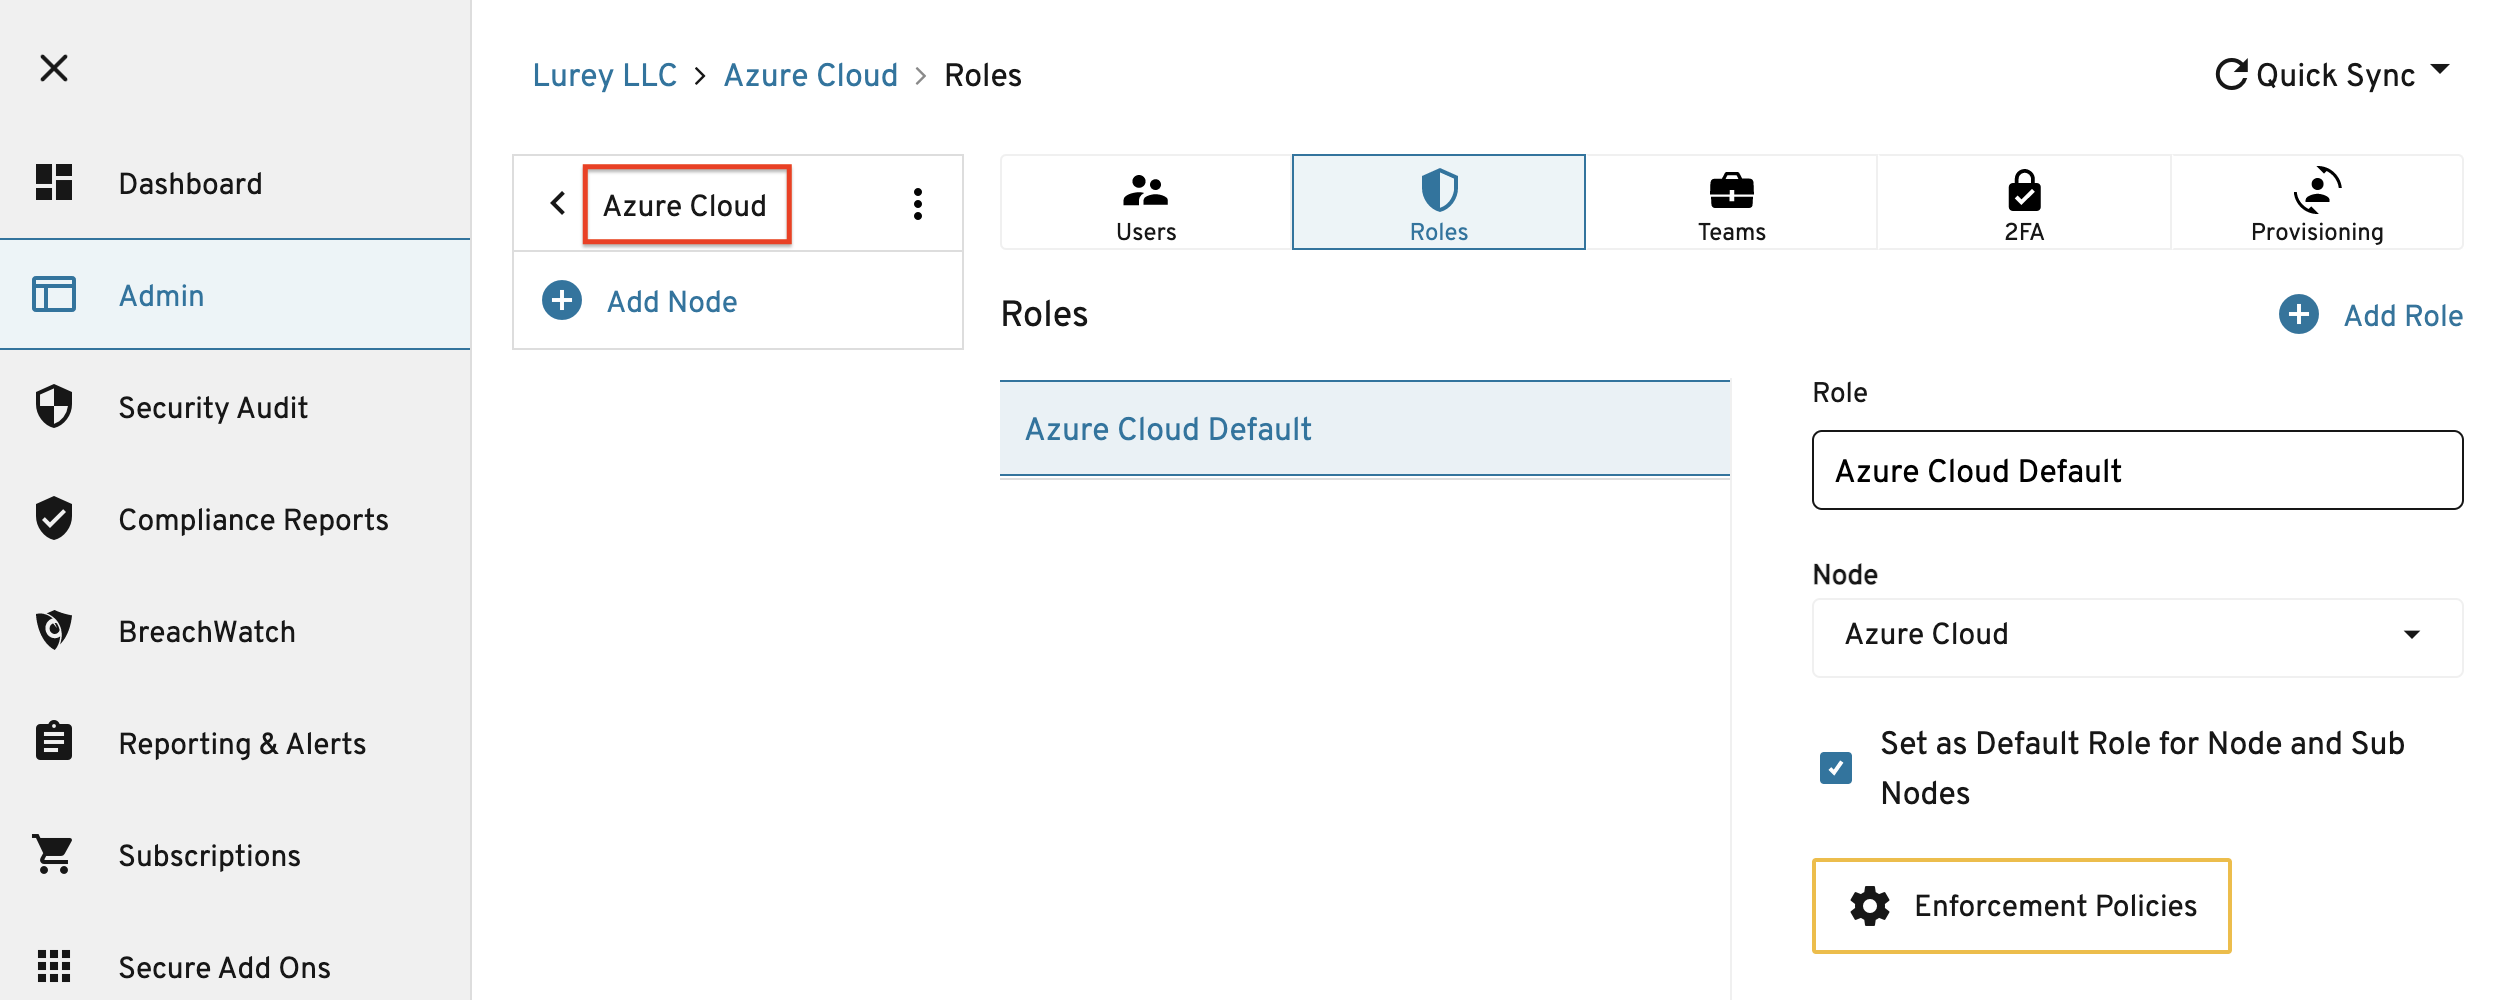
automator create --name="My Automator" --node="Azure Cloud"
```

ノード名 (この場合はAzure Cloud) は、以下のように管理コンソールのUIから取得します。

<figure><img src="https://1914737032-files.gitbook.io/~/files/v0/b/gitbook-x-prod.appspot.com/o/spaces%2F-Mfd2v-YT48Ljtykb8qm%2Fuploads%2FC6oIjbtwyKbIUJp0MvcZ%2FScreen%20Shot%202021-09-10%20at%203.59.58%20PM.png?alt=media&#x26;token=d72376f6-f3ad-4d72-91a1-ea0d2d6079d6" alt=""><figcaption><p>オートメーター作成</p></figcaption></figure>

コマンドの出力には、IDプロバイダからのメタデータを含むオートメーター設定が表示されます。

```
                    Automator ID: 1477468749950
                            Name: My Automator
                             URL: 
                         Enabled: No
                     Initialized: No
                          Skills: Device Approval
```

URLはまだ空です。選択したFQDNでURLを編集します。

{% code overflow="wrap" %}

```
automator edit --url=https://automator.lurey.com --skill=team --skill=team_for_user --skill=device "My Automator"
```

{% endcode %}

次に、キーを交換します。オートメーター公開キーで暗号化されたエンタープライズ秘密キーがオートメーターに提供されます。

```
automator setup "My Automator"
```

新しい設定でオートメーターを初期化します。

```
automator init "My Automator"
```

サービスを有効にします。

```
automator enable "My Automator"
```

この時点で設定は完了です。

自動ヘルスチェックには、以下のURLを使用できます。

https\://\<server>/health

以下は、`curl` コマンドの使用例です。

```
$ curl https://automator.lurey.com/health
OK
```

このURLはウェブブラウザでは開きません。

#### 21. AD FS環境の場合

IDプロバイダにAD FSを使用する場合、以下の手順でKeeper証明書を更新するまでログインできません。

* Keeper管理コンソールにログインします
* **Admin** > **SSO Node** > **Provisioning** を開き、クラウドSSOコネクトの構成を表示します
* **Export SP Cert** をクリックします
* AD FS管理コンソールで、Keeper Cloud SSO Relying Party Trust のプロパティを開きます
* **Encryption** タブで、古い証明書を新しい証明書に置き換えます
* **Signature** タブで、新しいSP証明書を追加または置き換えます

#### セットアップ完了

オートメーターサービスが稼働している状態になります。

## Azure Portal

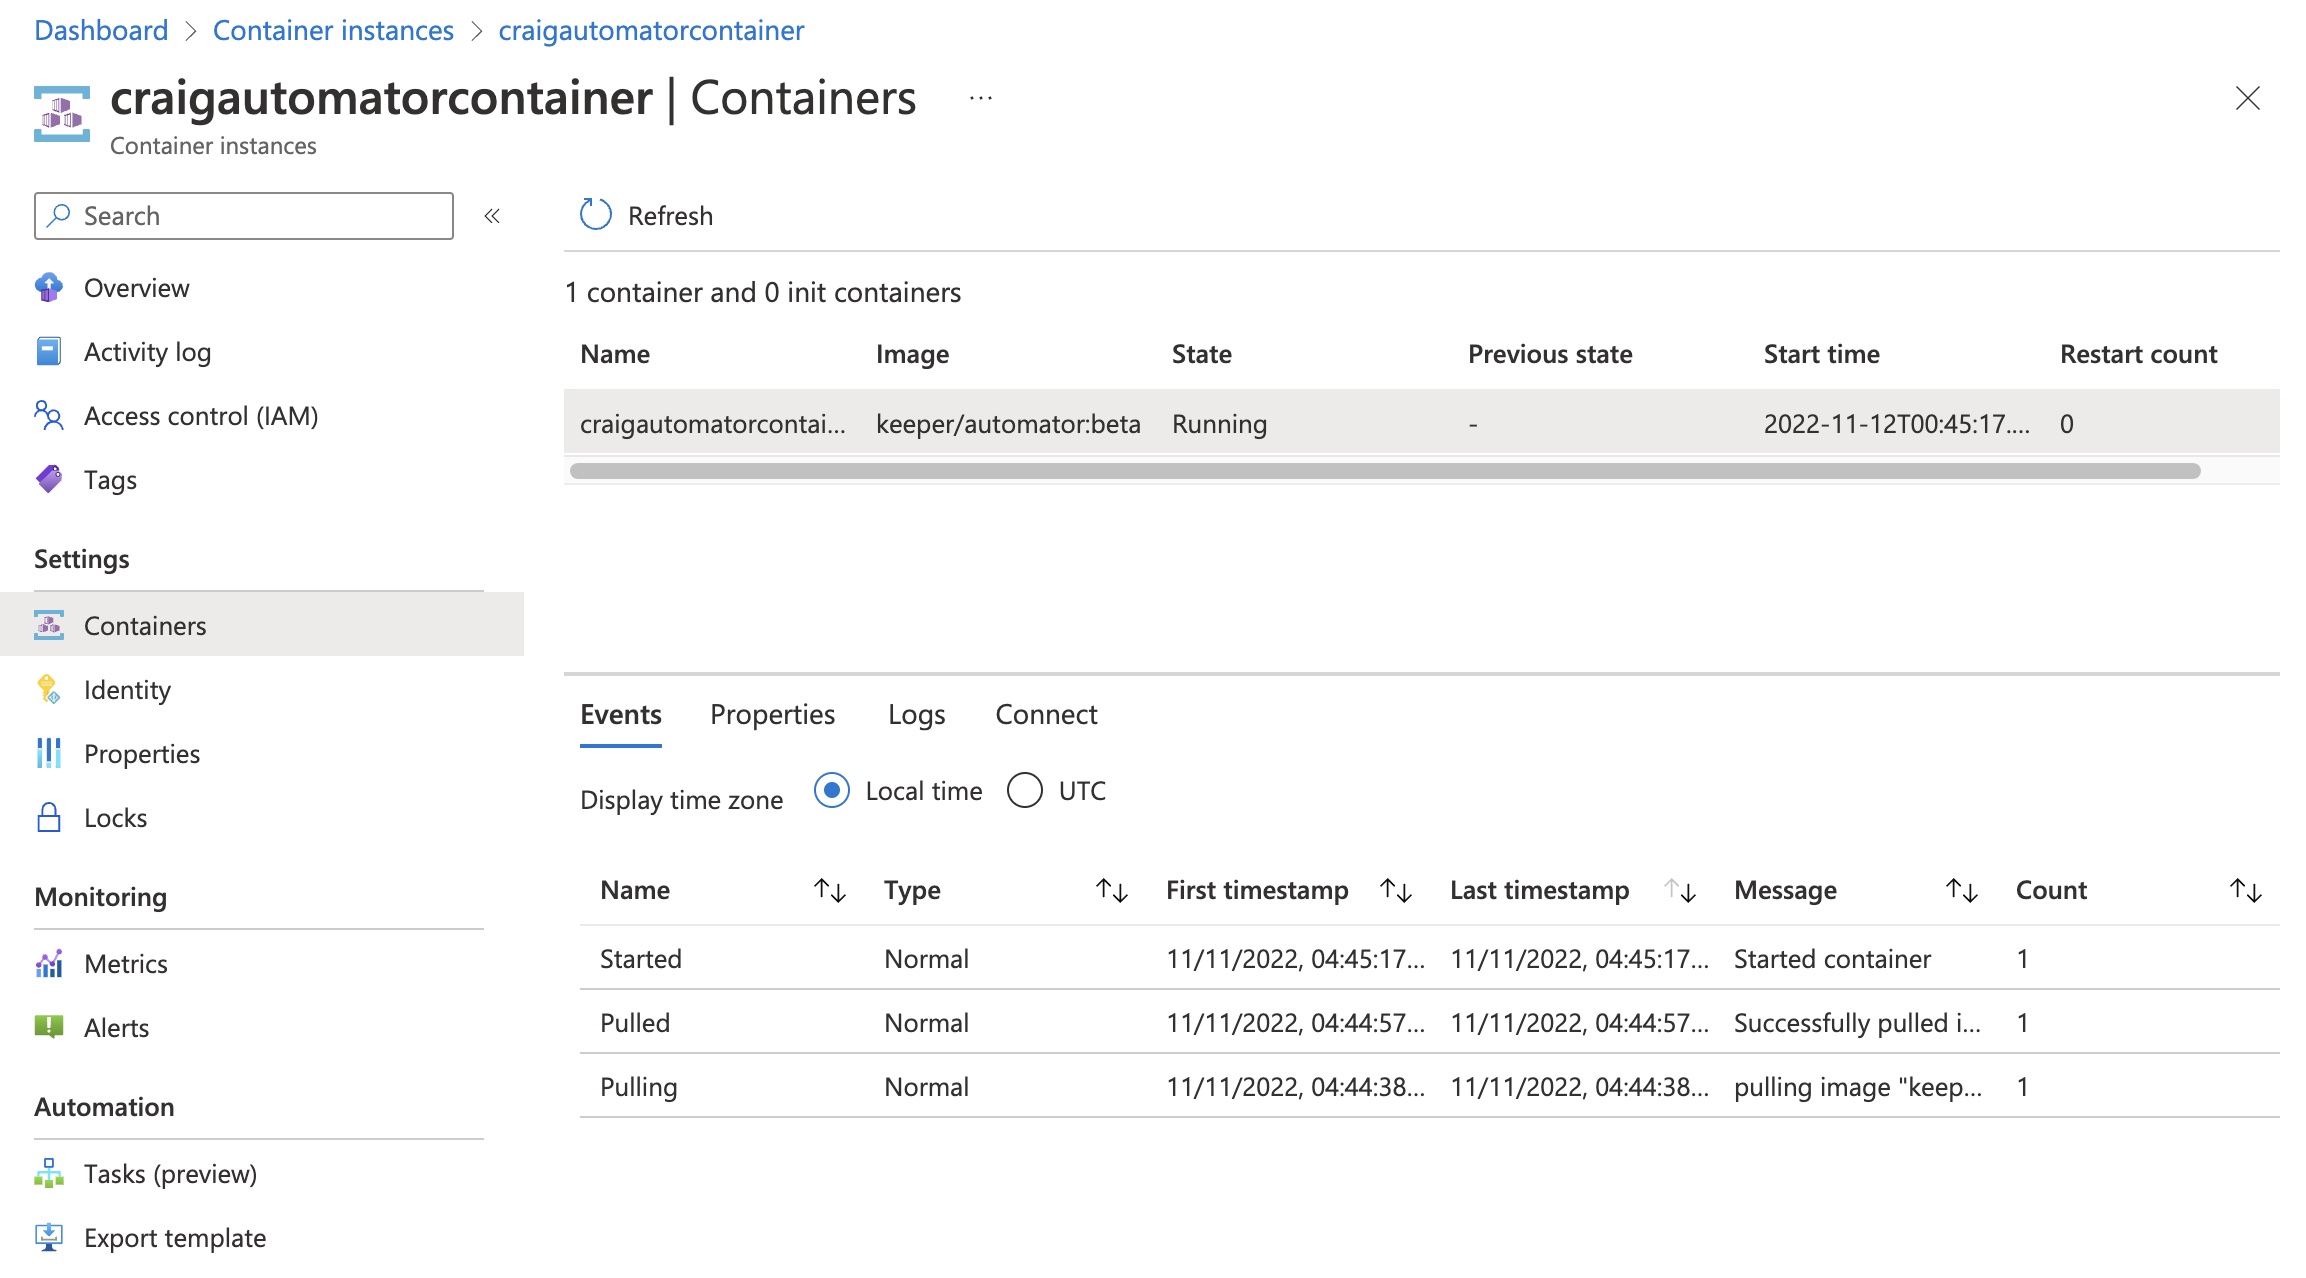
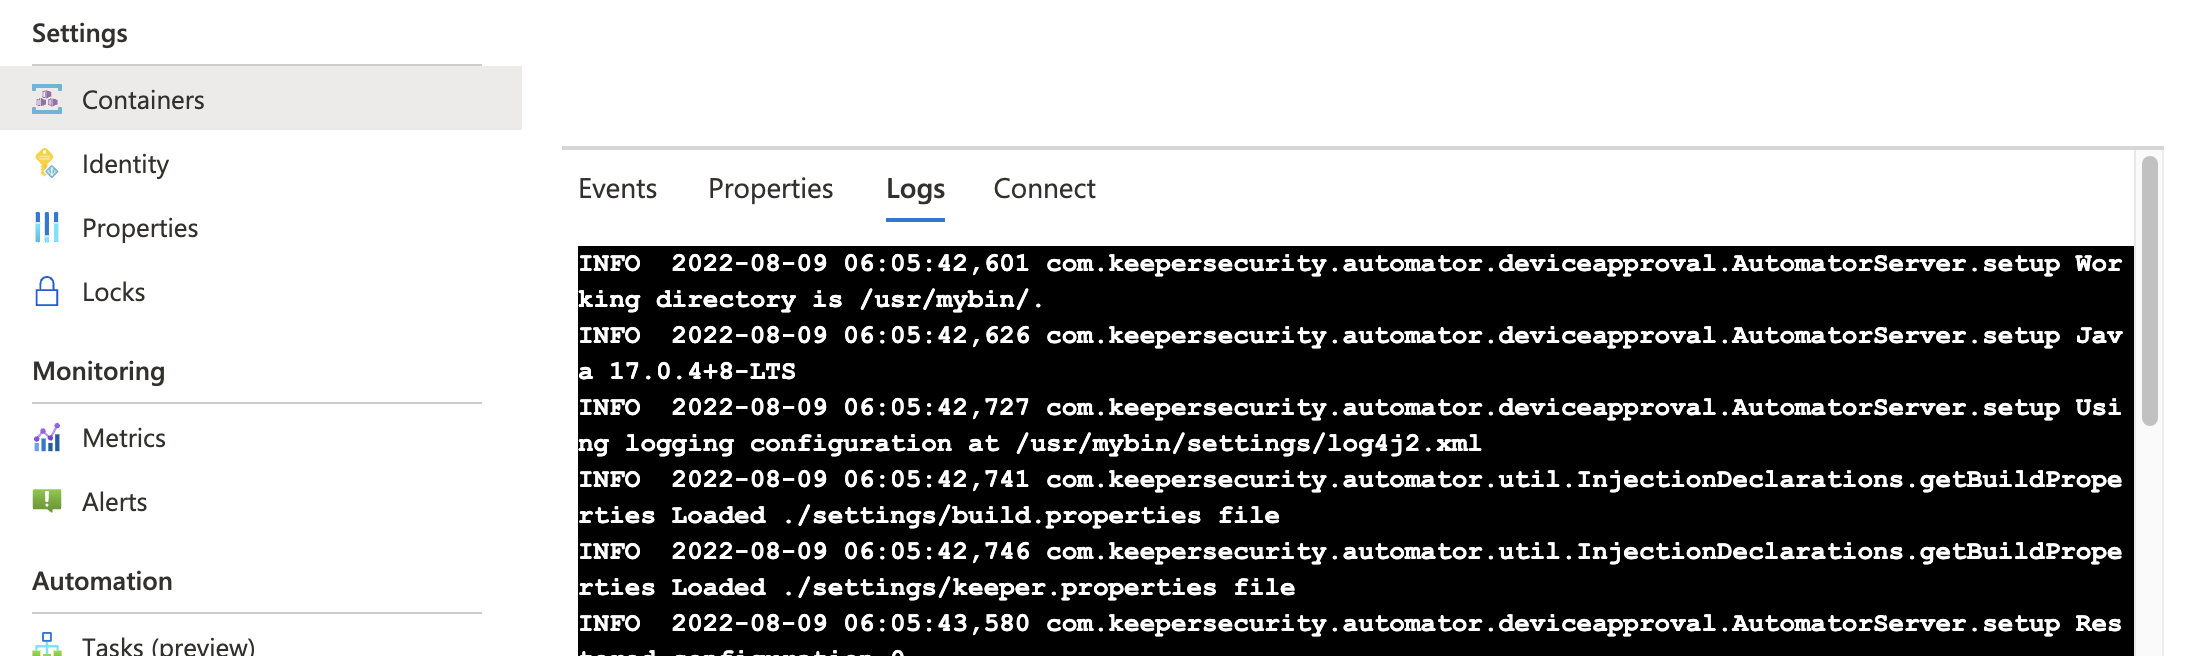
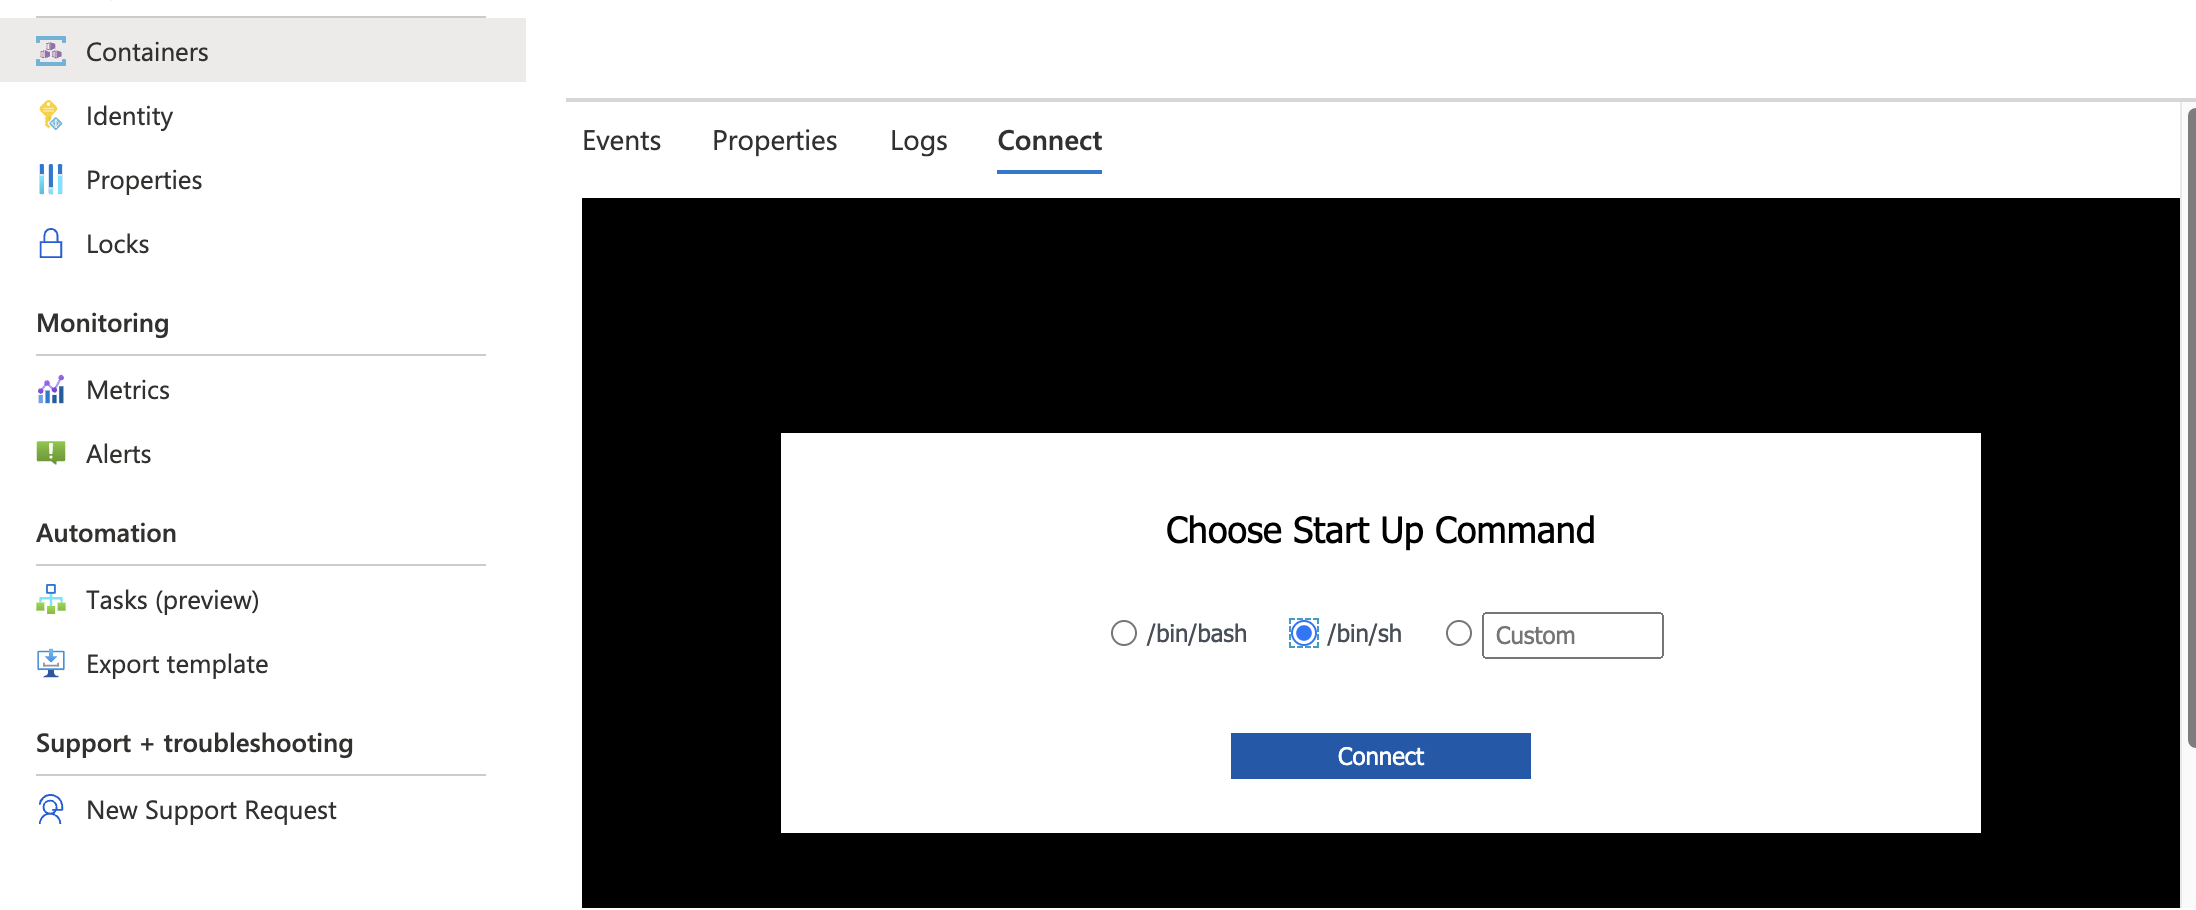
Azure Portal の **Container Instances** でコンテナの稼働を確認できます。`/bin/sh` でコンテナに接続し、実行ログを表示することもできます。

<figure><img src="https://1914737032-files.gitbook.io/~/files/v0/b/gitbook-x-prod.appspot.com/o/spaces%2F-Mfd2v-YT48Ljtykb8qm%2Fuploads%2FRtYhWlAe9YLIrcZOblwk%2FScreenshot%202022-11-11%20at%205.31.41%20PM.jpg?alt=media&#x26;token=6fc0b401-6eda-49bb-a6cf-4e830b43350c" alt=""><figcaption><p>コンテナー</p></figcaption></figure>

<figure><img src="https://1914737032-files.gitbook.io/~/files/v0/b/gitbook-x-prod.appspot.com/o/spaces%2F-Mfd2v-YT48Ljtykb8qm%2Fuploads%2FlJdCmcODq0ybzgaehzvM%2FScreen%20Shot%202022-08-08%20at%2011.27.41%20PM.png?alt=media&#x26;token=88d5f10b-2578-49d2-86f5-54d1c8b4d18e" alt=""><figcaption><p>ログ</p></figcaption></figure>

<figure><img src="https://1914737032-files.gitbook.io/~/files/v0/b/gitbook-x-prod.appspot.com/o/spaces%2F-Mfd2v-YT48Ljtykb8qm%2Fuploads%2FvMD4kPK5HK8qYK6qe57Y%2FScreen%20Shot%202022-08-08%20at%2011.28.25%20PM.png?alt=media&#x26;token=40225c91-1421-46dc-97bb-5e849129ceee" alt=""><figcaption><p>/bin/shで接続</p></figcaption></figure>

## コンテナ再起動時のIP更新

この構成では、コンテナ再起動時に /24 サブネットから新しいIPが割り当てられる場合があります。新しいIPを取得し、Application Gateway バックエンドプールを更新するには、Azure CLIで以下のスクリプトを実行します。

{% code overflow="wrap" lineNumbers="true" %}

```
# change these 3 variables according to your setup
RESOURCE_GROUP="keeper_automator_rg"
GATEWAY_NAME="KeeperAutomatorAppGateway"
CONTAINER_NAME="keeperautomatorcontainer"

BACKEND_POOL_NAME="appGatewayBackendPool"

CONTAINER_IP=$(az container show --resource-group $RESOURCE_GROUP --name $CONTAINER_NAME --query 'ipAddress.ip' --output tsv)

az network application-gateway address-pool update --resource-group $RESOURCE_GROUP --gateway-name $GATEWAY_NAME --name $BACKEND_POOL_NAME --servers $CONTAINER_IP
```

{% endcode %}

## オートメーターのテスト

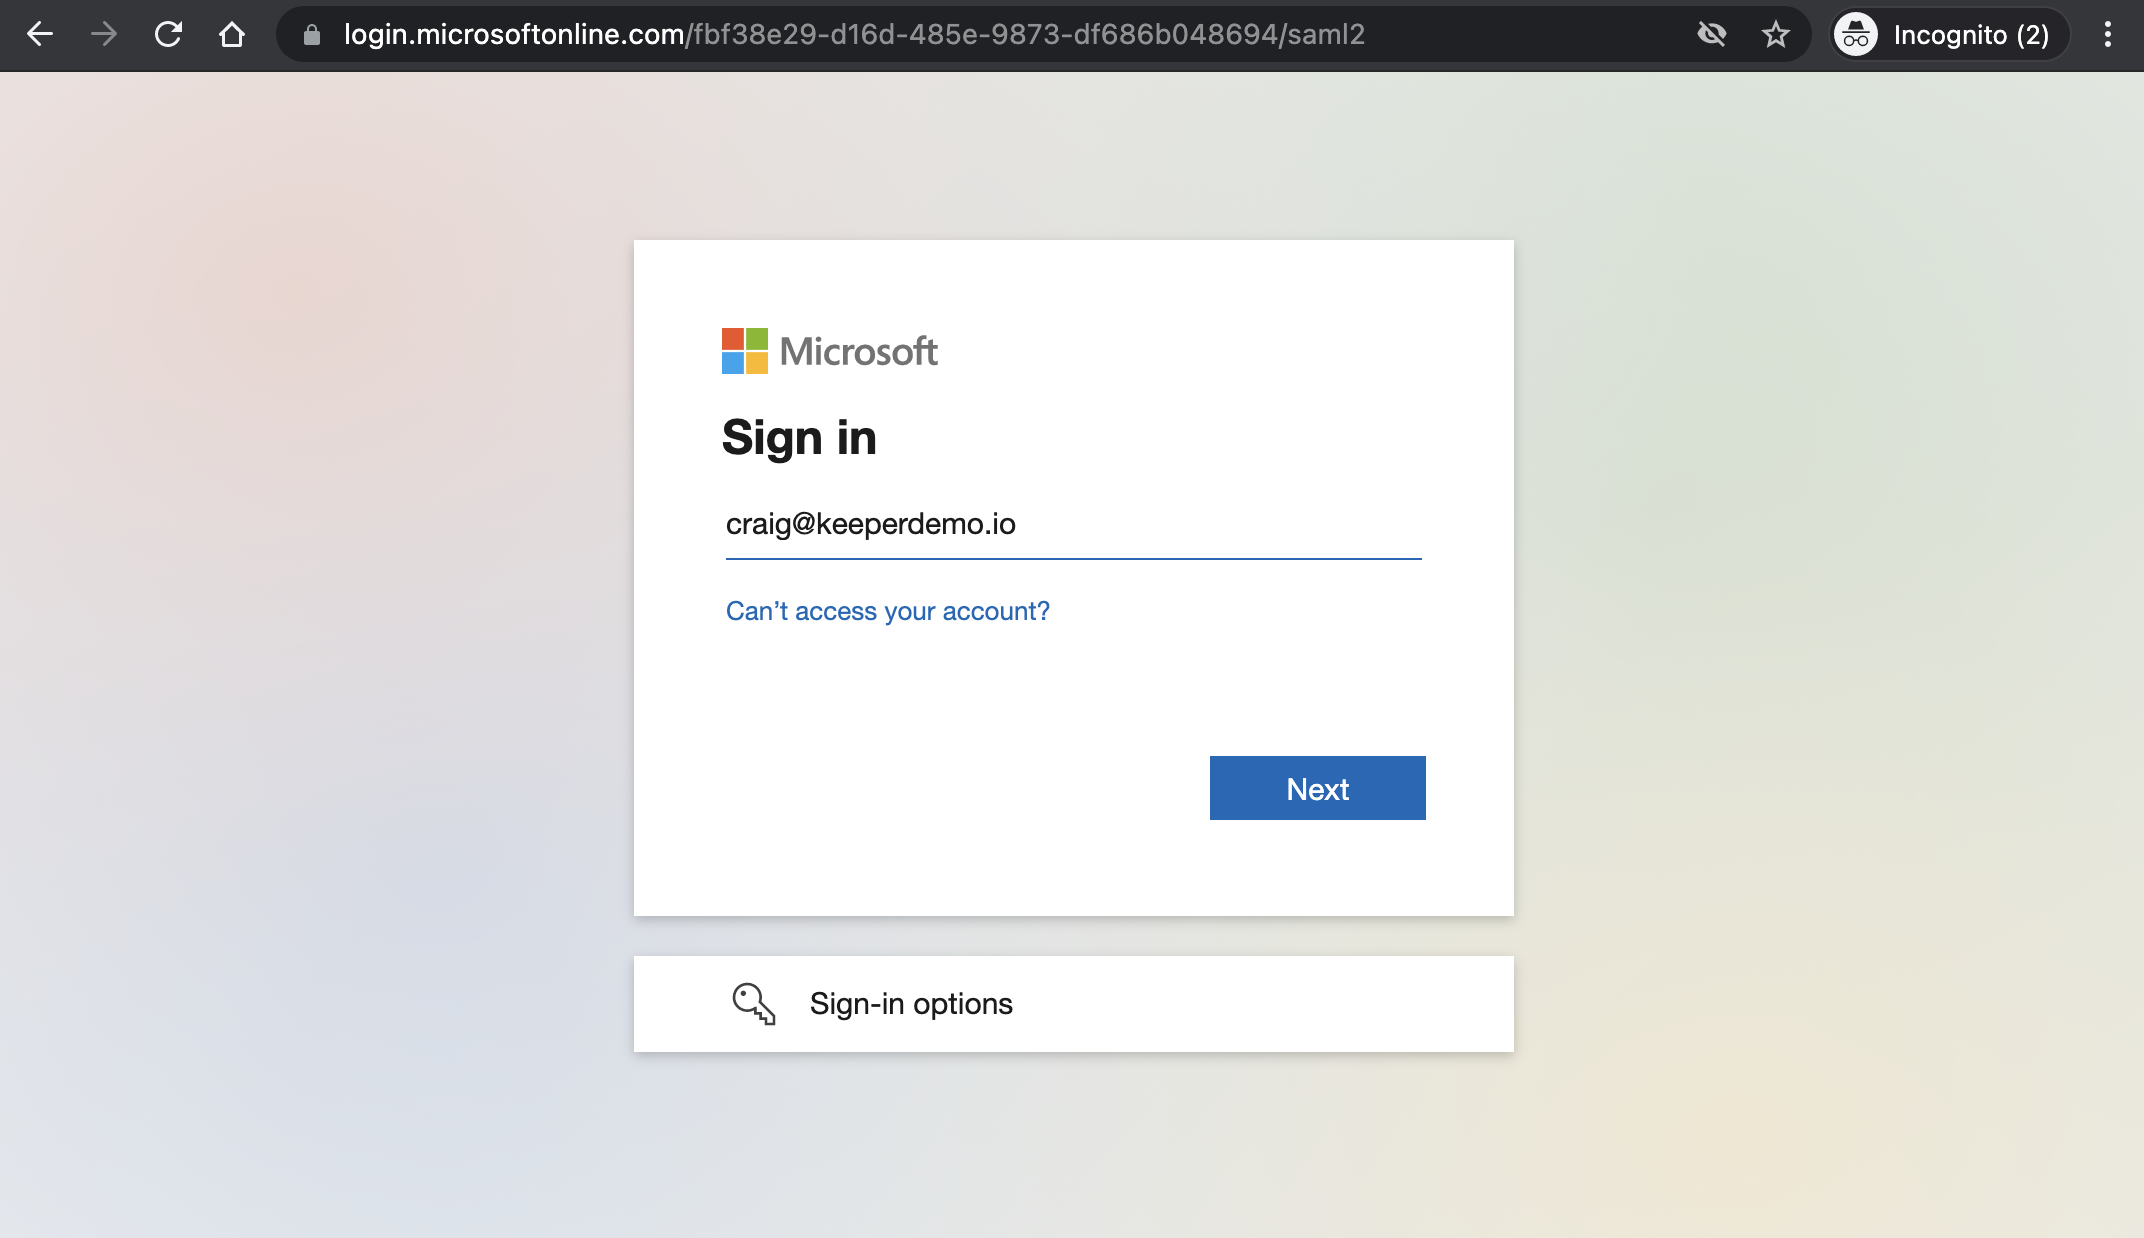
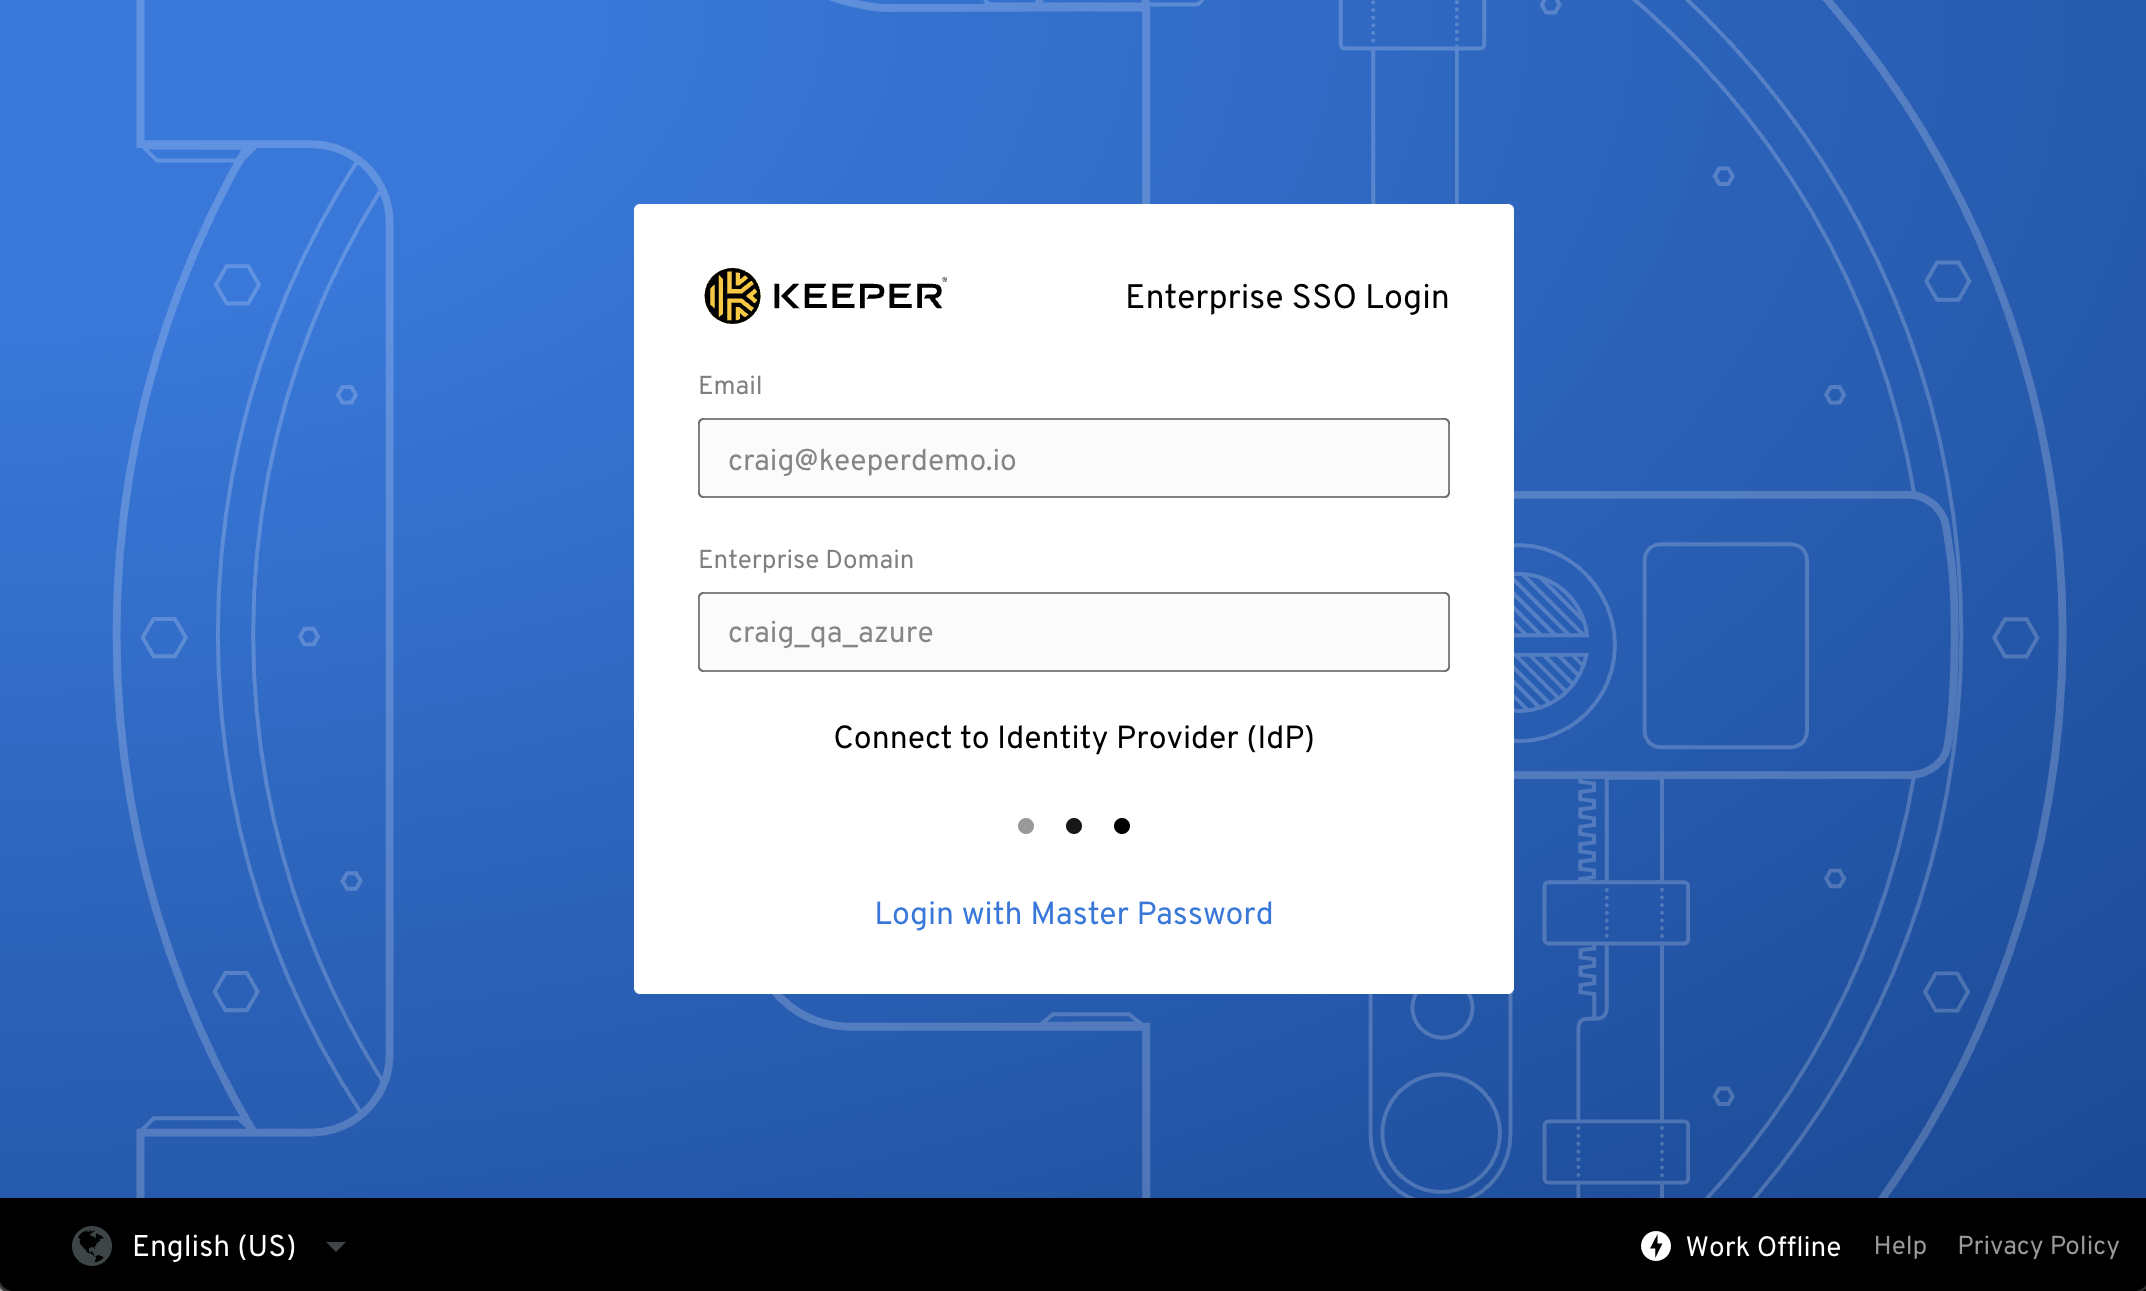
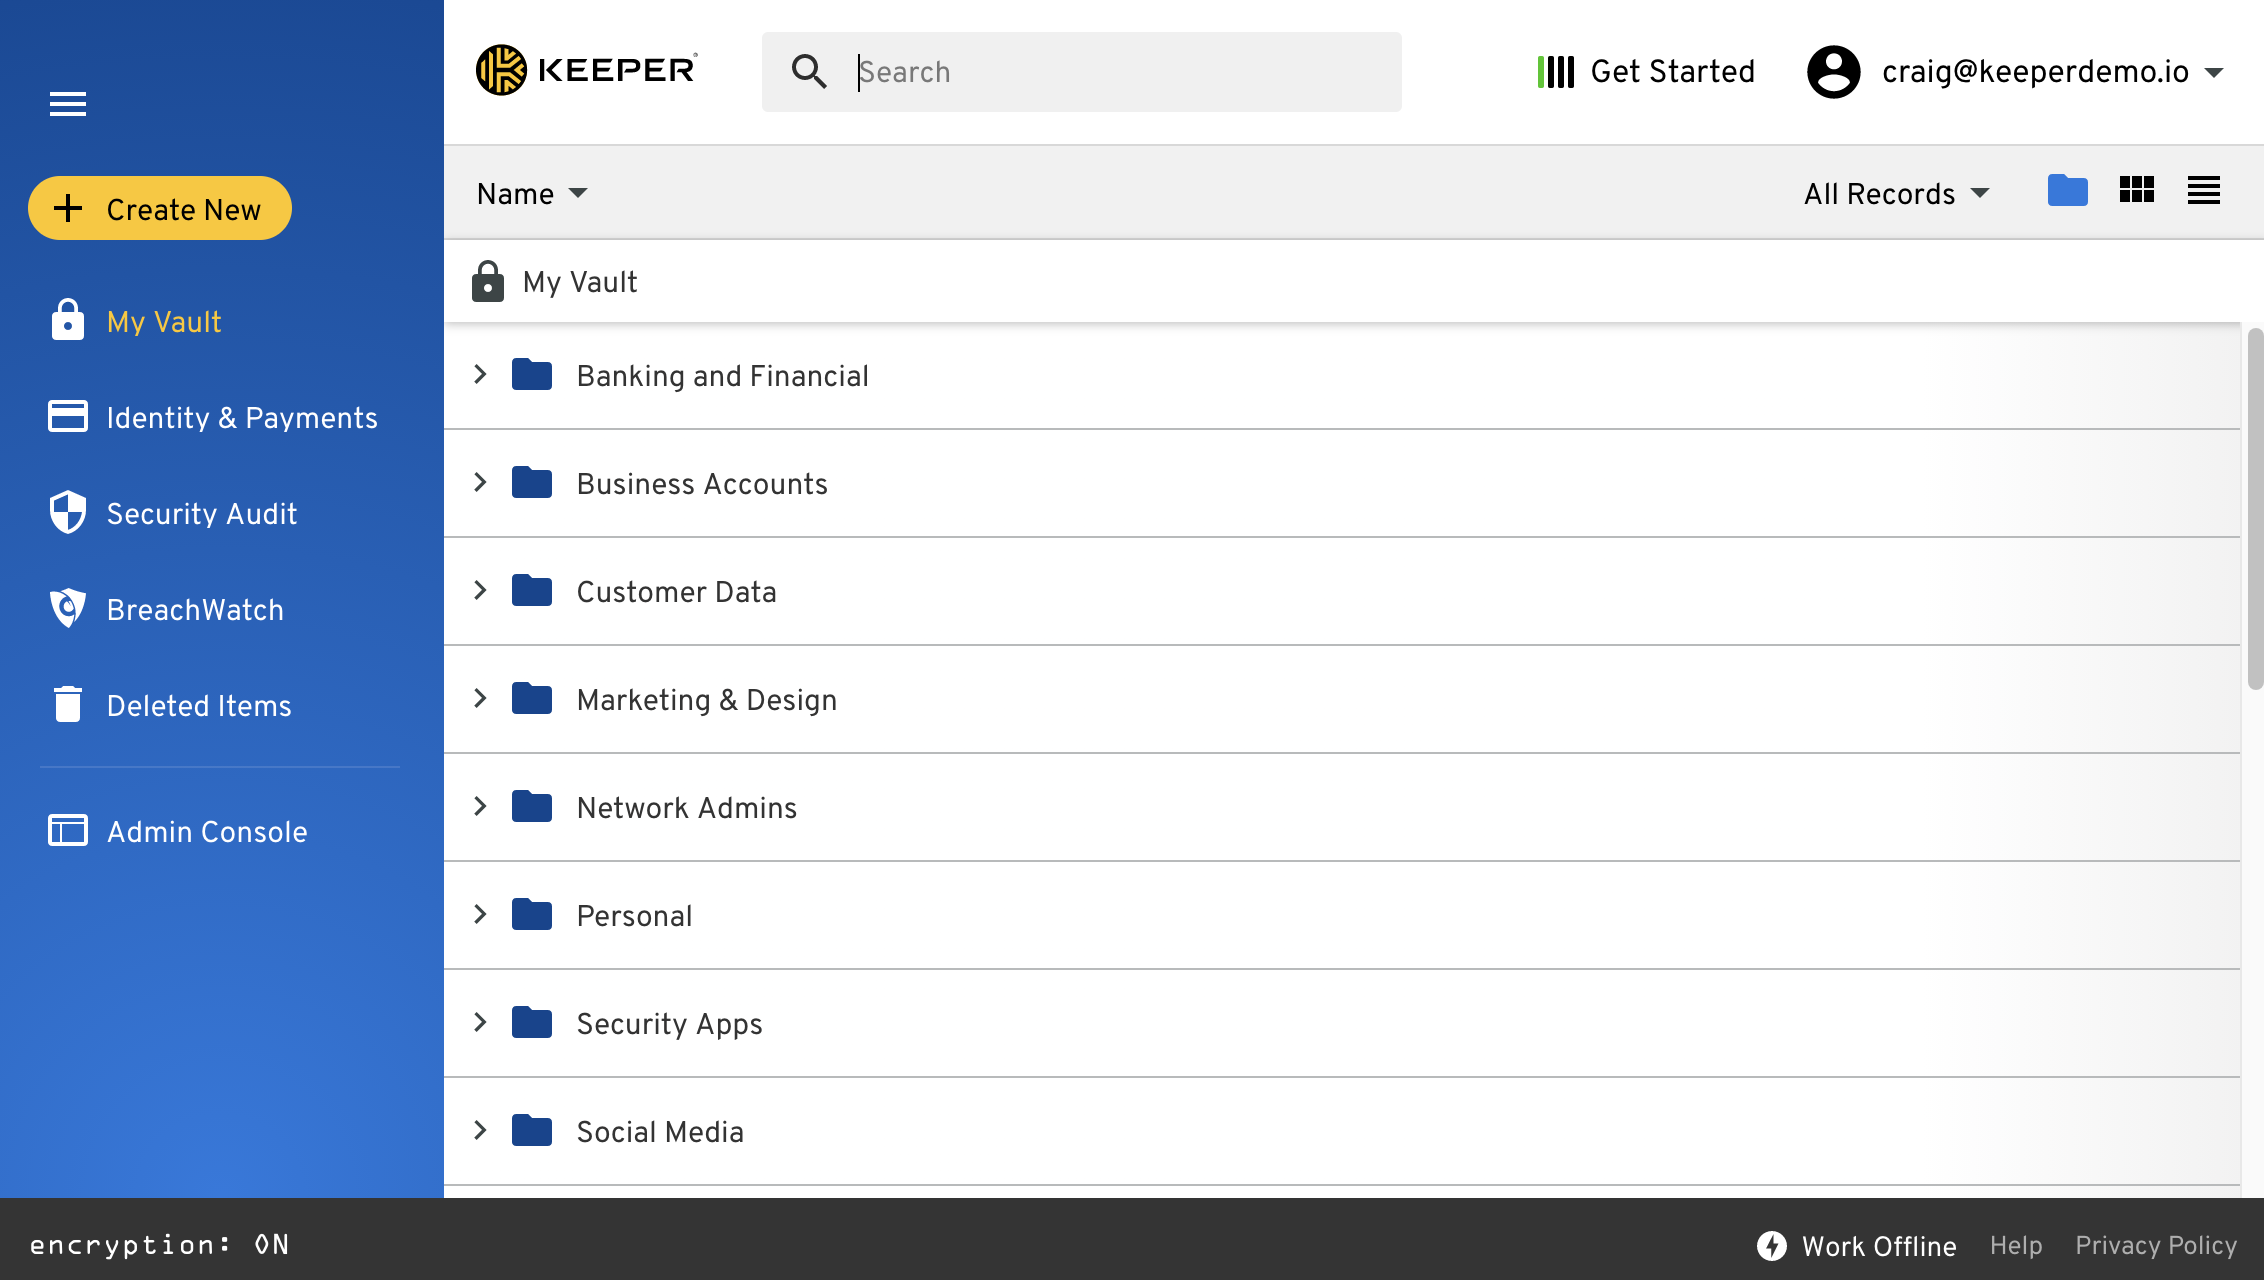
Keeperオートメーターがデプロイされましたので、エンドユーザー体験のテストが可能です。ユーザーが SSO IDプロバイダーで認証した後は、承認を求めるプロンプトは必要ありません。

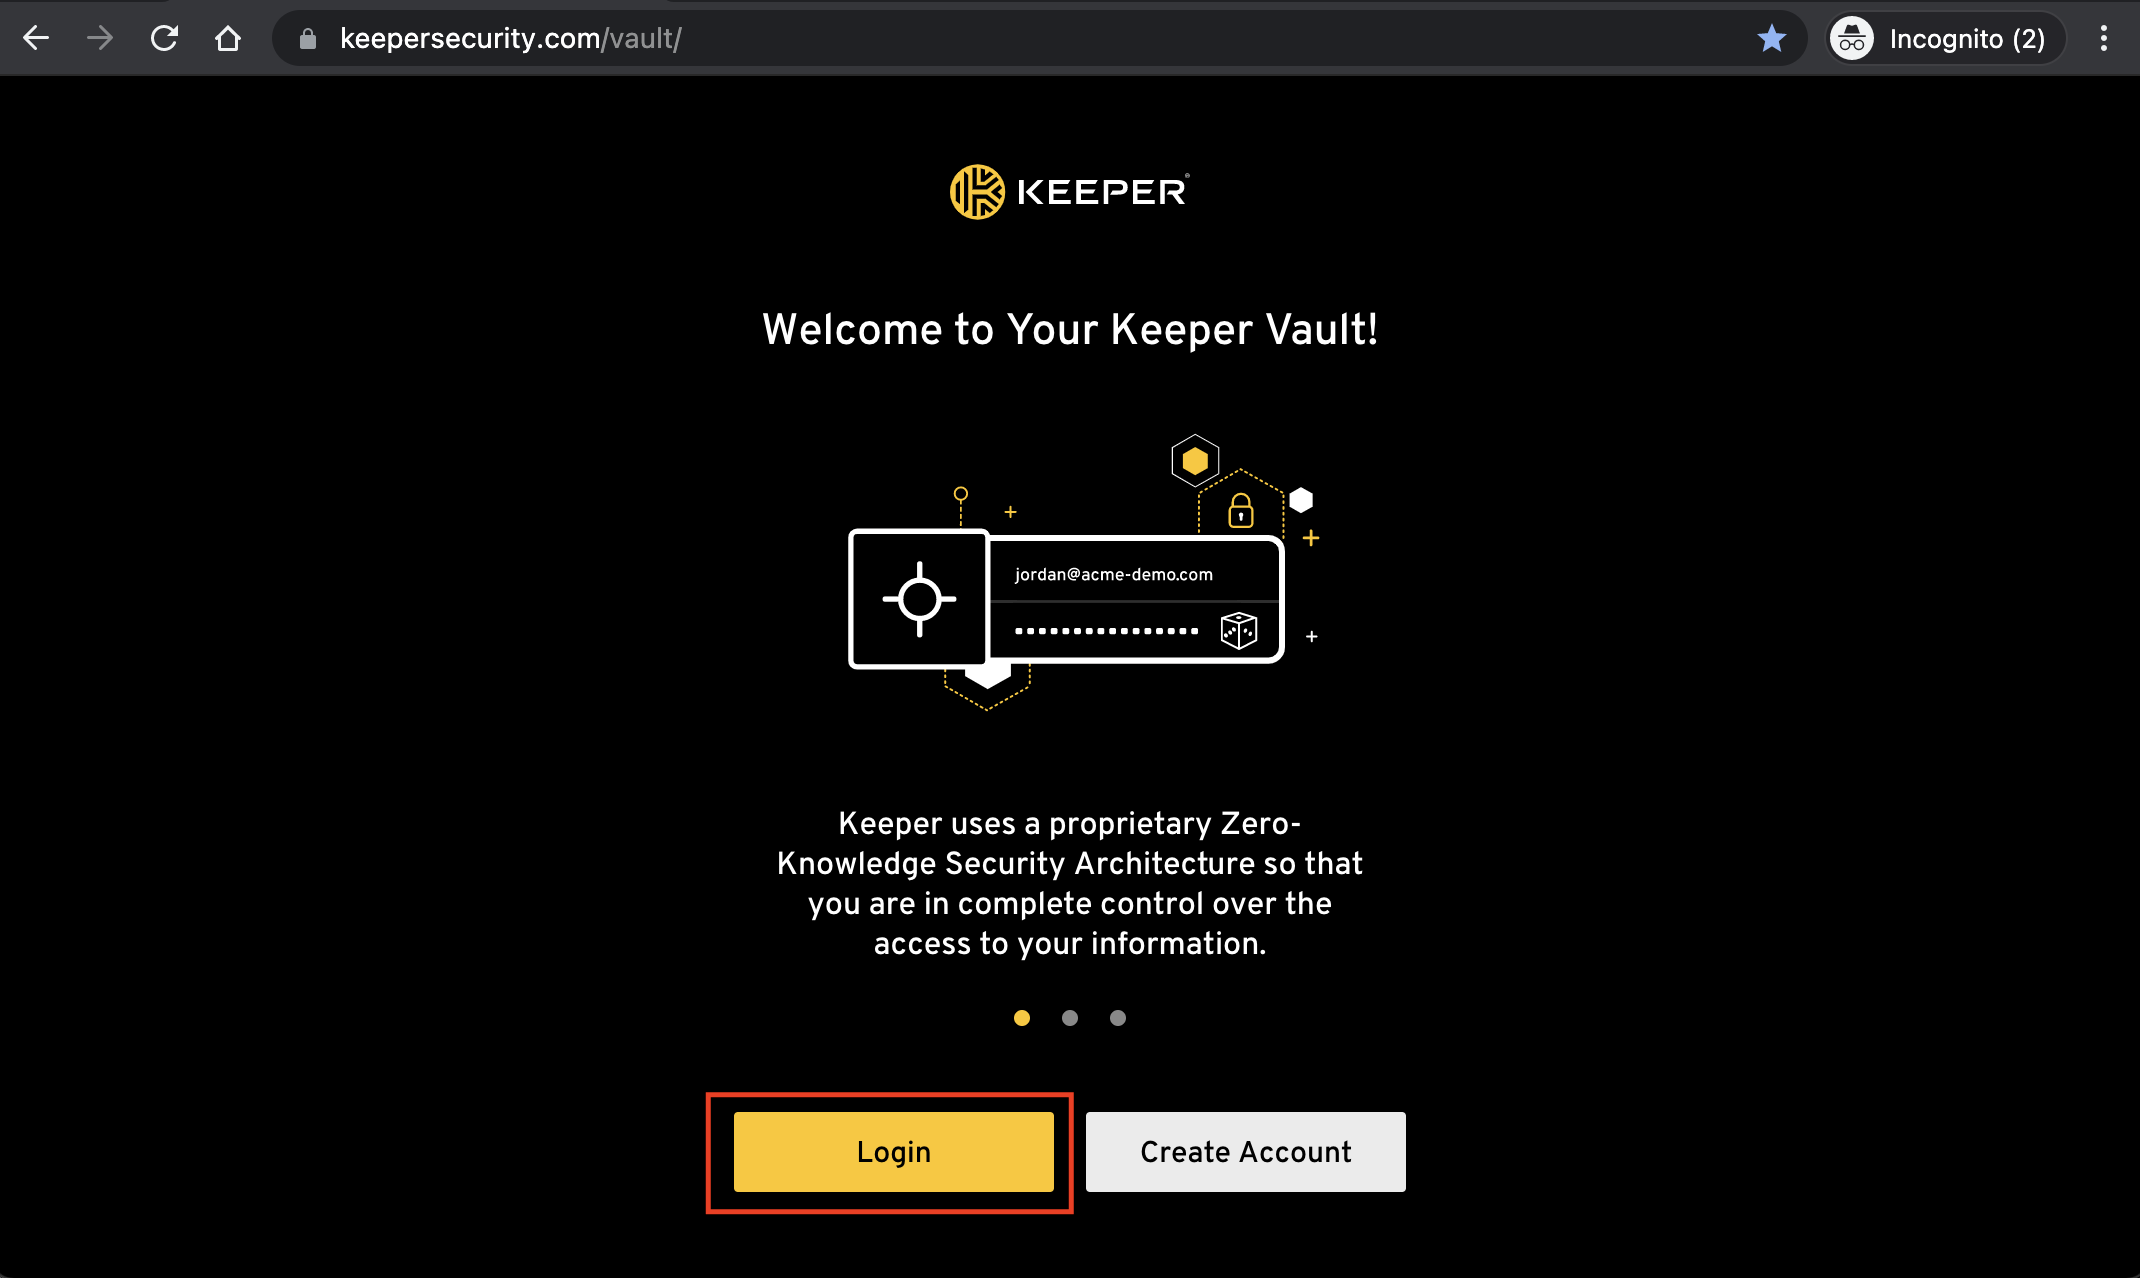
最も簡単な方法は、ブラウザのシークレットモードで [Keeperウェブボルト](https://keepersecurity.jp/vault/) を開き、クラウドSSOコネクトでログインすることです。**デバイス承認のプロンプトが表示されなければ、オートメーターは正常に動作しています。**

<figure><img src="https://1914737032-files.gitbook.io/~/files/v0/b/gitbook-x-prod.appspot.com/o/spaces%2F-Mfd2v-YT48Ljtykb8qm%2Fuploads%2F6M47BZgNYXHJ6aTUtbc1%2FScreen%20Shot%202021-09-10%20at%205.17.42%20PM.png?alt=media&#x26;token=e642b030-fef5-45e2-bd69-31a69b4c17f2" alt=""><figcaption><p>ボルトへログイン</p></figcaption></figure>

<figure><img src="https://1914737032-files.gitbook.io/~/files/v0/b/gitbook-x-prod.appspot.com/o/spaces%2F-Mfd2v-YT48Ljtykb8qm%2Fuploads%2FbqTOKRYMbSo5HTGpHTQX%2FScreen%20Shot%202021-09-10%20at%205.18.15%20PM.png?alt=media&#x26;token=73817b67-9c8b-4e42-b585-3e73d0a6b437" alt=""><figcaption><p>SSOログイン</p></figcaption></figure>

<figure><img src="https://1914737032-files.gitbook.io/~/files/v0/b/gitbook-x-prod.appspot.com/o/spaces%2F-Mfd2v-YT48Ljtykb8qm%2Fuploads%2F2ePvTbVgjp70enV5sTmc%2FScreen%20Shot%202021-09-10%20at%205.30.15%20PM.png?alt=media&#x26;token=ed4aff69-cdc9-494c-bcc3-29523f8cc65a" alt=""><figcaption><p>自動承認</p></figcaption></figure>

<figure><img src="https://1914737032-files.gitbook.io/~/files/v0/b/gitbook-x-prod.appspot.com/o/spaces%2F-Mfd2v-YT48Ljtykb8qm%2Fuploads%2FhKfNZnzP0MelaFgtnj7s%2FScreen%20Shot%202021-09-10%20at%205.32.12%20PM.png?alt=media&#x26;token=7fb689ee-343e-4117-825b-beaeff2e9409" alt=""><figcaption><p>ボルトの復号化</p></figcaption></figure>

[^1]: This name must be globally unique to azure.

[^2]: Make sure to use your storage account name.

[^3]: Make sure to enter your storage account name.

[^4]: Replace with your storage key.

[^5]: Replace this entire line with your subnet ID path.

[^6]: Put your PFX certificate password here.


---

# Agent Instructions
This documentation is published with GitBook. GitBook is the documentation platform designed so that both humans and AI agents can read, navigate, and reason over technical content effectively. Learn more at gitbook.com.

## Querying This Documentation
If you need additional information that is not directly available in this page, you can query the documentation dynamically by asking a question.

Perform an HTTP GET request on the current page URL with the `ask` query parameter, and the optional `goal` query parameter:

```
GET https://docs.keeper.io/sso-connect-cloud/jp/device-approvals/automator/azure-app-gateway-advanced.md?ask=<question>&goal=<endgoal>
```

`ask` is the immediate question: it should be specific, self-contained, and written in natural language.
`goal` is optional and describes the broader end goal you are ultimately trying to accomplish on behalf of the user. GitBook uses it to tailor the answer towards what is most useful for that goal.

The response will contain a direct answer to the question and relevant excerpts and sources from the documentation.

Use this mechanism when the answer is not explicitly present in the current page, you need clarification or additional context, or you want to retrieve related documentation sections.