> For the complete documentation index, see [llms.txt](https://docs.keeper.io/llms.txt). Markdown versions of documentation pages are available by appending `.md` to page URLs; this page is available as [Markdown](https://docs.keeper.io/sso-connect-cloud/jp/device-approvals/automator/keeper-automator-aws-linux.md).
# LinuxベースのJava
本ページでは、Javaを実行できるLinuxインスタンスにKeeperオートメーターを公開する手順を取り扱います。
{% hint style="info" %}
SSL証明書がすでに用意できていることをご確認ください。用意できていない場合は、[SSL証明書作成](/sso-connect-cloud/jp/device-approvals/automator/custom-ssl-certificate.md)のページの手順をご参照ください。
{% endhint %}
## スタンドアロンJavaサービス
1. Javaをインストールします
サービスの準備としてJava 17以上をインストールします。標準のAmazon AWS Linux 2インスタンスでは、以下のコマンドでAmazon Corretto Java 17 SDKをインストールできます。
```
[ec2-user@xxx ~]$ sudo yum install -y java-17-amazon-corretto-devel
```
どのバージョンが実行中かを確認するには、以下のように入力します。
```
[ec2-user@xxx ~]$ java --version
```
2. サービスをインストールします
オートメーターインスタンスから、Keeperオートメーターサービスをダウンロードして解凍します。
```
mkdir automator
cd automator/
wget https://keepersecurity.com/automator/keeper-automator.zip
unzip keeper-automator.zip
```
3. configフォルダを作成します
このフォルダが存在しない場合は、解凍先にconfigフォルダを作成します。
```
mkdir keeper-automator/config
```
4. .pfxファイルとパスワードファイルをコピーします
[SSL証明書作成](/sso-connect-cloud/jp/device-approvals/automator/custom-ssl-certificate.md)のページで作成した.pfxファイルをオートメーターの`config/`フォルダにアップロードし、ファイル名が`ssl-certificate.pfx`になっていることを確認します。
以下は、scpを使用した例です。
```
scp -i xxx.pem ssl-certificate.pfx \
ec2-user@xxx:/home/ec2-user/automator/keeper-automator/config/
```
`ssl-certificate.pfx` ファイルがパスフレーズで保護されている場合は、`ssl-certificate-password.txt` という名前のファイルを作成し、前項と同じ `config/` フォルダに配置する必要があります。
以下に例を示します。
```
echo "my_pfx_password..." > ssl-certificate-password.txt
scp -i xxx.pem ssl-certificate-password.txt \
ec2-user@xxx:/home/ec2-user/automator/keeper-automator/config/
```
5. 設定を編集
`settings`フォルダ内の`keeper.properties`ファイルは、サービスの高度な構成パラメータを管理するために使用されます。編集が必要となる一般的なパラメーターには、以下が含まれます。
* `automator_host`
* `automator_port`
* `ssl_certificate`
各パラメーターの詳細については、[高度な設定](/sso-connect-cloud/jp/device-approvals/automator/advanced-settings.md)のページをご参照ください。
6. サービスを開始します
オートメーターインスタンスから、`java -jar`を使用してサービスを開始します。以下の例では、`nohup`を使用してバックグラウンドで実行します。
```
cd automator/
nohup java -jar keeper-automator.jar &
```
WindowsのコマンドラインまたはPowerShellでは、コマンドは以下のとおりに実行する必要があります。
```
start "" /B javaw -jar "keeper-automator.jar"
```
7. サービスのステータスを確認します
サービスが実行中であることをウェブブラウザで確認します (テストしている端末からポート443へアクセスできる必要があります)。\
\
この場合、URLは**https\://\/health**となります。
このURLは自動ヘルスチェックにも使用できます。
例
```
curl https://automator.lurey.com/health
OK
```
サービスが起動したら、Keeperコマンダーを使ってオートメーターを環境に組み込みます。
## コマンダーでの最後の設定
Keeperコマンダーでオートメーター設定の最後の手順を実行します。コマンダーはどこからでも実行可能で、サーバーにインストールする必要はありません。
ご利用のワークステーション、サーバー、コンピュータなどにKeeperコマンダーCLIをインストールします。バイナリインストーラーを含むインストール手順については[こちら](/keeperpam/jp/commander-cli/commander-installation-setup.md)のページをご参照ください。\
\
コマンダーをインストールした後、`keeper shell`と入力してセッションを開き、`login`コマンドを使用してログインできます。オートメーターを設定するには、Keeper管理者、またはSSOノードを管理できる管理者としてログインする必要があります。
```
$ keeper shell
My Vault> login admin@company.com
_ __
| |/ /___ ___ _ __ ___ _ _
| ' Settings)
Enter password for admin@company.com
Password:
Successfully authenticated with Master Password
Syncing...
Decrypted [58] record(s)
My Vault>
```
Keeperコマンダーにログインし、`automator create`で始まる一連のコマンドを使用してオートメーターを有効化します。
```
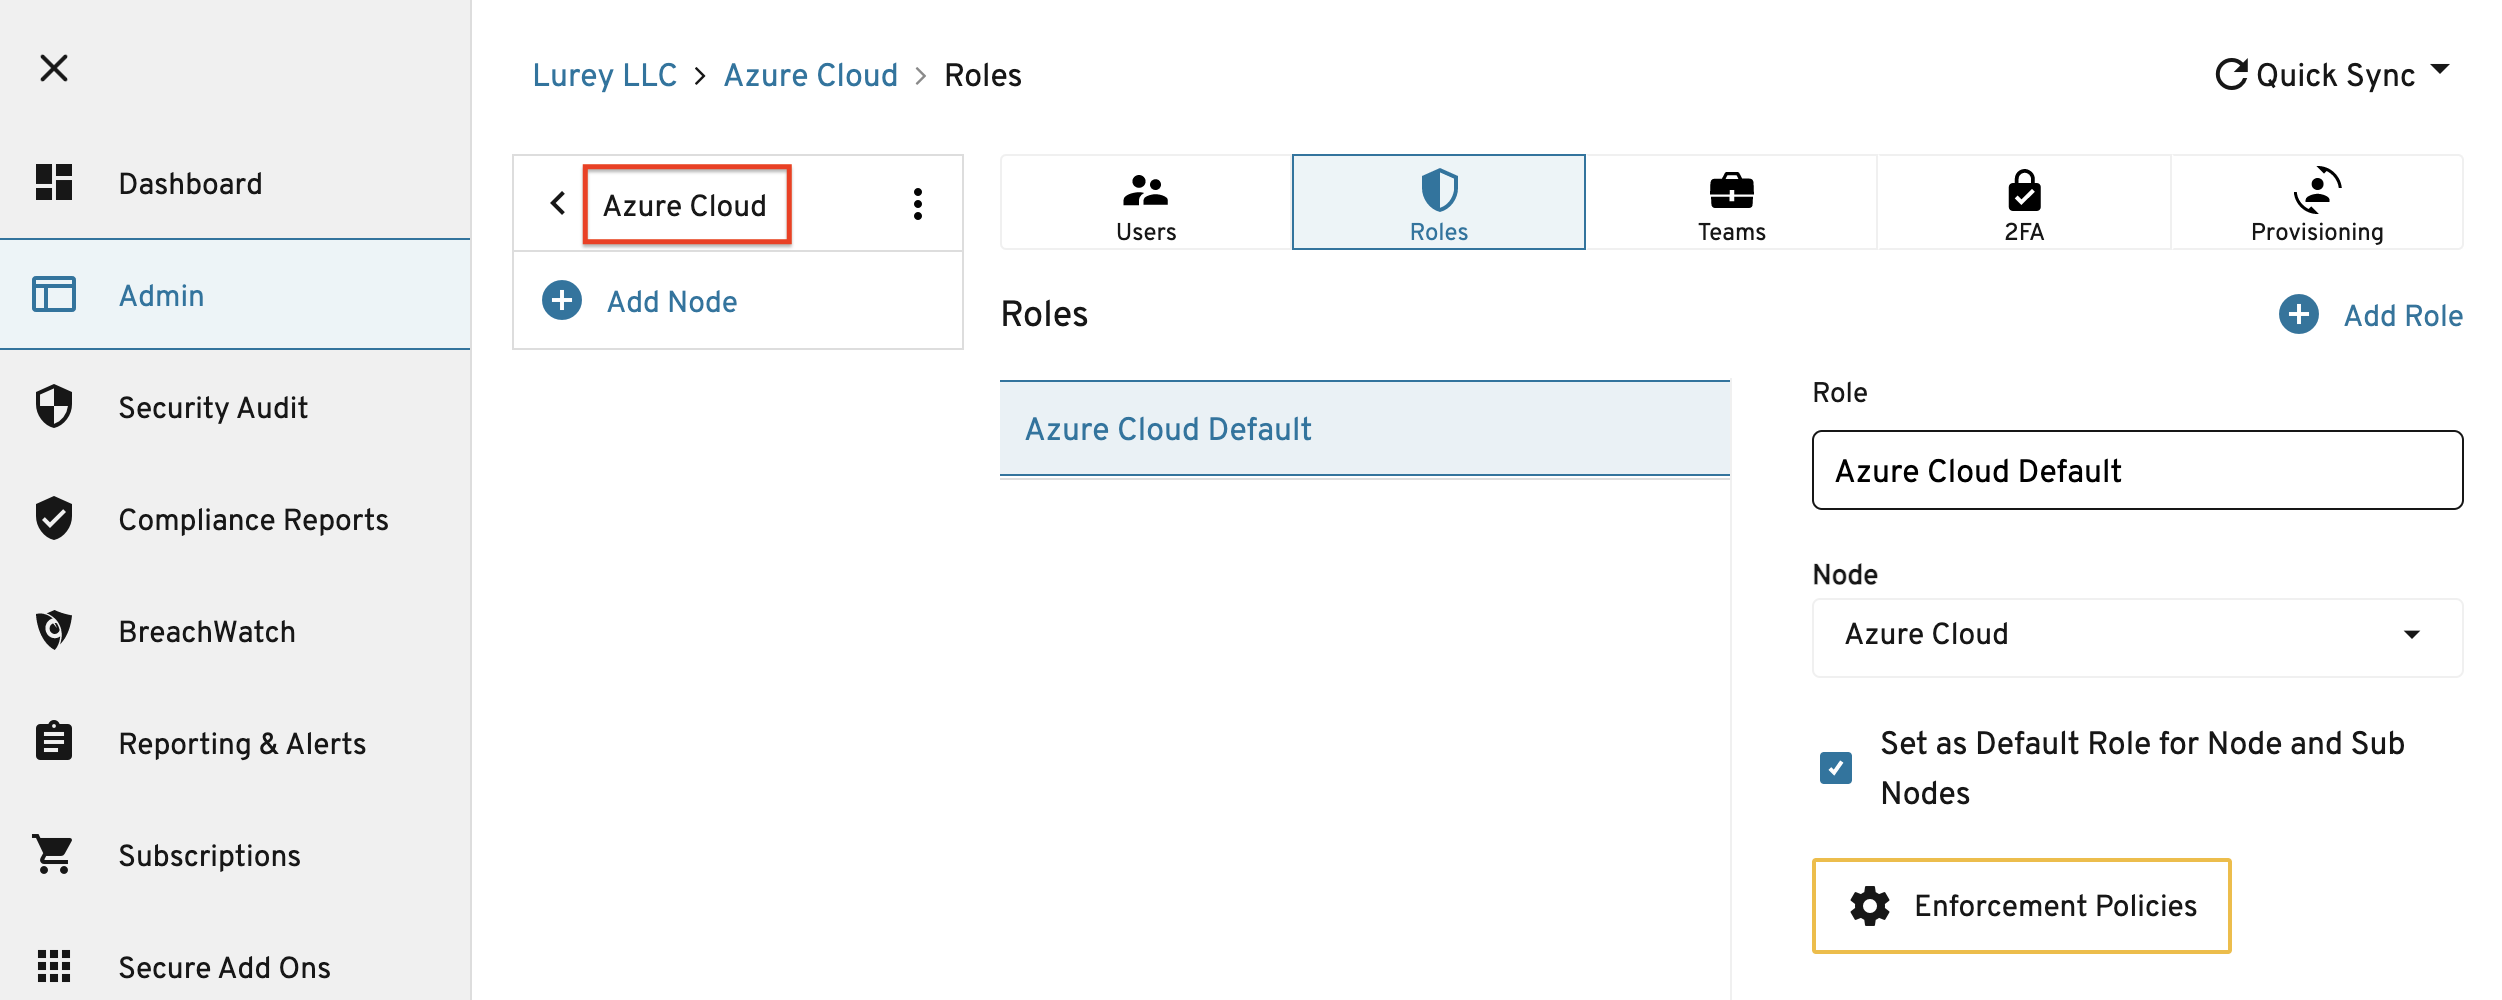
My Vault> automator create --name="My Automator" --node="Azure Cloud"
```
ノード名 (この場合は、「Azure Cloud」) は、以下に示すように管理コンソールのUIに表示されます。
オートメーターの作成
コマンドの出力には、IDプロバイダから取得したメタデータを含むオートメーターの設定が表示されます。
```
Automator ID:1477468749950
Name:My Automator
URL:
Enabled:No
Initialized:No
Skills:Device Approval
```
以下のようにautomator editコマンドを実行します。これによりURLとスキルが設定されます (`team`、 `team_for_user`、`device`)。
{% code overflow="wrap" %}
```
automator edit --url https:// --skill=team --skill=team_for_user --skill=device "My Automator"
```
{% endcode %}
次にキーを交換します。オートメーター公開キーで暗号化されたエンタープライズ秘密キーがオートメーターに提供されます。
```
automator setup "My Automator"
```
次に、他のIdPメタデータをオートメーターに送信します。
```
automator init "My Automator"
```
オートメーターサービスを有効にします。
```
automator enable "My Automator"
```
この時点で設定は完了となります。
#### AD FSを使用した環境の場合
IDプロバイダとしてAD FSを使用してKeeperオートメーターを有効にする場合、以下の手順に従ってKeeper証明書を更新するまでログインできません。
* Keeper管理コンソールへログインします。
* **\[管理者]** > **SSOノード** > **\[プロビジョニング]** に移動し、SSOクラウド設定を見ます。
* **\[SP証明書をエクスポート]** をクリックします。
* AD FS管理コンソールで、Keeper Cloud SSO証明書利用者信頼プロパティを選択します。
* **\[暗号化]** タブで、古い証明書をこの新しい証明書に置き換えます。
* **\[署名]** タブで、新しいSP証明書をこの新しい証明書に置き換えます。
## ネットワークアクセスの制限
Keeperのサーバーおよび運用担当のワークステーションなど、必要な送信元だけがサービスに届くようネットワークアクセスを制限することを推奨します。許可するIPアドレスの一覧は、[イングレス要件](/sso-connect-cloud/jp/device-approvals/automator/ingress-requirements.md)をご参照ください。
## ユーザー体験のテスト
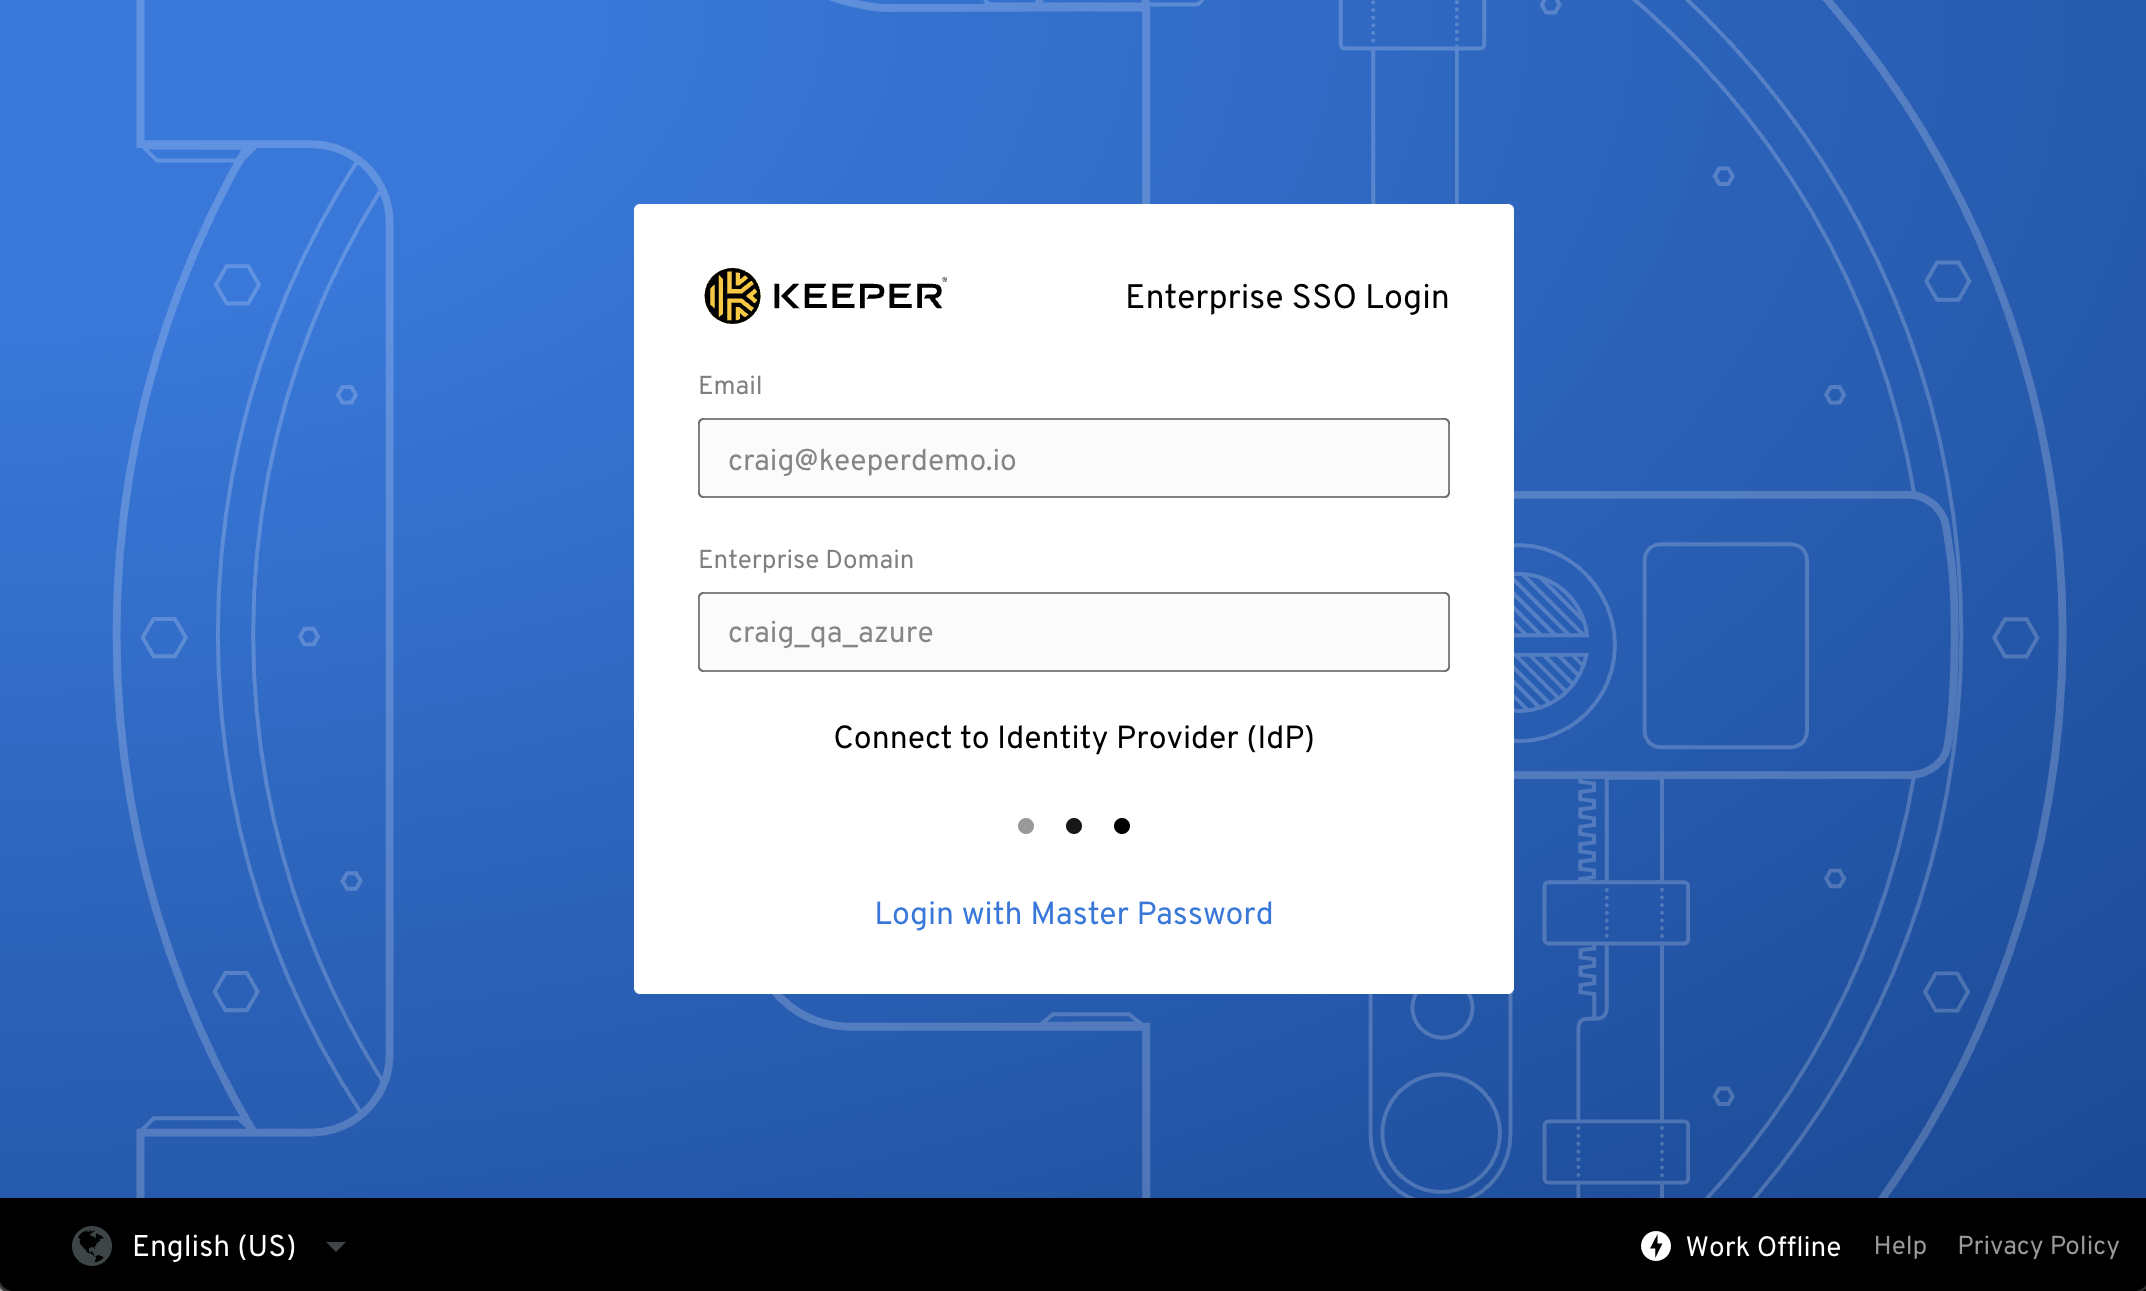
Keeperオートメーターをデプロイしたら、エンドユーザー体験をテストできます。ユーザーがSSOのIDプロバイダーで認証したあとは、承認を求めるプロンプトは表示されません。
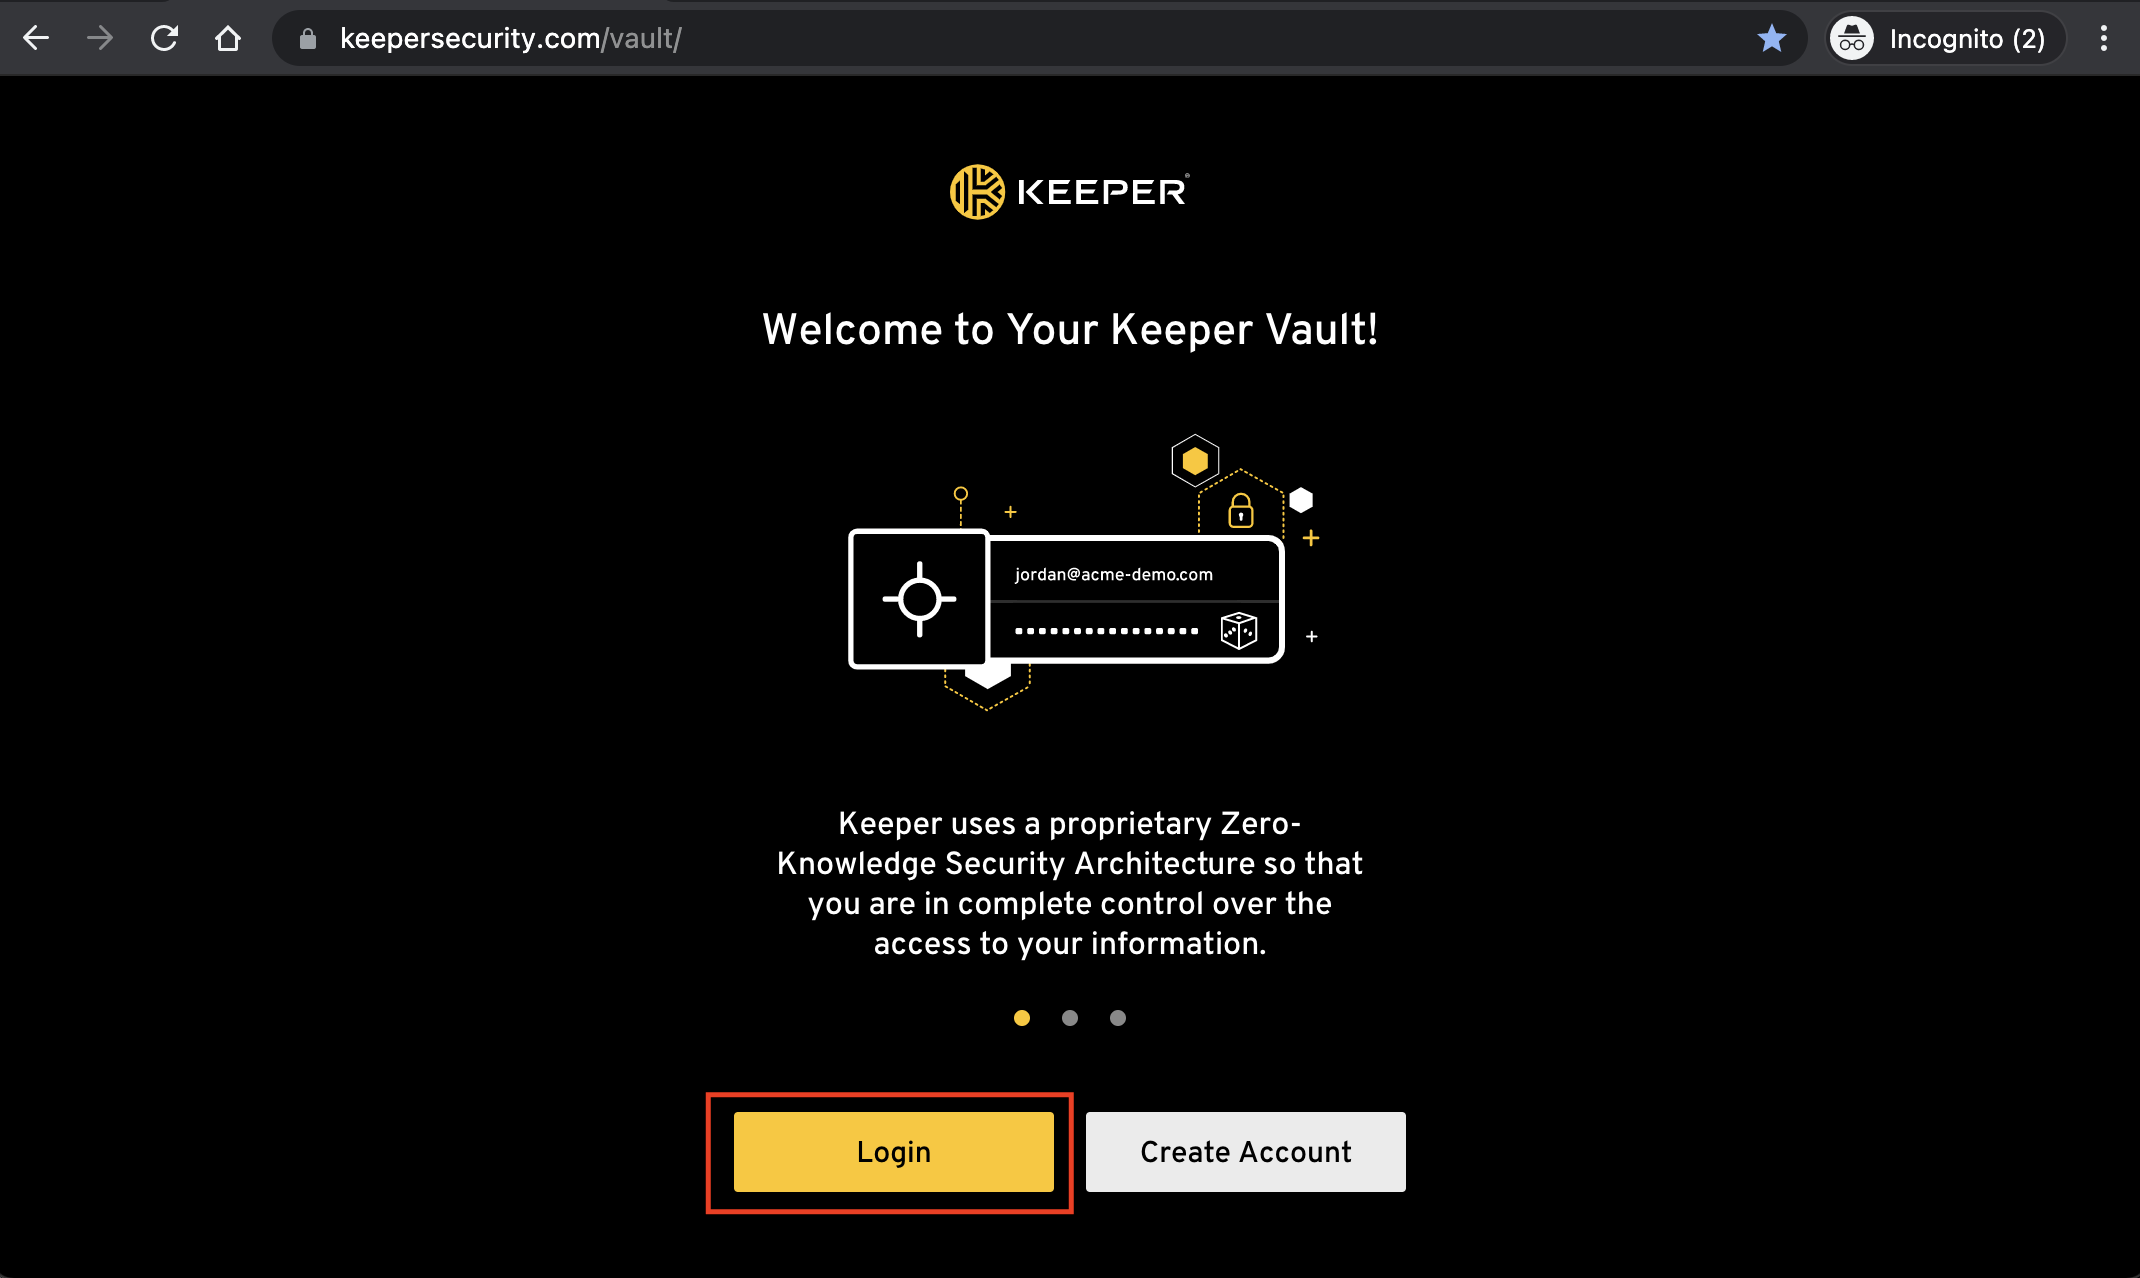
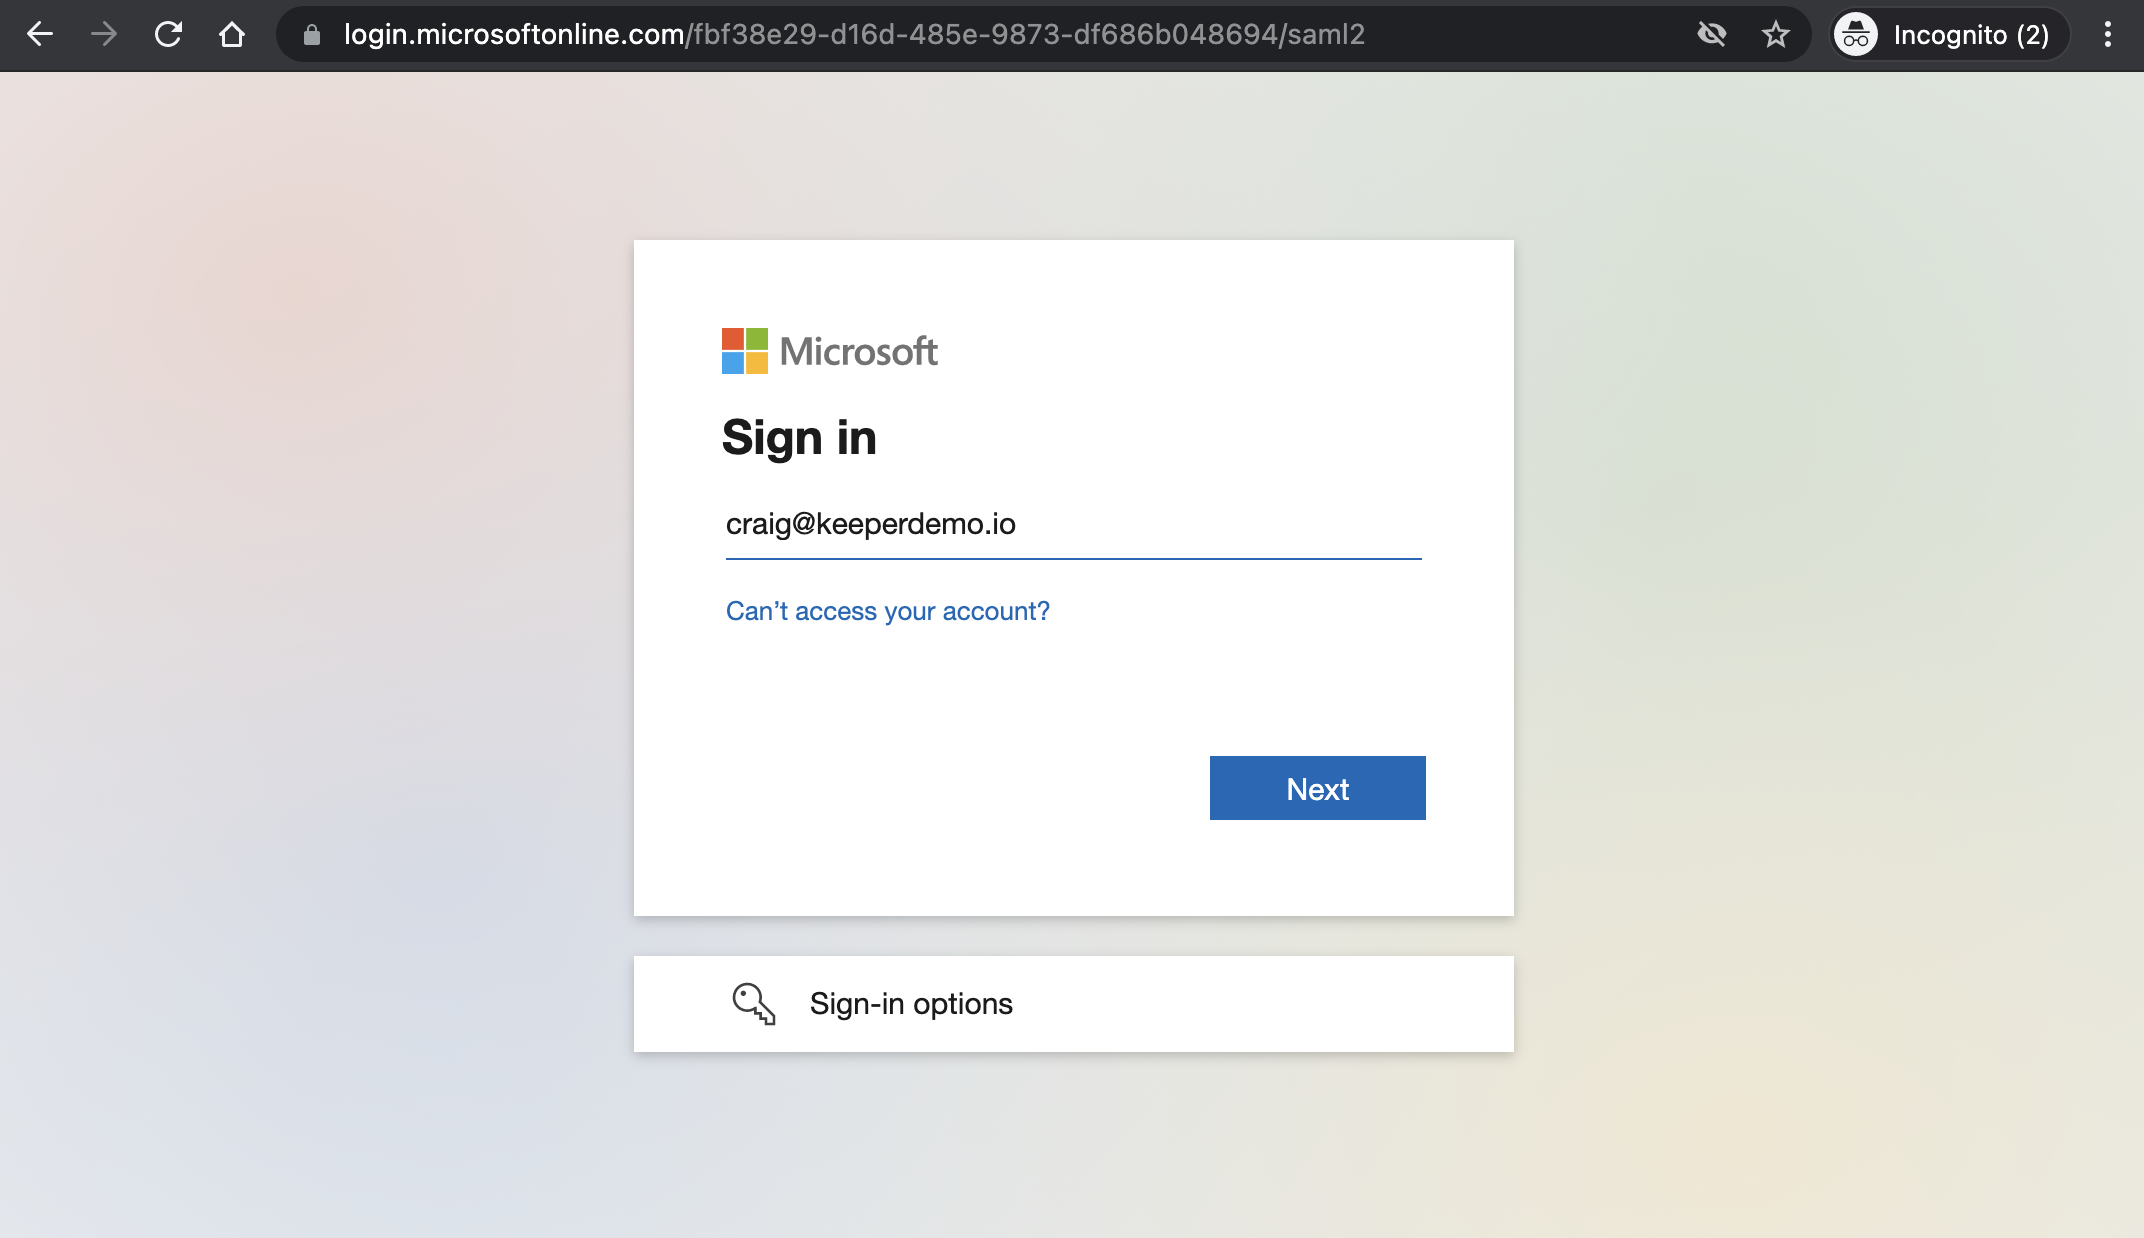
最も簡単なテスト方法は、ブラウザのシークレットウィンドウからKeeperウェブボルトを開き、SSOクラウドでログインすることです。デバイス承認を求めるプロンプトは表示されません。
## サービスの更新
Keeperオートメーターサービスを停止/開始する場合、あるいはサーバーを再起動する場合は、Keeperコマンダーを使用してサービスエンドポイントを再初期化する必要がある場合があります。
```
automator setup "My Automator"
automator init "My Automator"
automator enable "My Automator"
```
## トラブルシューティング
#### サービスが始まらない
Keeperオートメーターのログを確認してください。通常これで問題がわかります。Linuxではログはインストールディレクトリにあります。
#### 常に承認のプロンプトが表示される
Keeperオートメーターサービスを再設定する際、Keeperコマンダーを使用してサービスエンドポイントを再初期化する必要がある場合があります。Keeperコマンダーについては[こちら](/keeperpam/jp/commander-cli/overview.md)のページをご参照ください。
Keeperコマンダーでオートメーターインスタンスを再初期化するのに必要なコマンドは以下のとおりです。
```
$ keeper shell
My Vault> automator list
288797895952179 My Automator True https://something.company.com
(find the Name corresponding to your Automator)
My Vault> automator setup "My Automator"
My Vault> automator init "My Automator"
My Vault> automator enable "My Automator"
```
---
# Agent Instructions
This documentation is published with GitBook. GitBook is the documentation platform designed so that both humans and AI agents can read, navigate, and reason over technical content effectively. Learn more at gitbook.com.
## Querying This Documentation
If you need additional information that is not directly available in this page, you can query the documentation dynamically by asking a question.
Perform an HTTP GET request on the current page URL with the `ask` query parameter:
```
GET https://docs.keeper.io/sso-connect-cloud/jp/device-approvals/automator/keeper-automator-aws-linux.md?ask=
```
The question should be specific, self-contained, and written in natural language.
The response will contain a direct answer to the question and relevant excerpts and sources from the documentation.
Use this mechanism when the answer is not explicitly present in the current page, you need clarification or additional context, or you want to retrieve related documentation sections.