Okta Configuration

How to configure Keeper SSO Connect On-Prem with Okta for seamless and secure SAML 2.0 authentication.

For a 100% cloud-based integration with Okta, see Keeper SSO Connect Cloud

Okta SSO Configuration

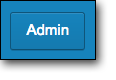
Login to the Admin section of the Okta portal.

Select Admin

Select the Applications tab and select Applications.

Next, select the Add Application button.

In the application search field, type Keeper Password, and then select the Add button for the Keeper Password Manager and Digital Vault Application.

On the General Settings page, Enter the Entity ID from your Keeper SSO Connect server: (i.e. https://DOMAIN:8443/sso-connect where DOMAIN is the server name or IP address of your Keeper SSO Connect application ). Then select the Done button.

Add users or groups on the Assignments page. (This step can be skipped and returned to after setup is complete.)-

Next, select the Sign On tab.

Select the Edit button.

Next, check the Enable Single Logout setting and choose a certificate to upload.

After selecting upload the certificate file (.crt) for the Keeper SSO Connect SSL instance endpoint.

After the file is successfully uploaded, select save at the bottom of the Sign On page.

The setting will be saved.

Scroll down to the SAML 2.0 configuration section, download the Identity Provider metadata file. Rename the file to metadata.xml. This will be used in Step 8.

  • The View Setup Instructions link provides additional setup instructions many of which are also found within this document.

Upload metadata.xml file into the Keeper SSO Connect interface by dragging and dropping the file into the Setup screen:

Select Save and Your Keeper SSO Connect setup is now complete!

Okta SCIM Provisioning

To enable Okta SCIM user and group provisioning please follow the below guide:

Last updated