
Set Your Master Password
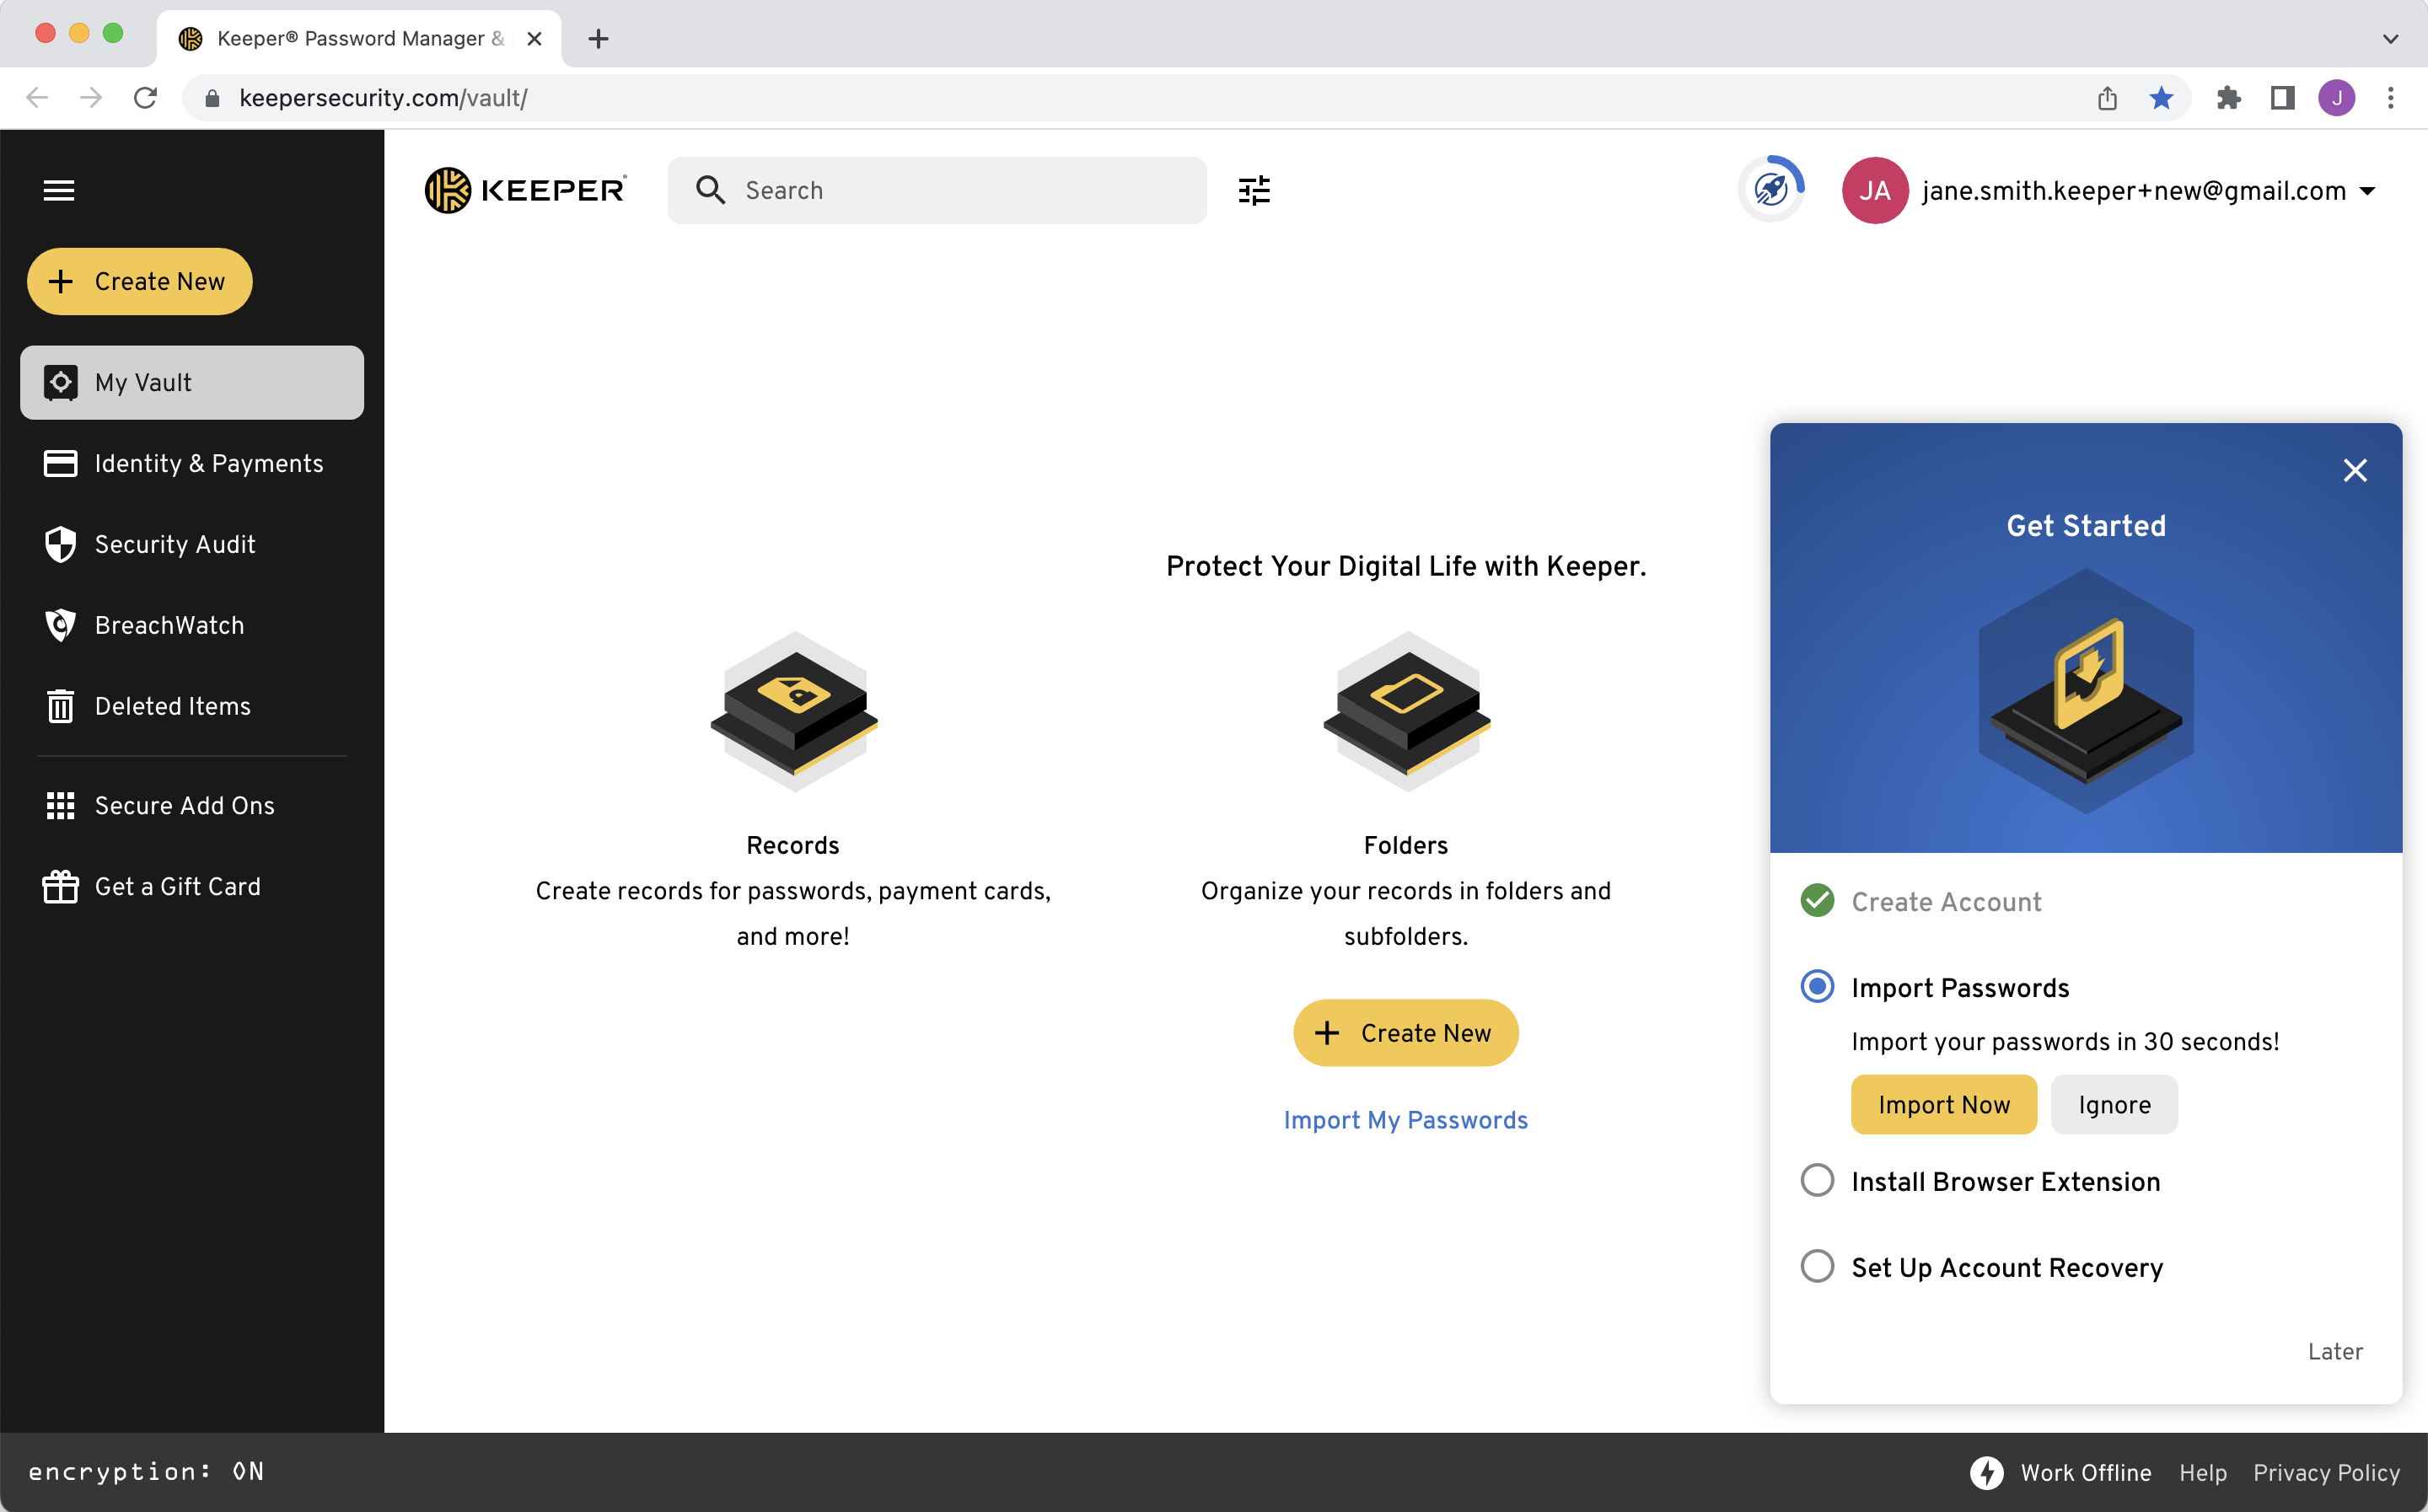
Get Started Wizard
.gif?alt=media&token=6fd74319-b7f0-4f08-b5a5-aedbc94bfb27)
Create a Record
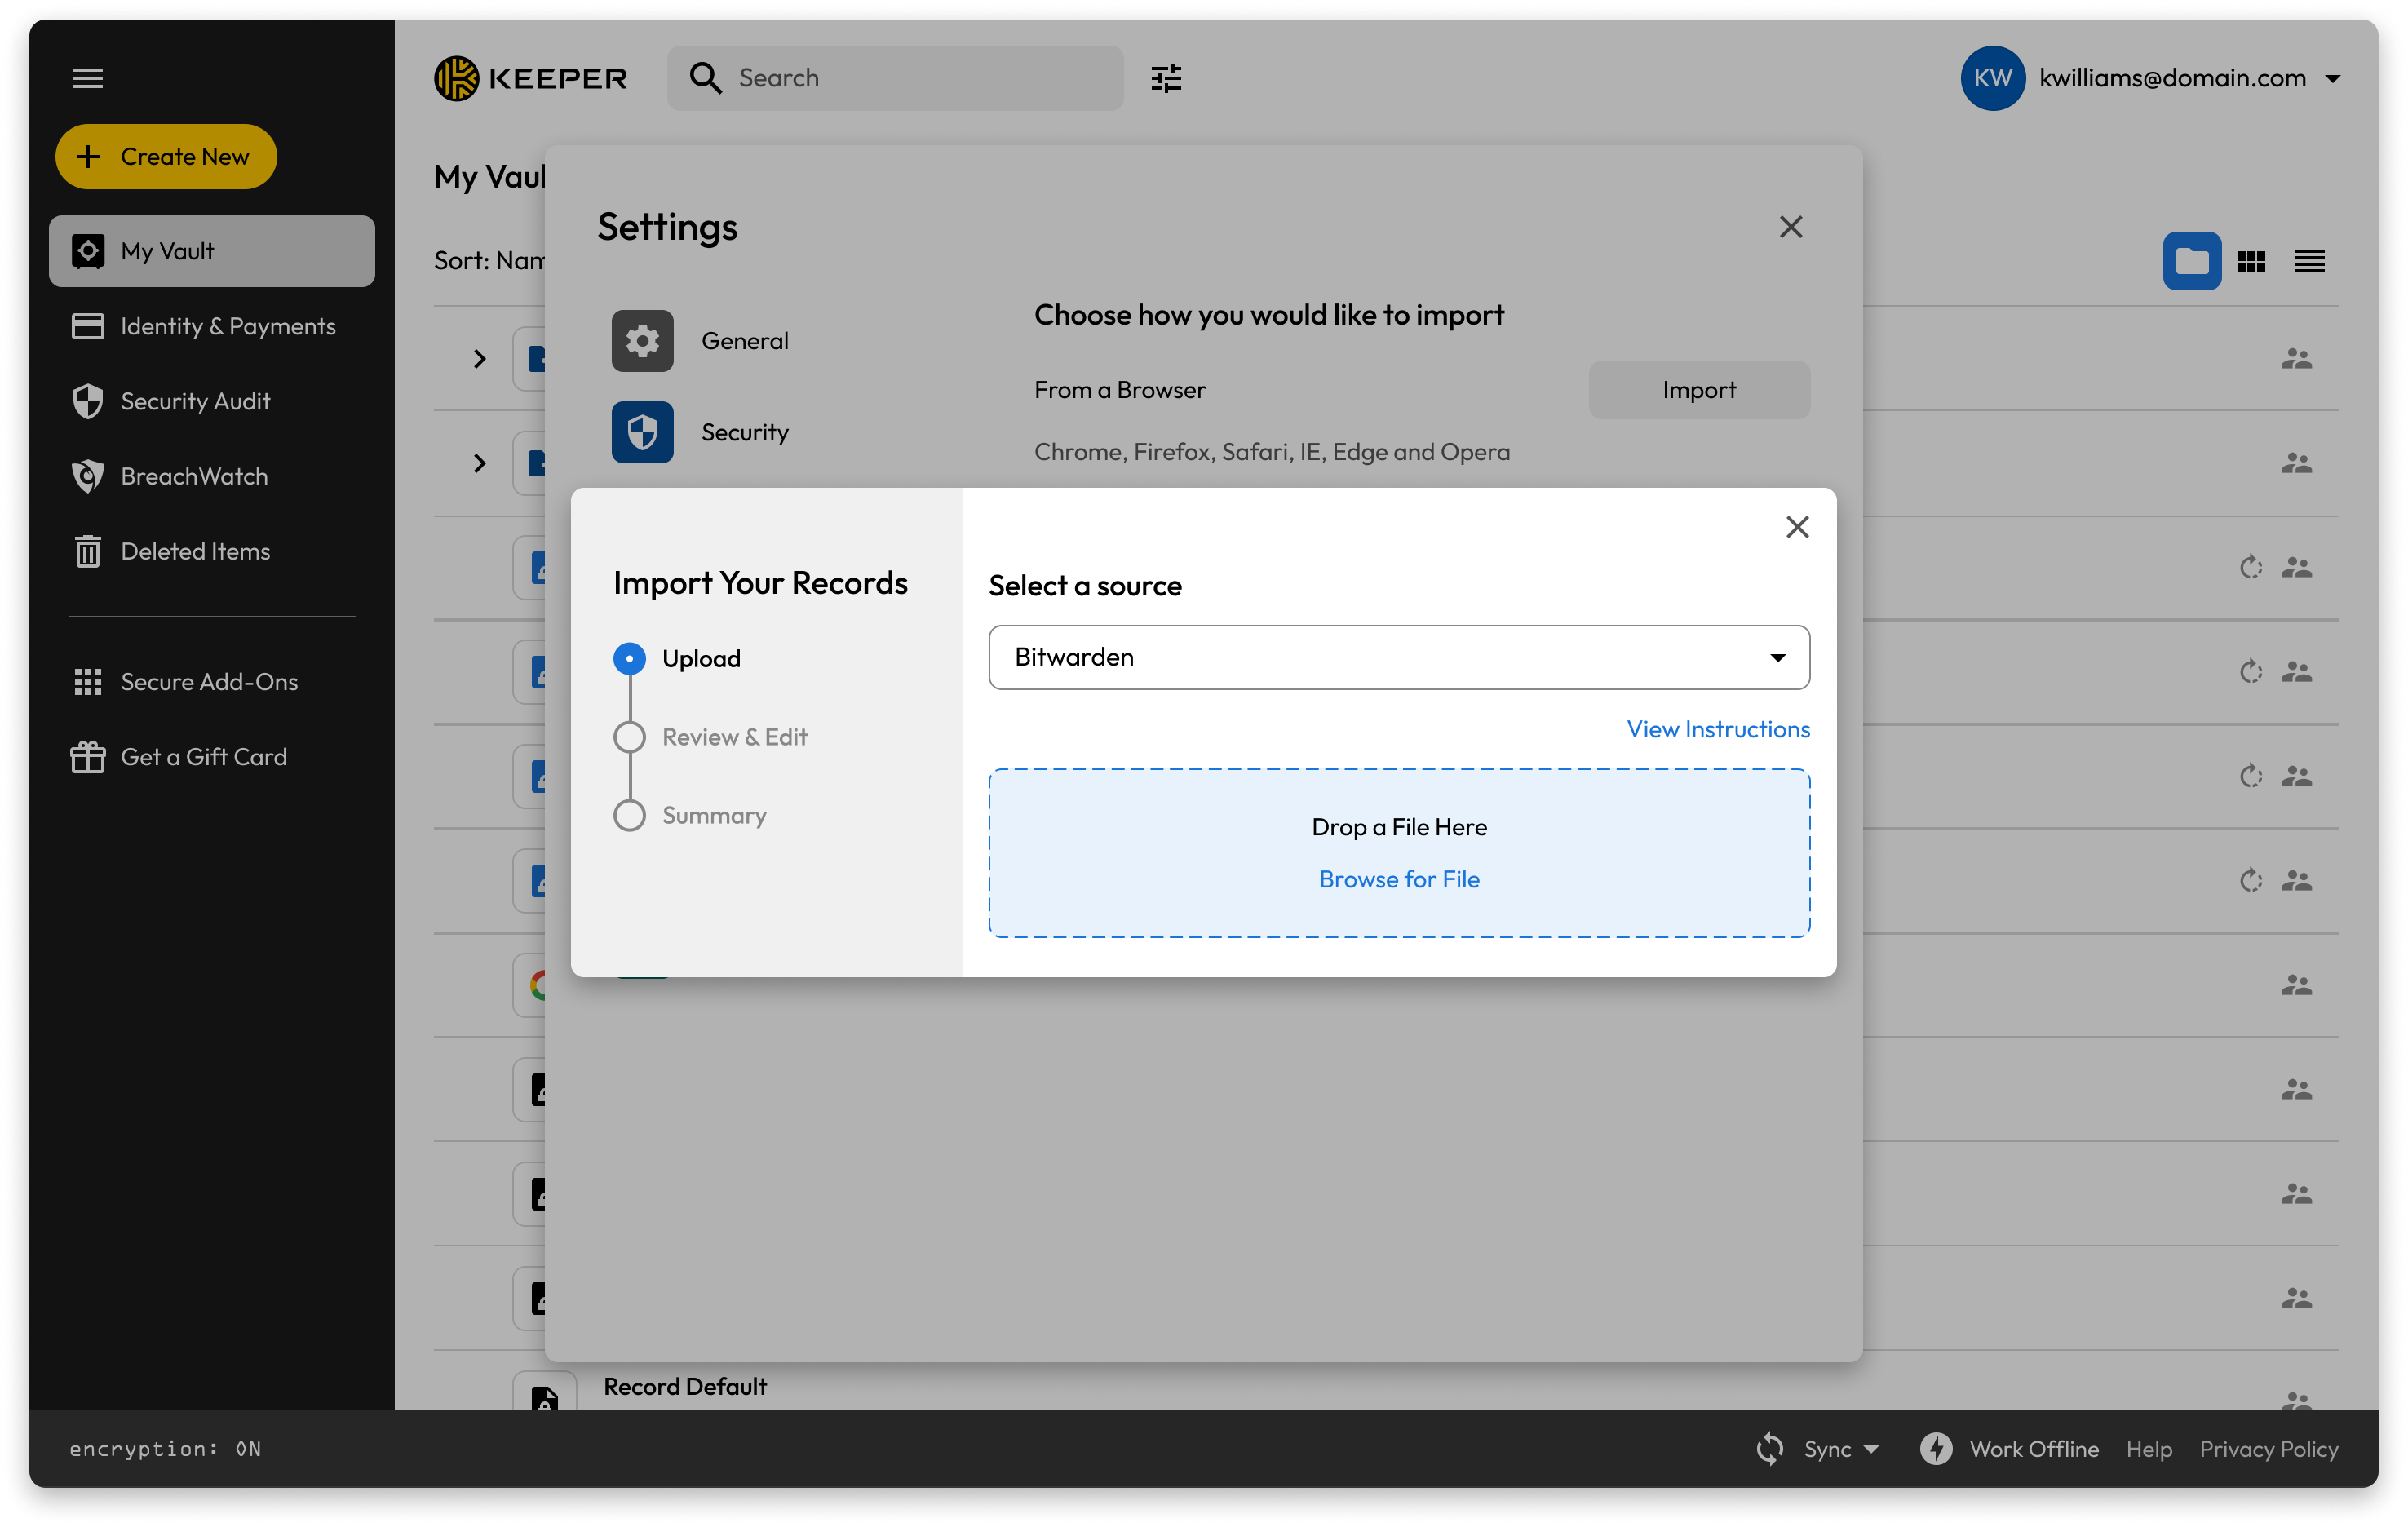
Drop or Browse for Exported File
.png?alt=media&token=ea392533-e610-4d1c-9ab3-bdd8db1db84f)
Import from Text File
.png?alt=media&token=9e950a00-fd66-48f4-ab50-b07bbbb25fb1)
File Uploaded
.png?alt=media&token=e266680b-0bd2-46f1-8730-19da78913ad5)
Review & Edit the Imported Information
.png?alt=media&token=5659ce5c-83c3-4bdb-8b1f-a67705050a55)
Summary of Import
.png?alt=media&token=9f1ea266-1d65-4fef-bcb6-42445c12f4d2)
Successful Import

Right-Click Context Menu

Delete a Record

| Permission Name | Permission Level |
|---|---|
| Can Edit | User can edit this record |
| Can Share | User can share this record |
| Can Edit & Share | User can edit and share this record |
| View Only | User can only view the record |
| Transfer Ownership | User will obtain ownership the record and control the sharing permissions |
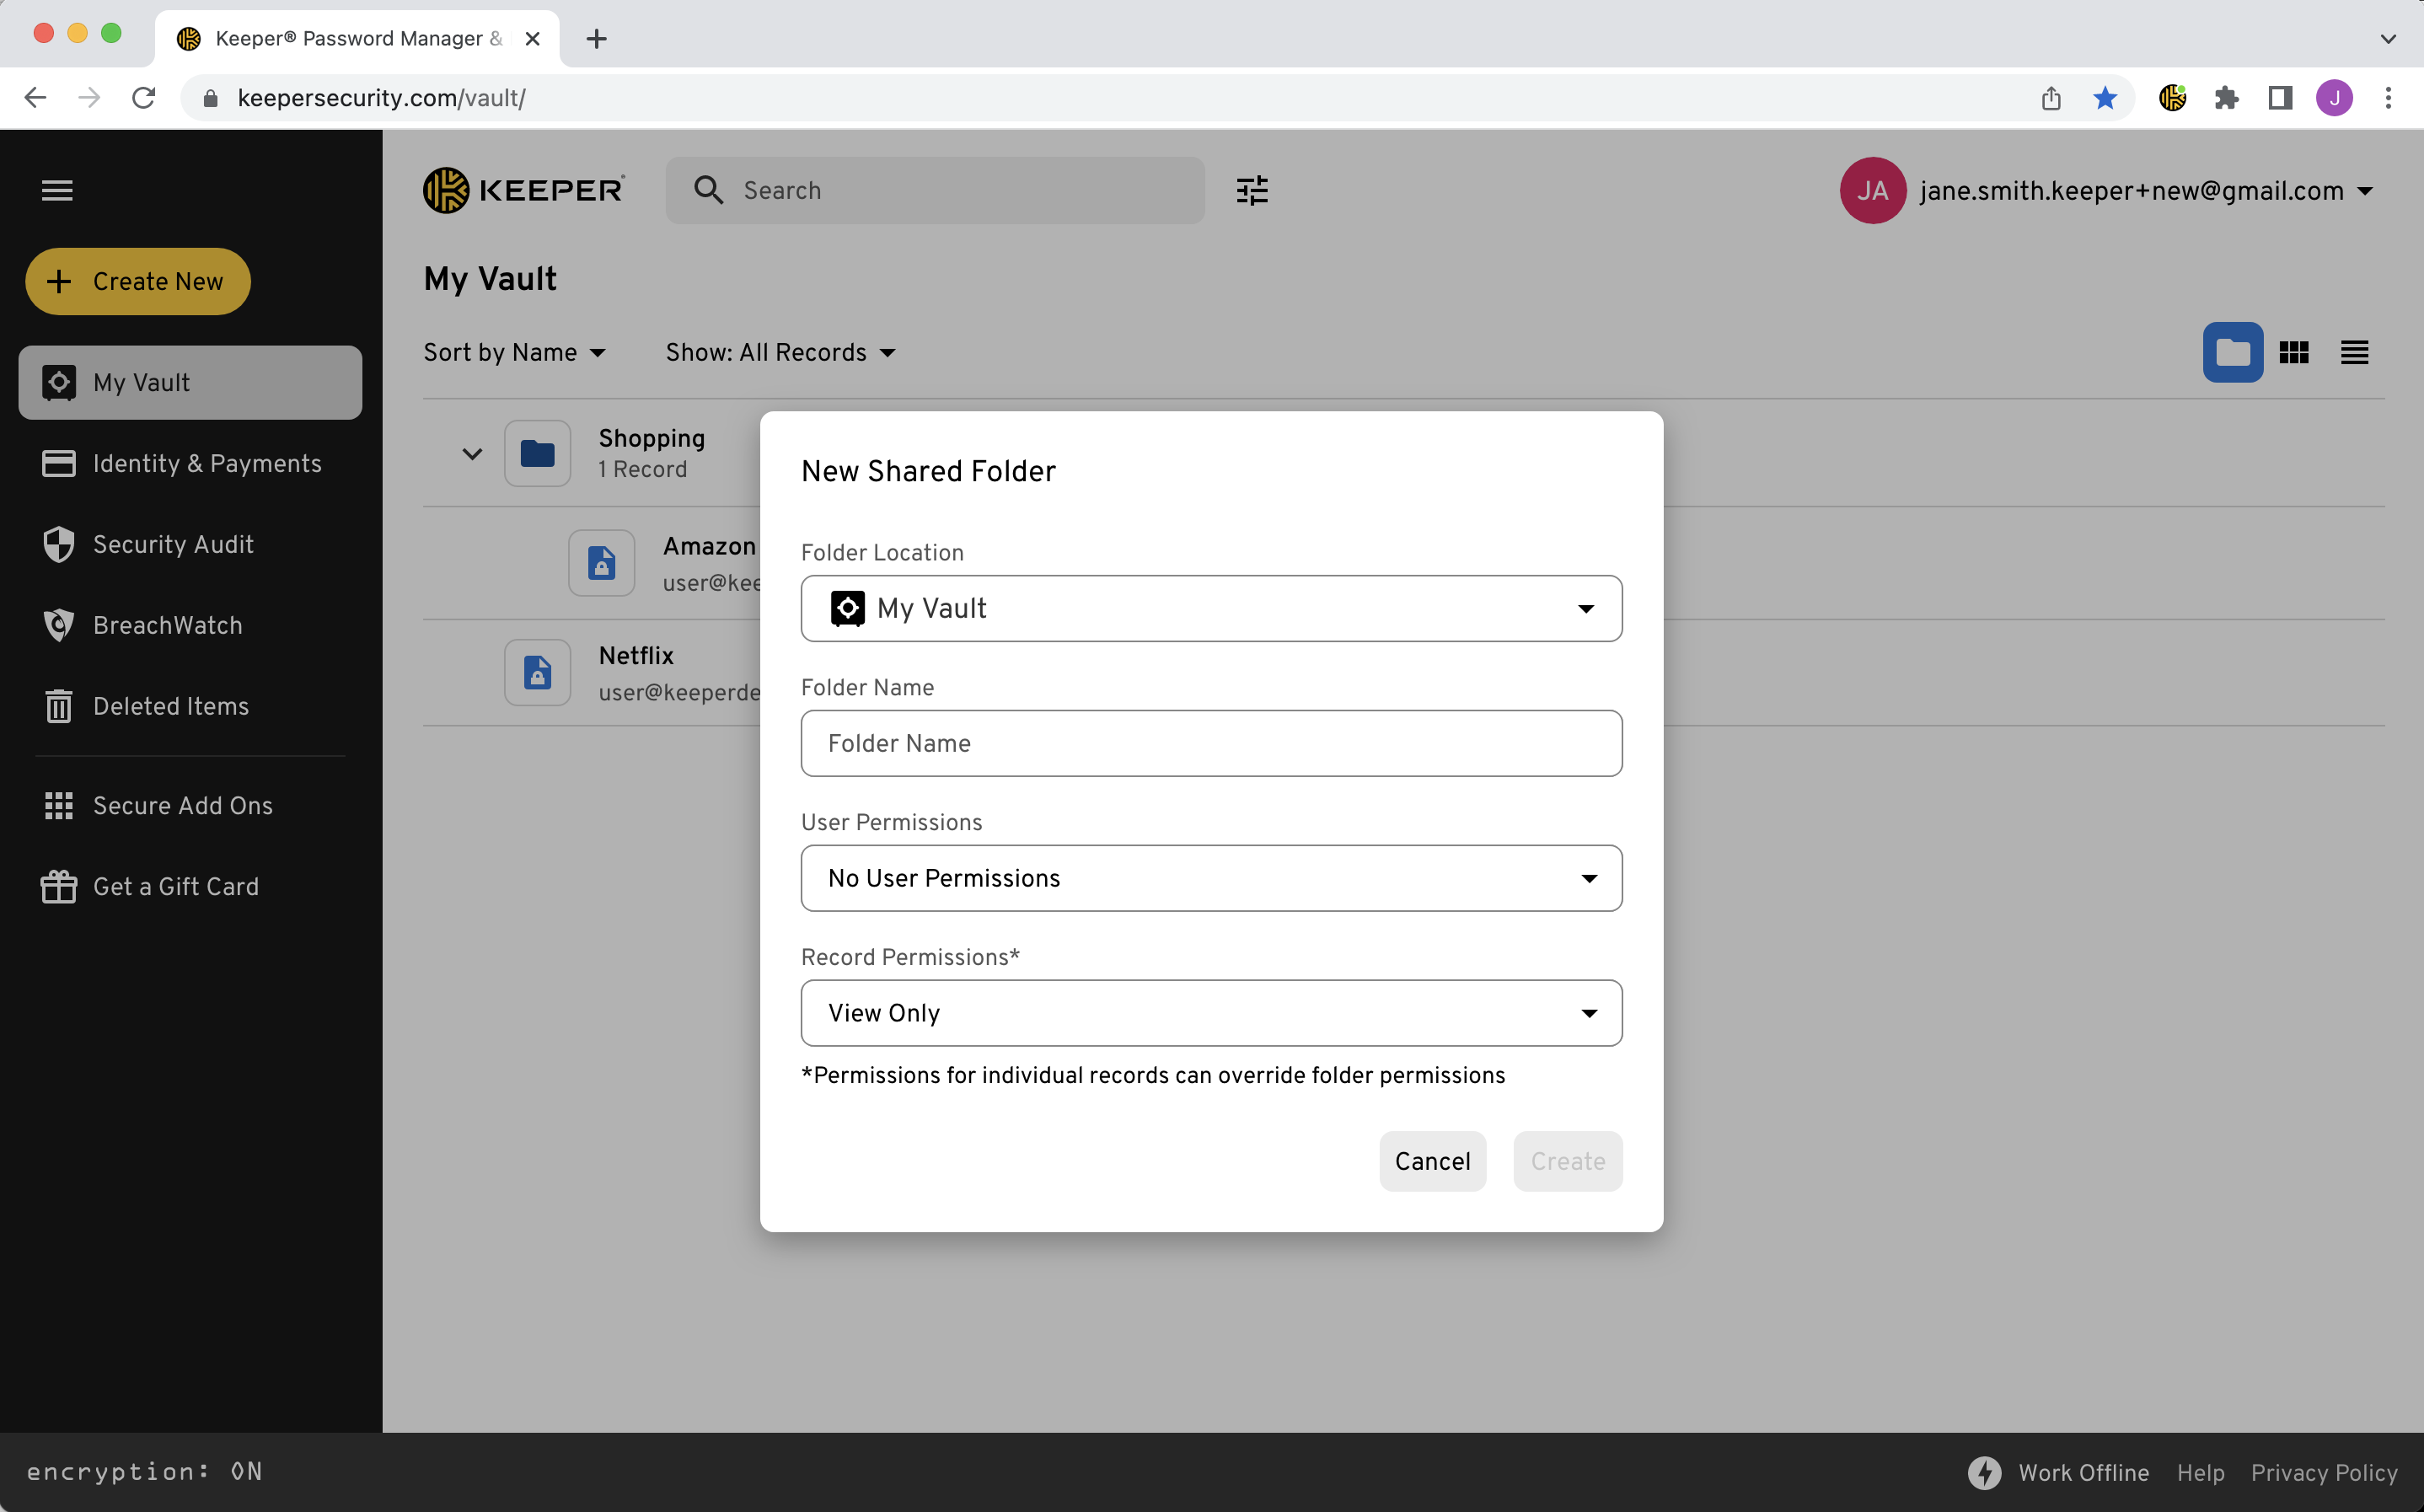
New Shared Folder Creation

Password Customization

Password/Passphrase Generator

Select Passphrase

Customize Passphrase
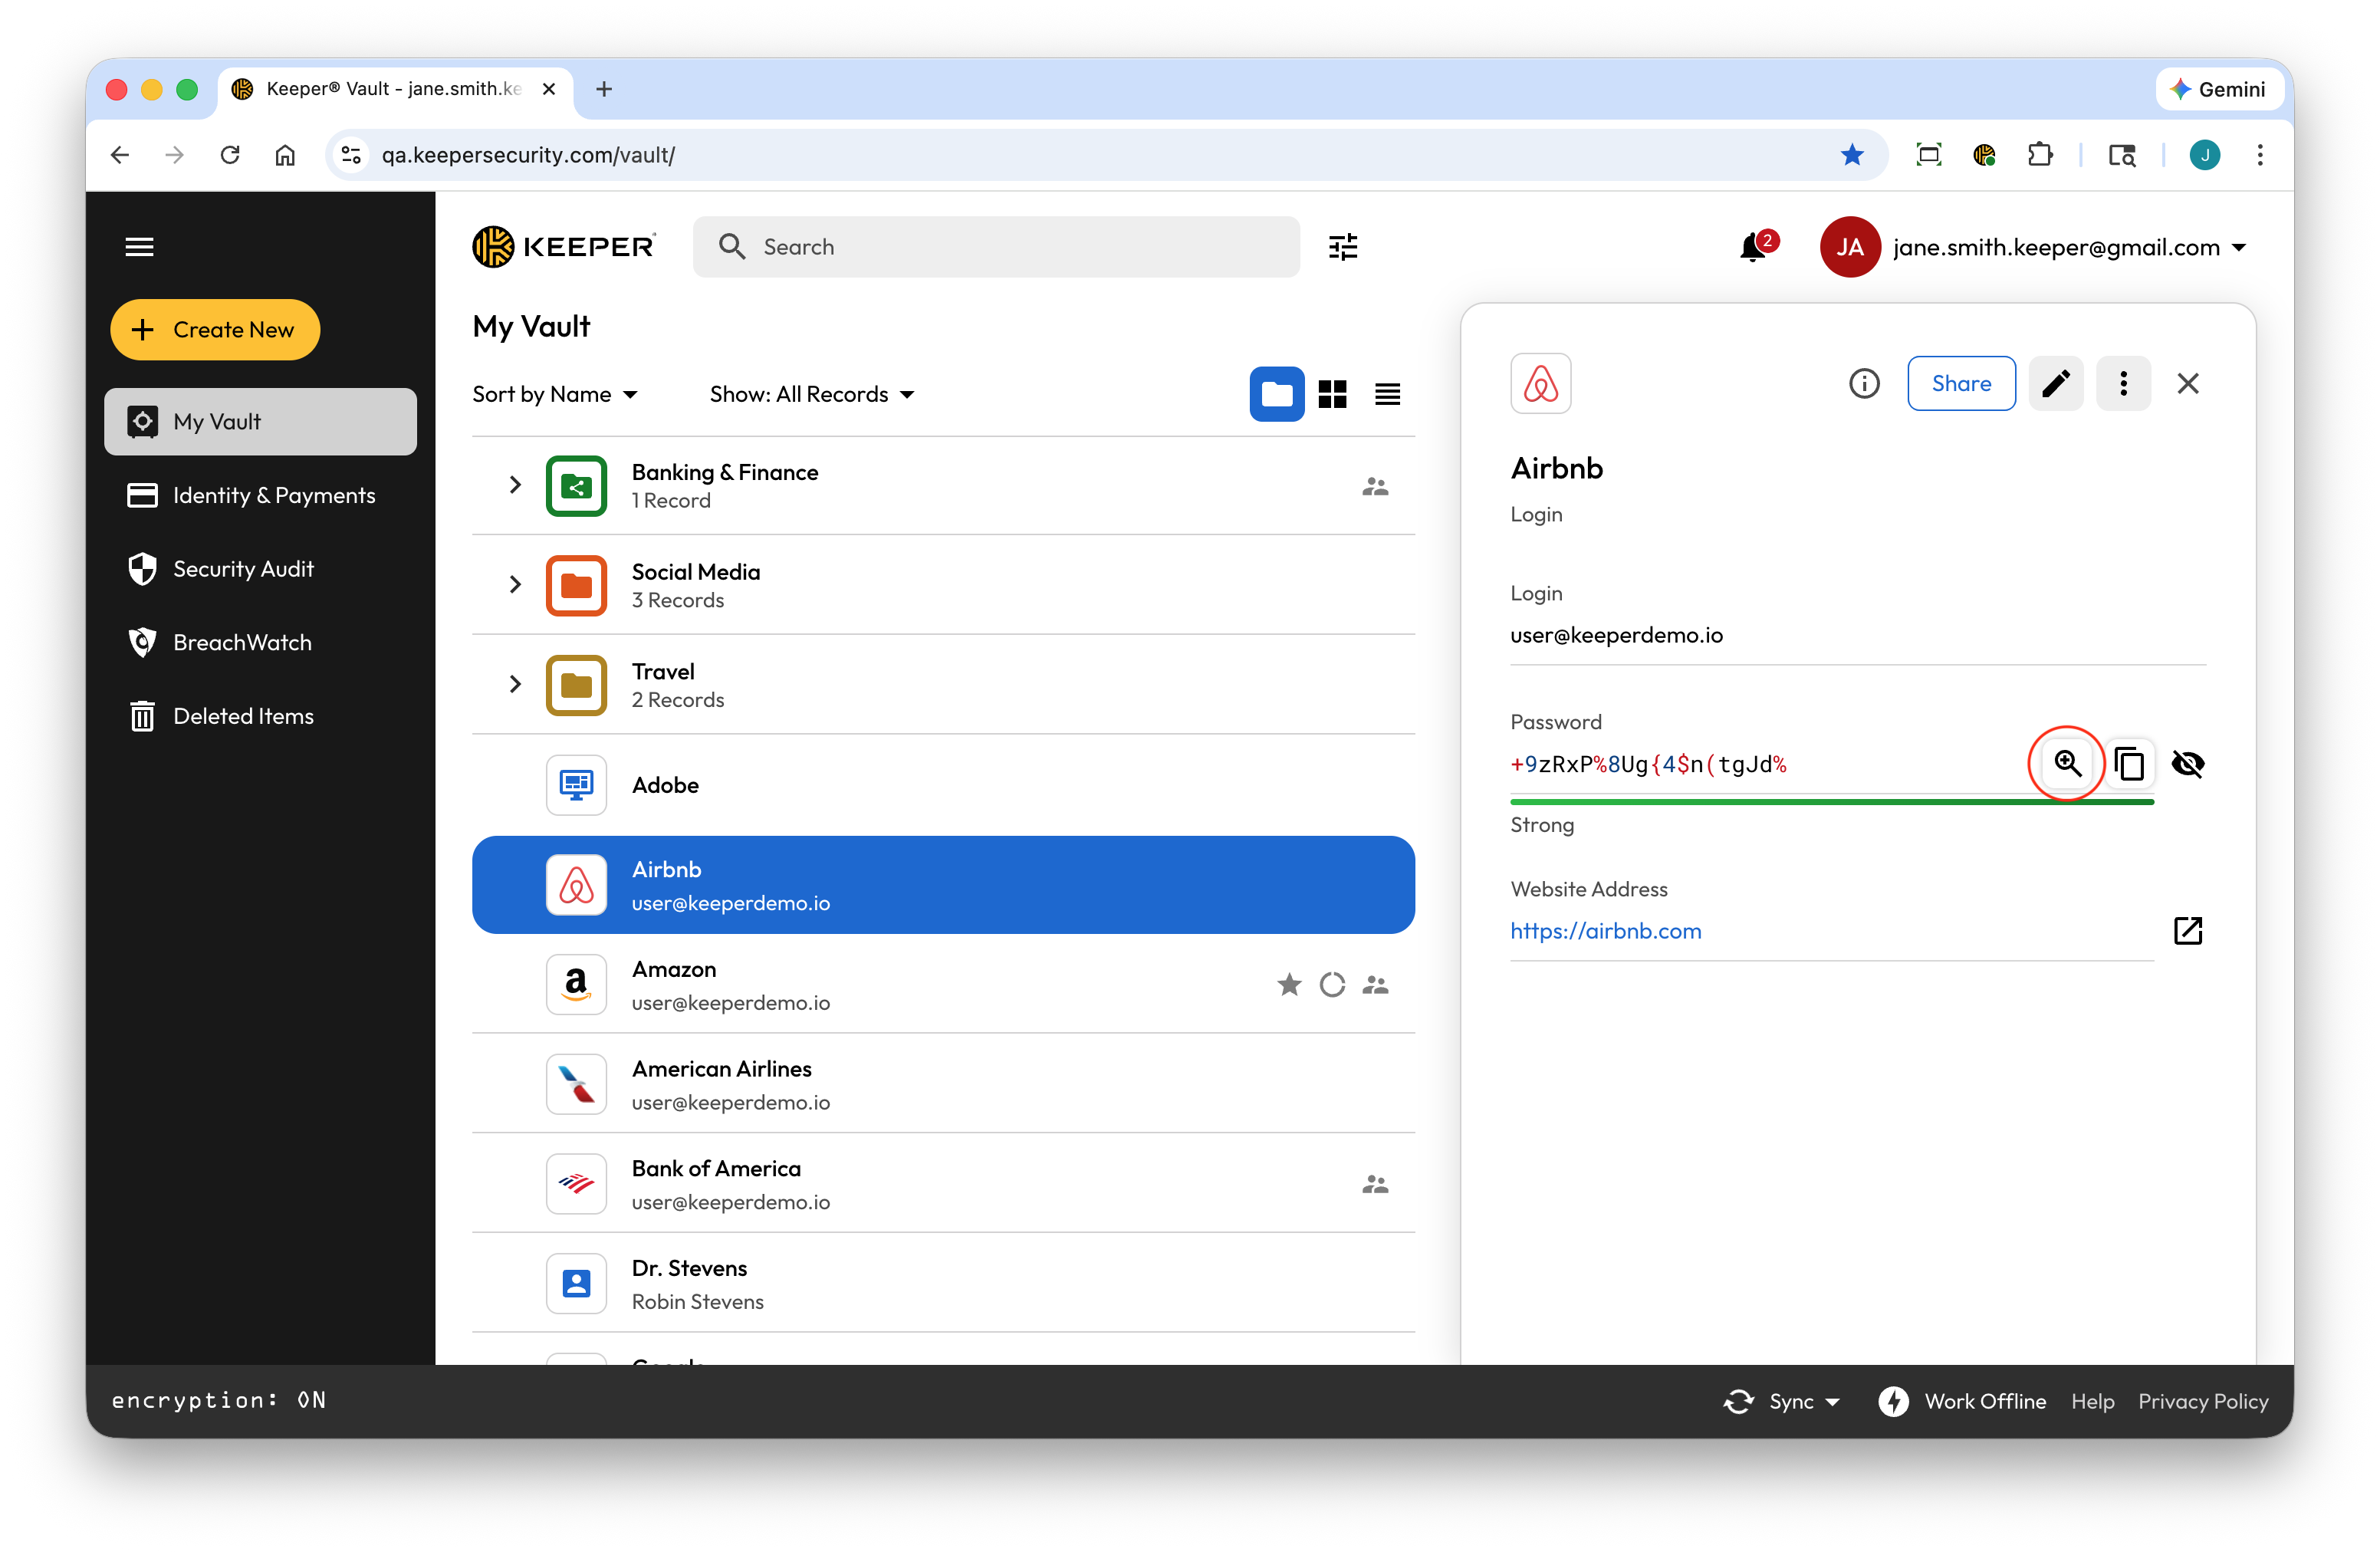
Password Zoom Icon
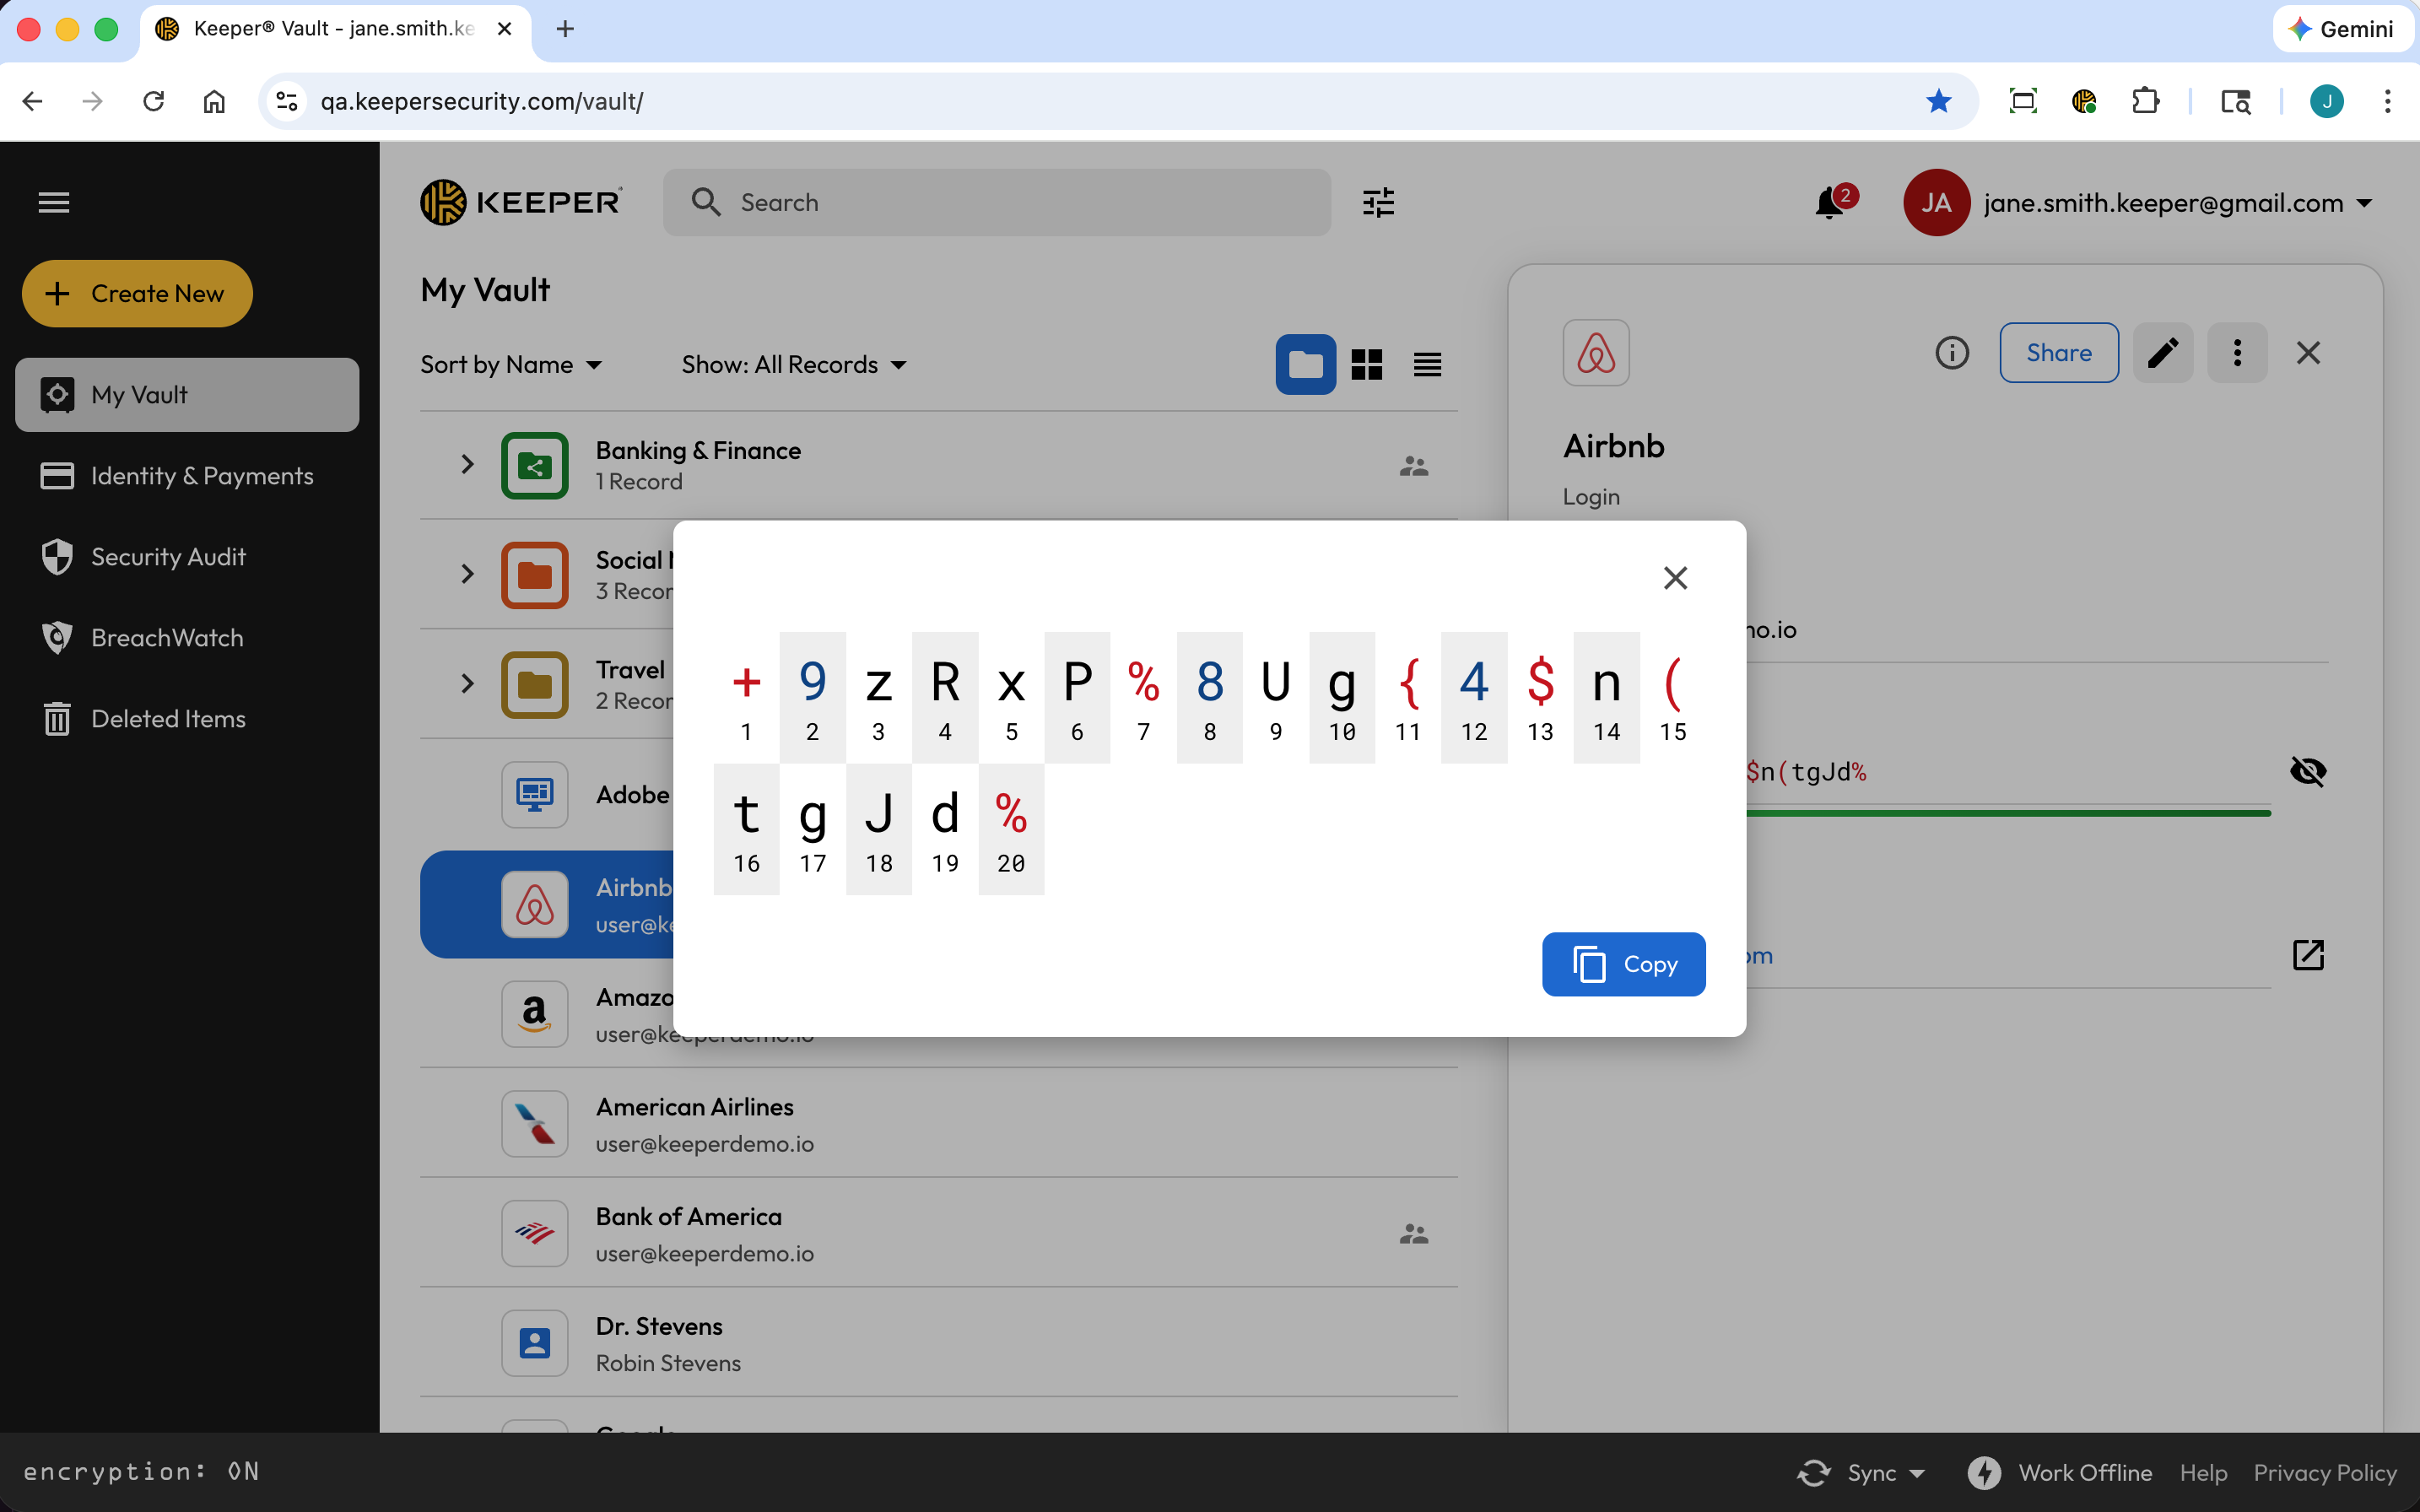
Password Zoom Tray - Character Positions
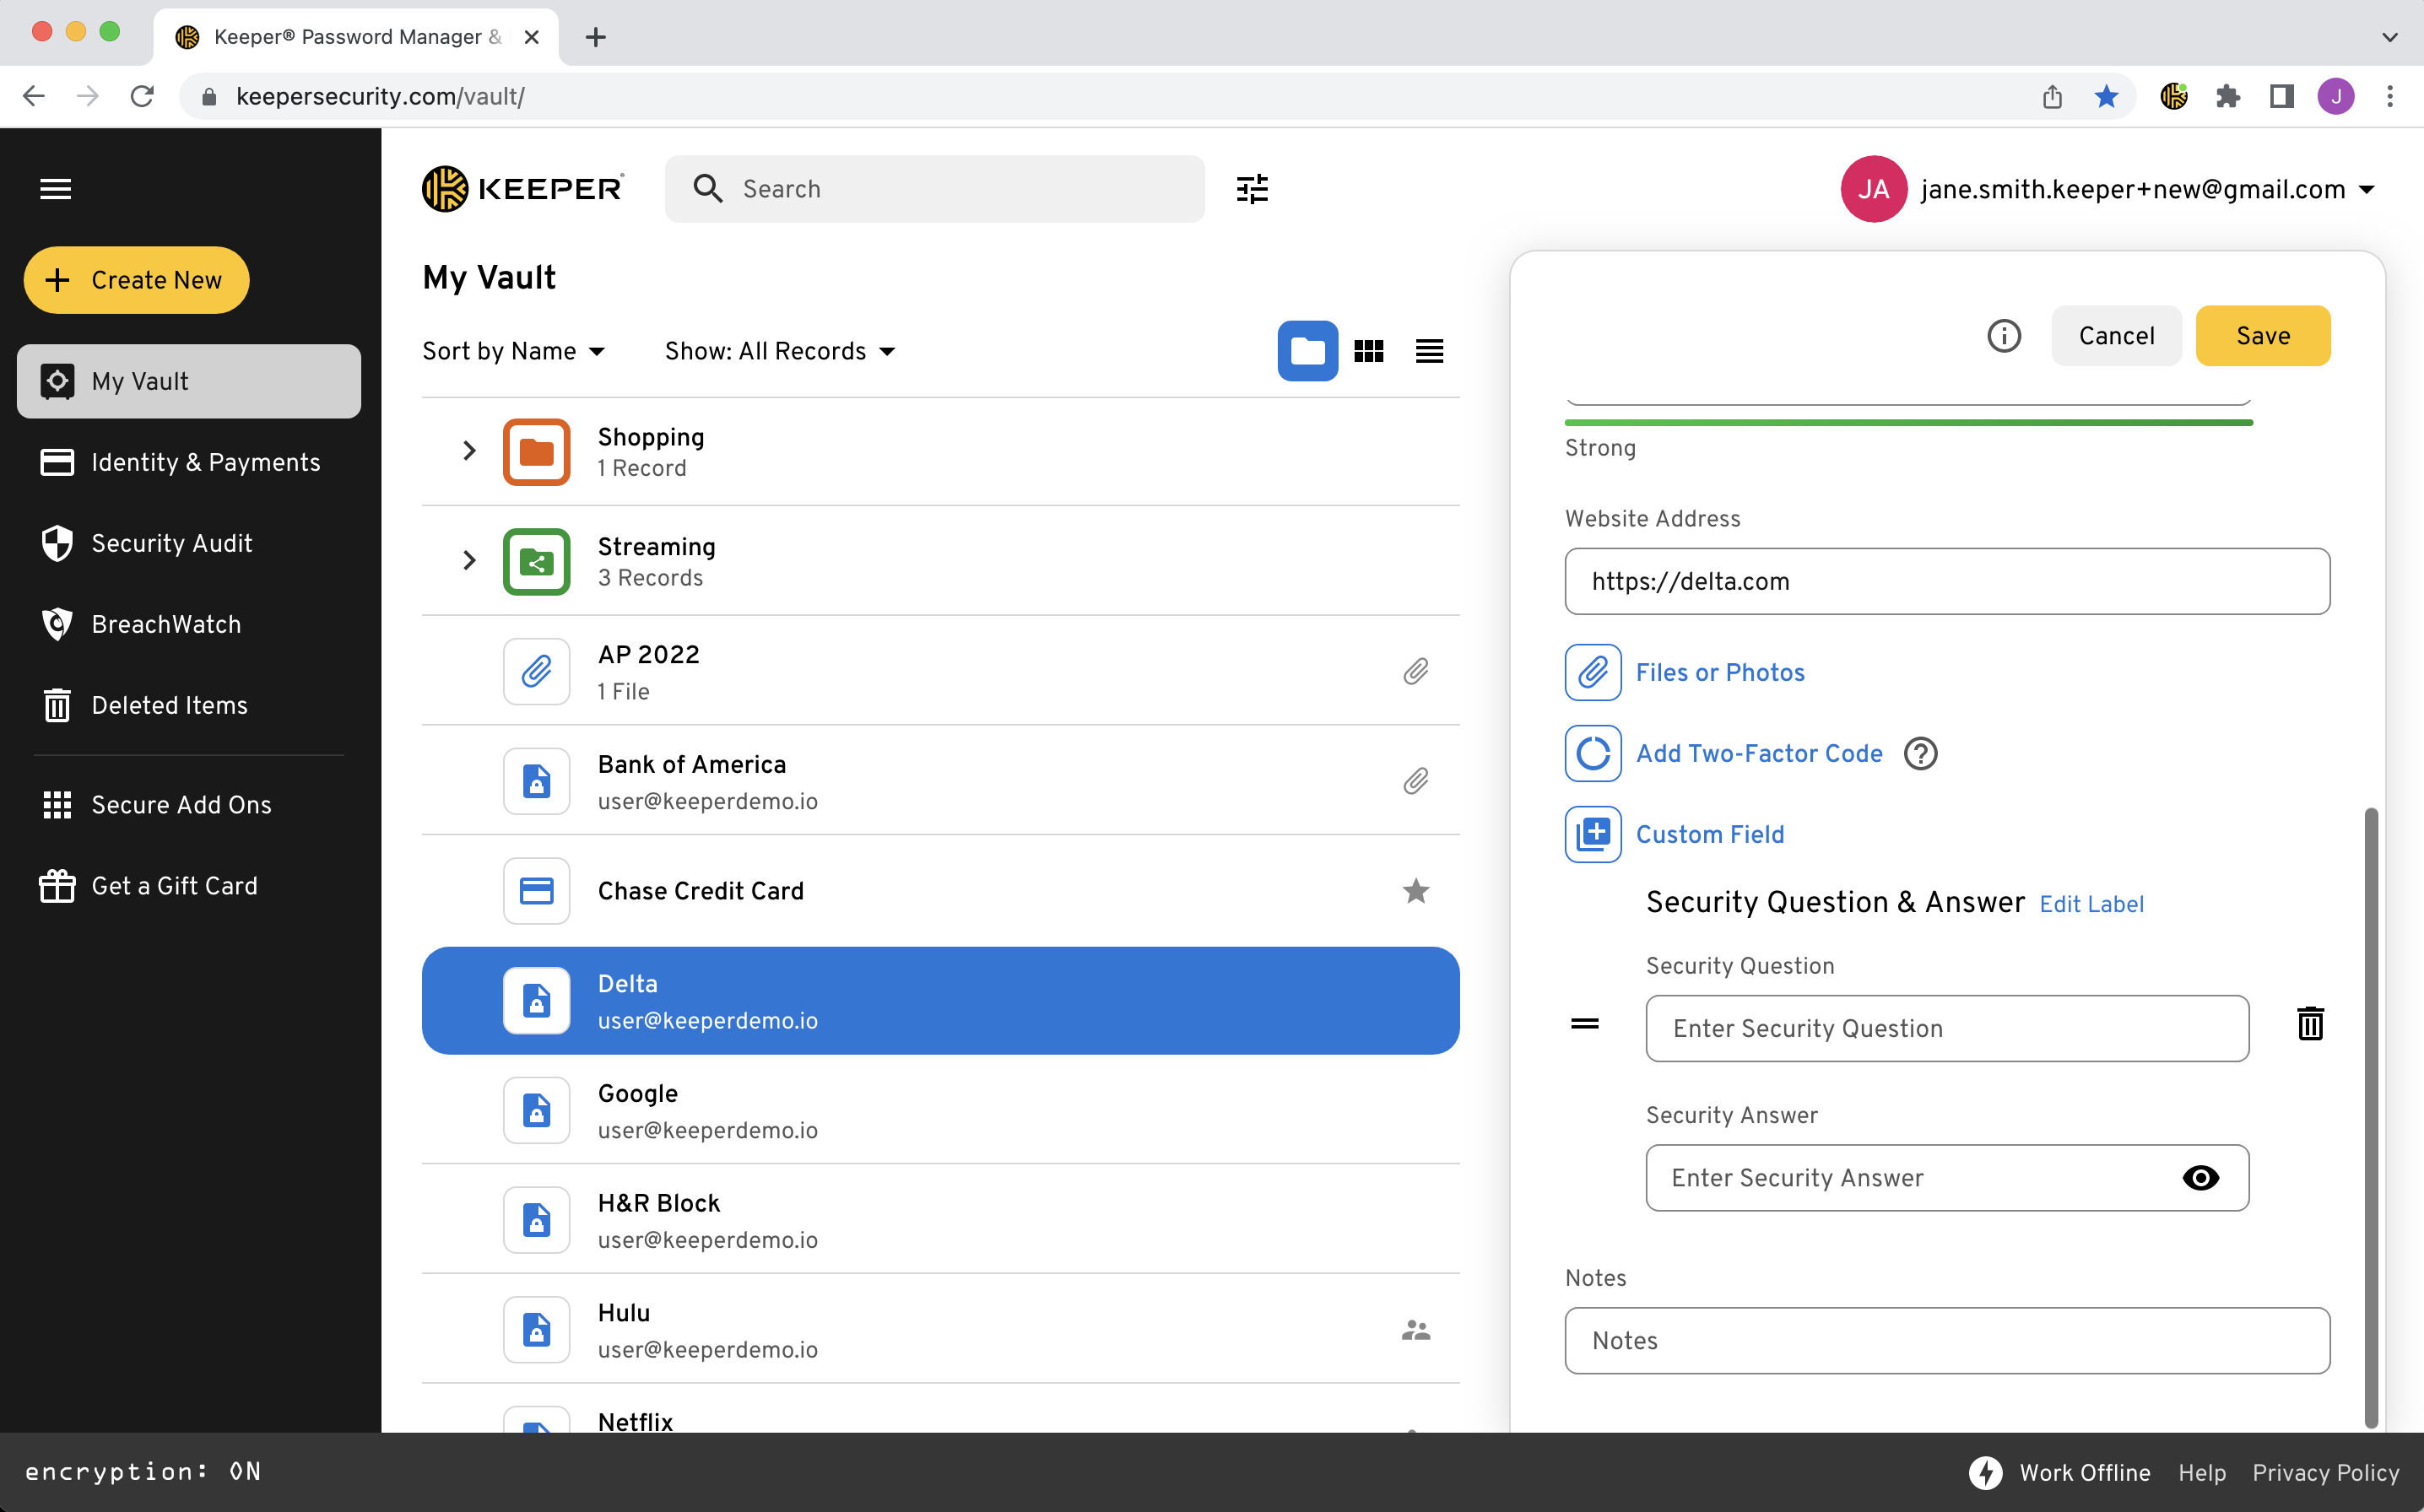
Security Question & Answer Custom Field

Advanced Search Filters

Quick Search and Recently Viewed

Open Notifications Center

Approve/Deny Requests
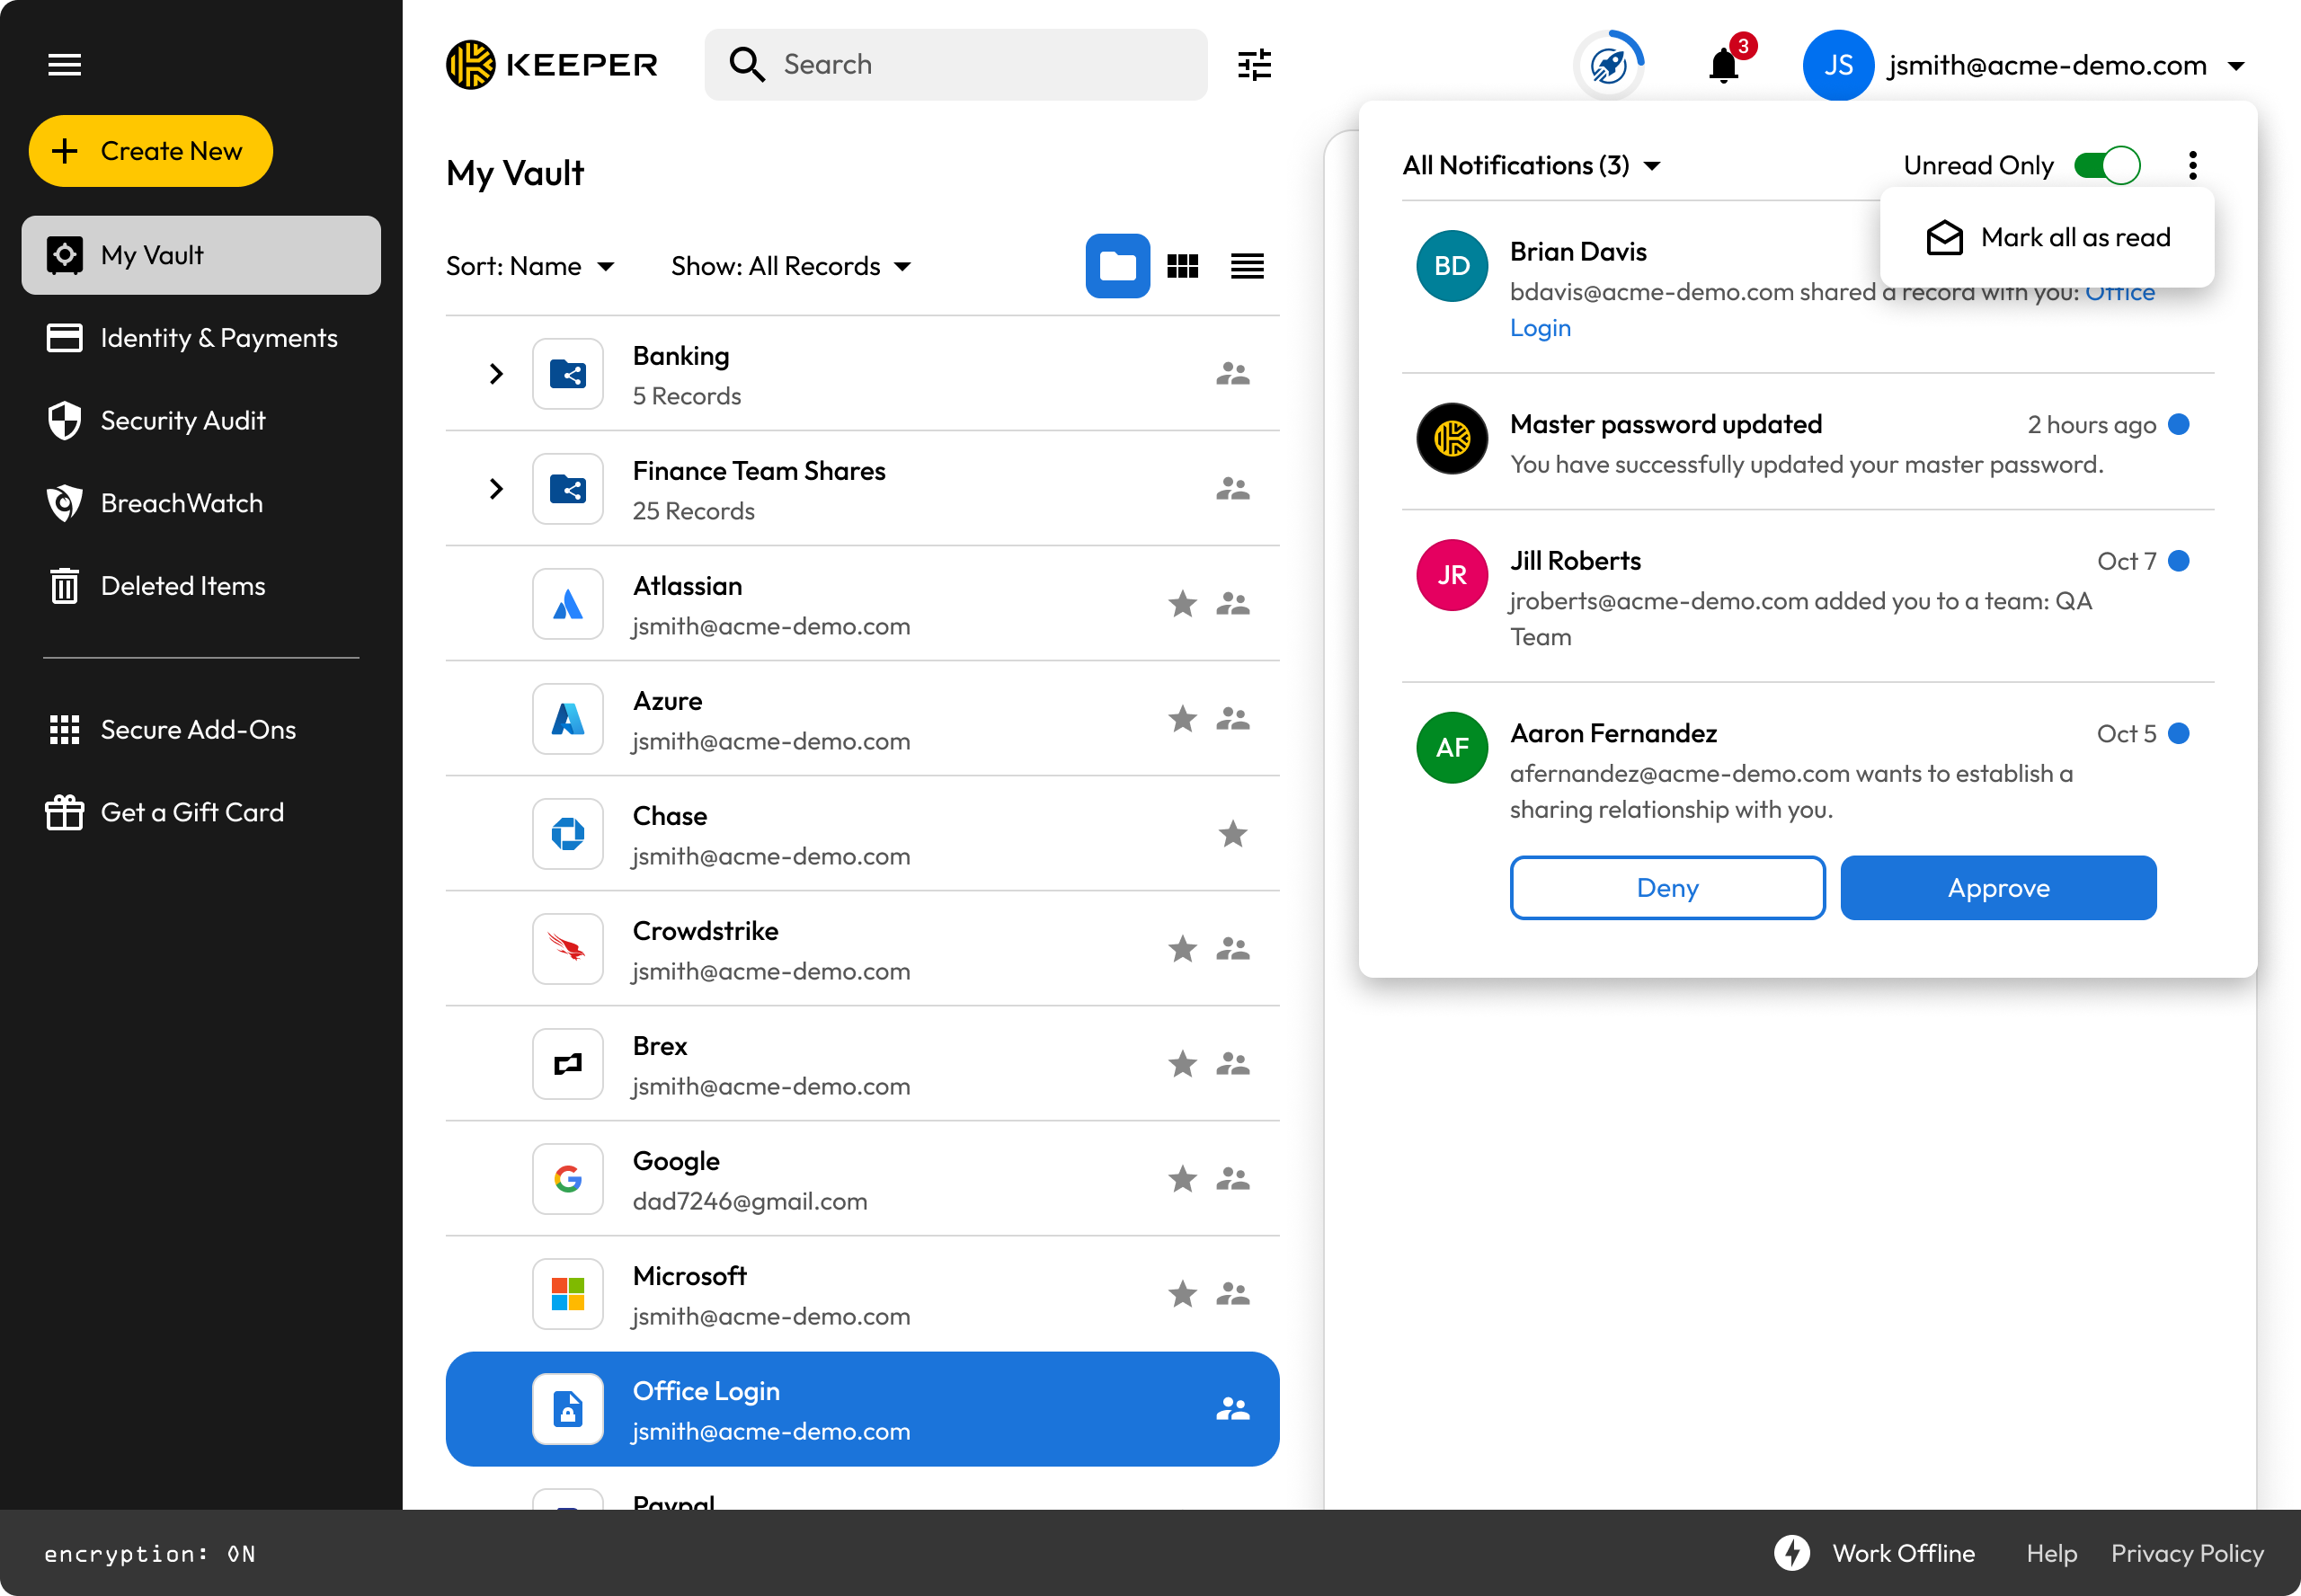
Filter Notifications, Unread Only, & Mark All as Read
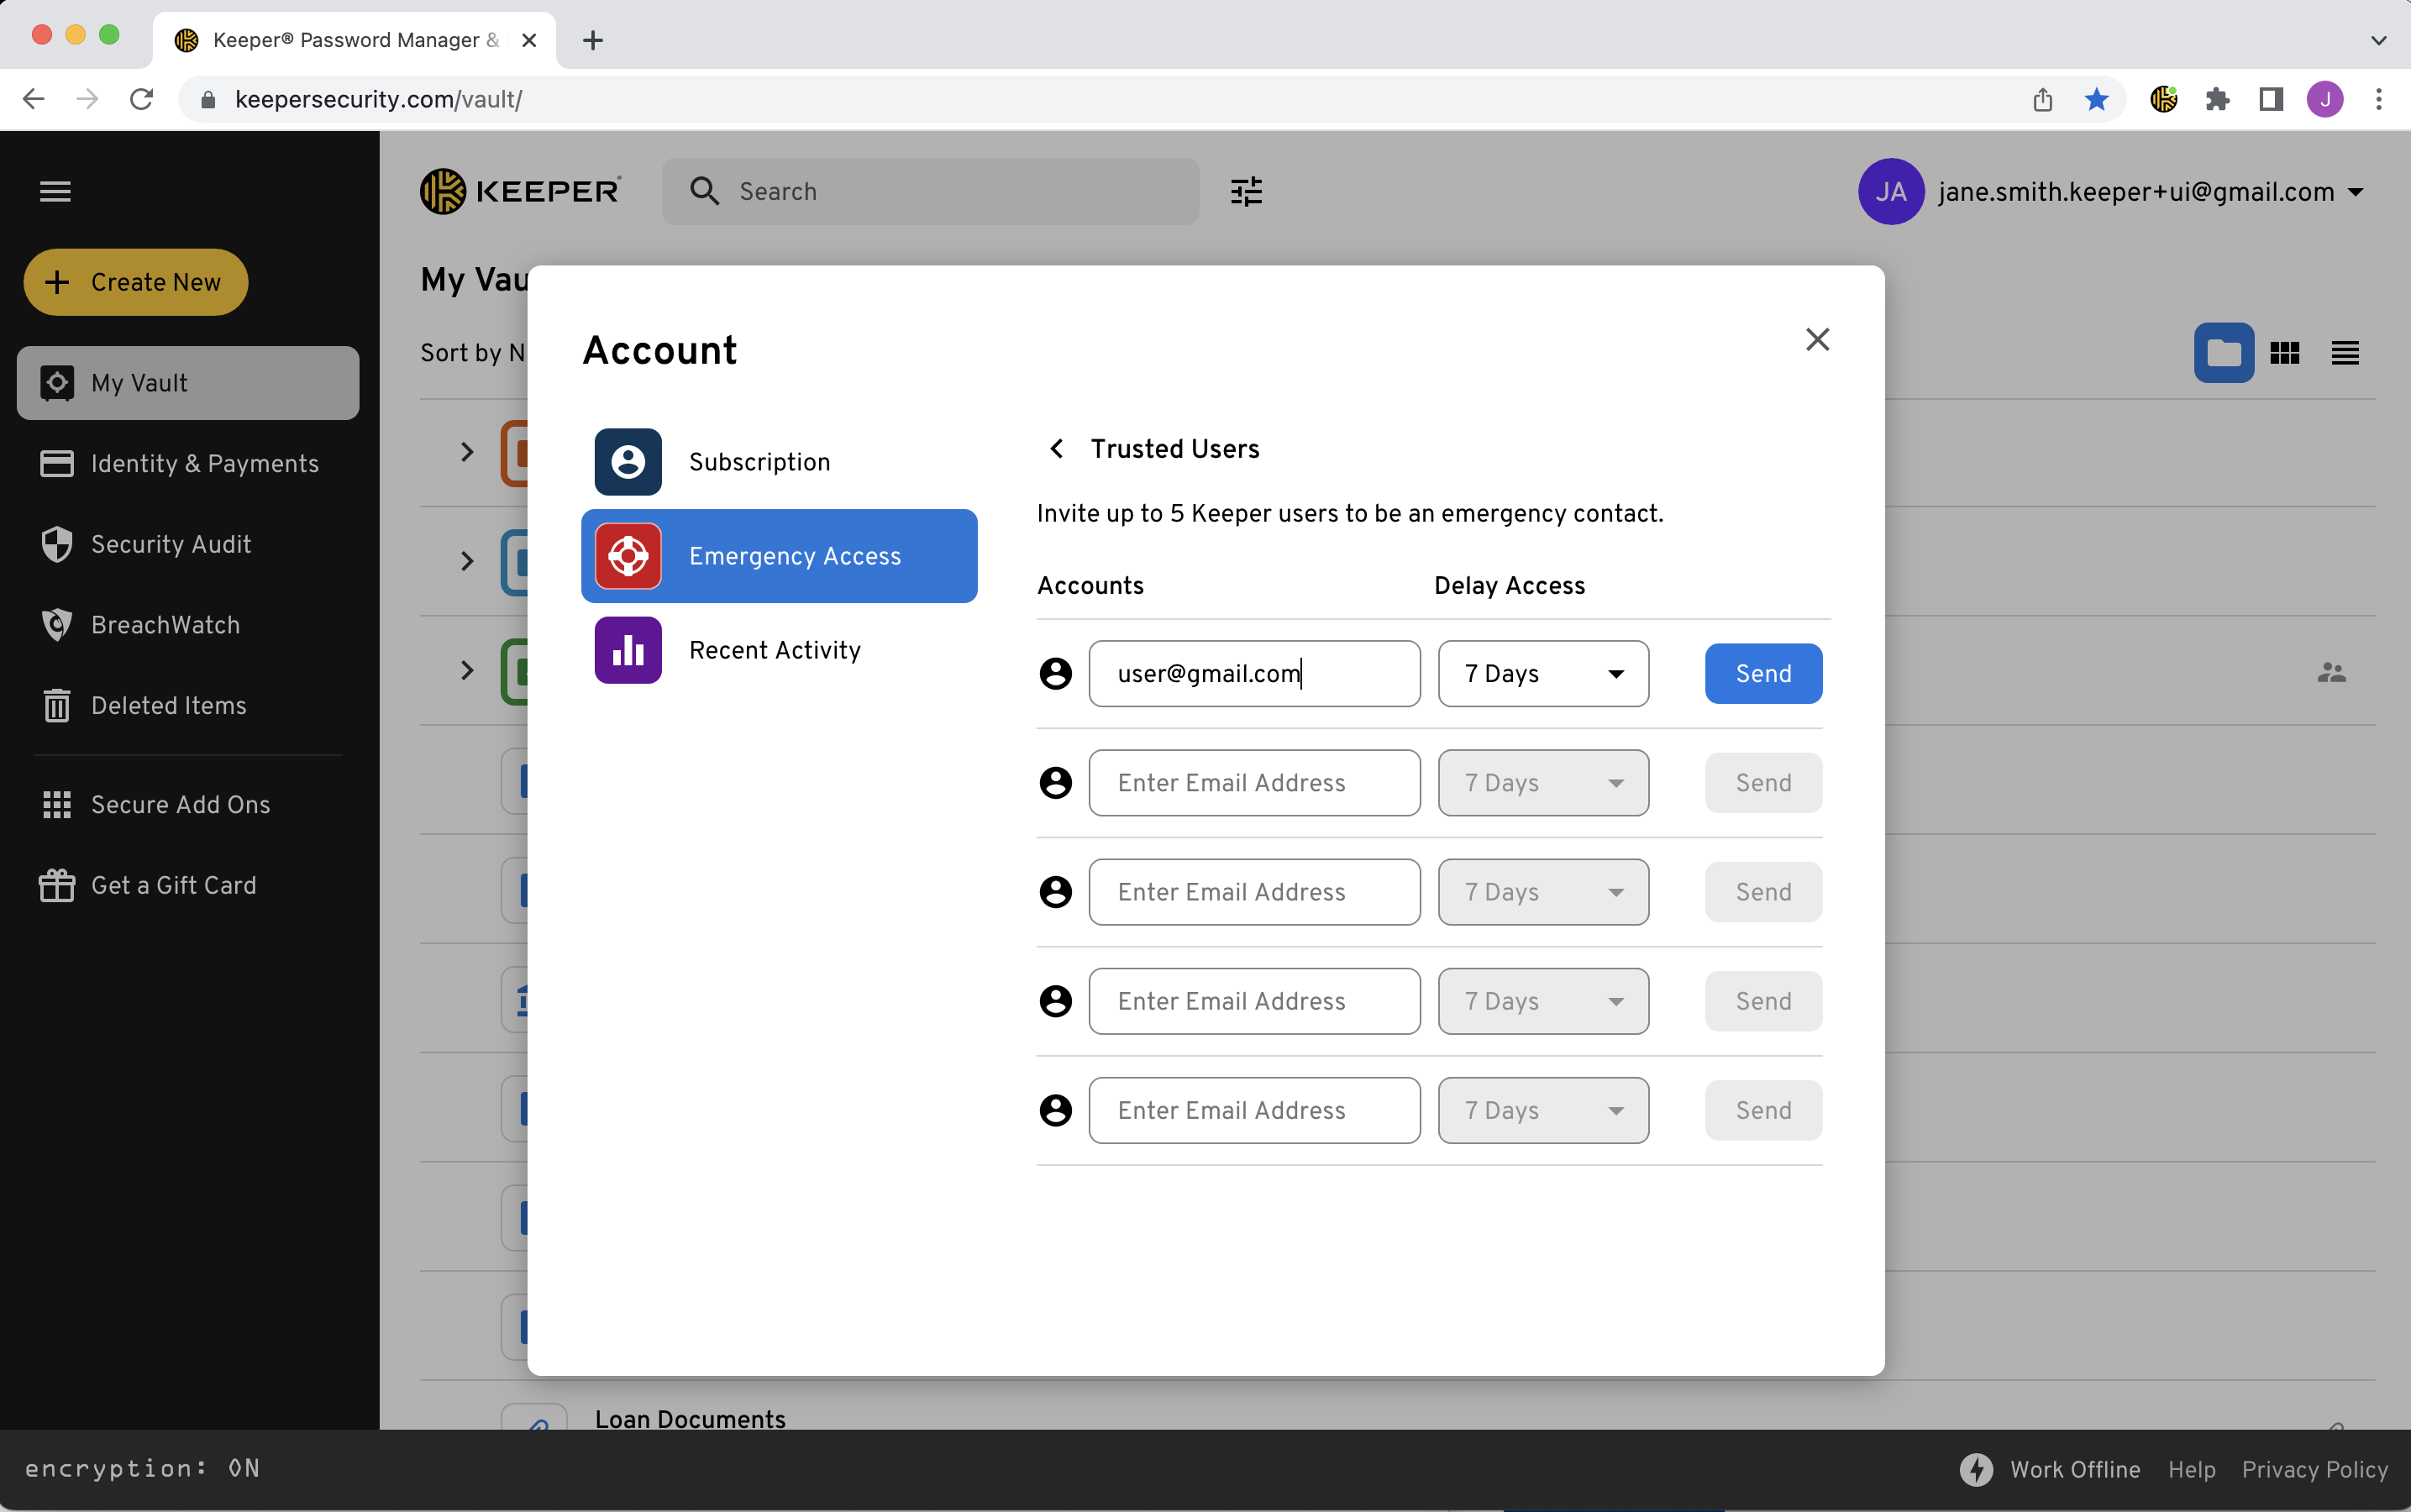
Add Trusted Users

Recently Deleted Records

Delete Forever

Enforcement of Data Retention Policies
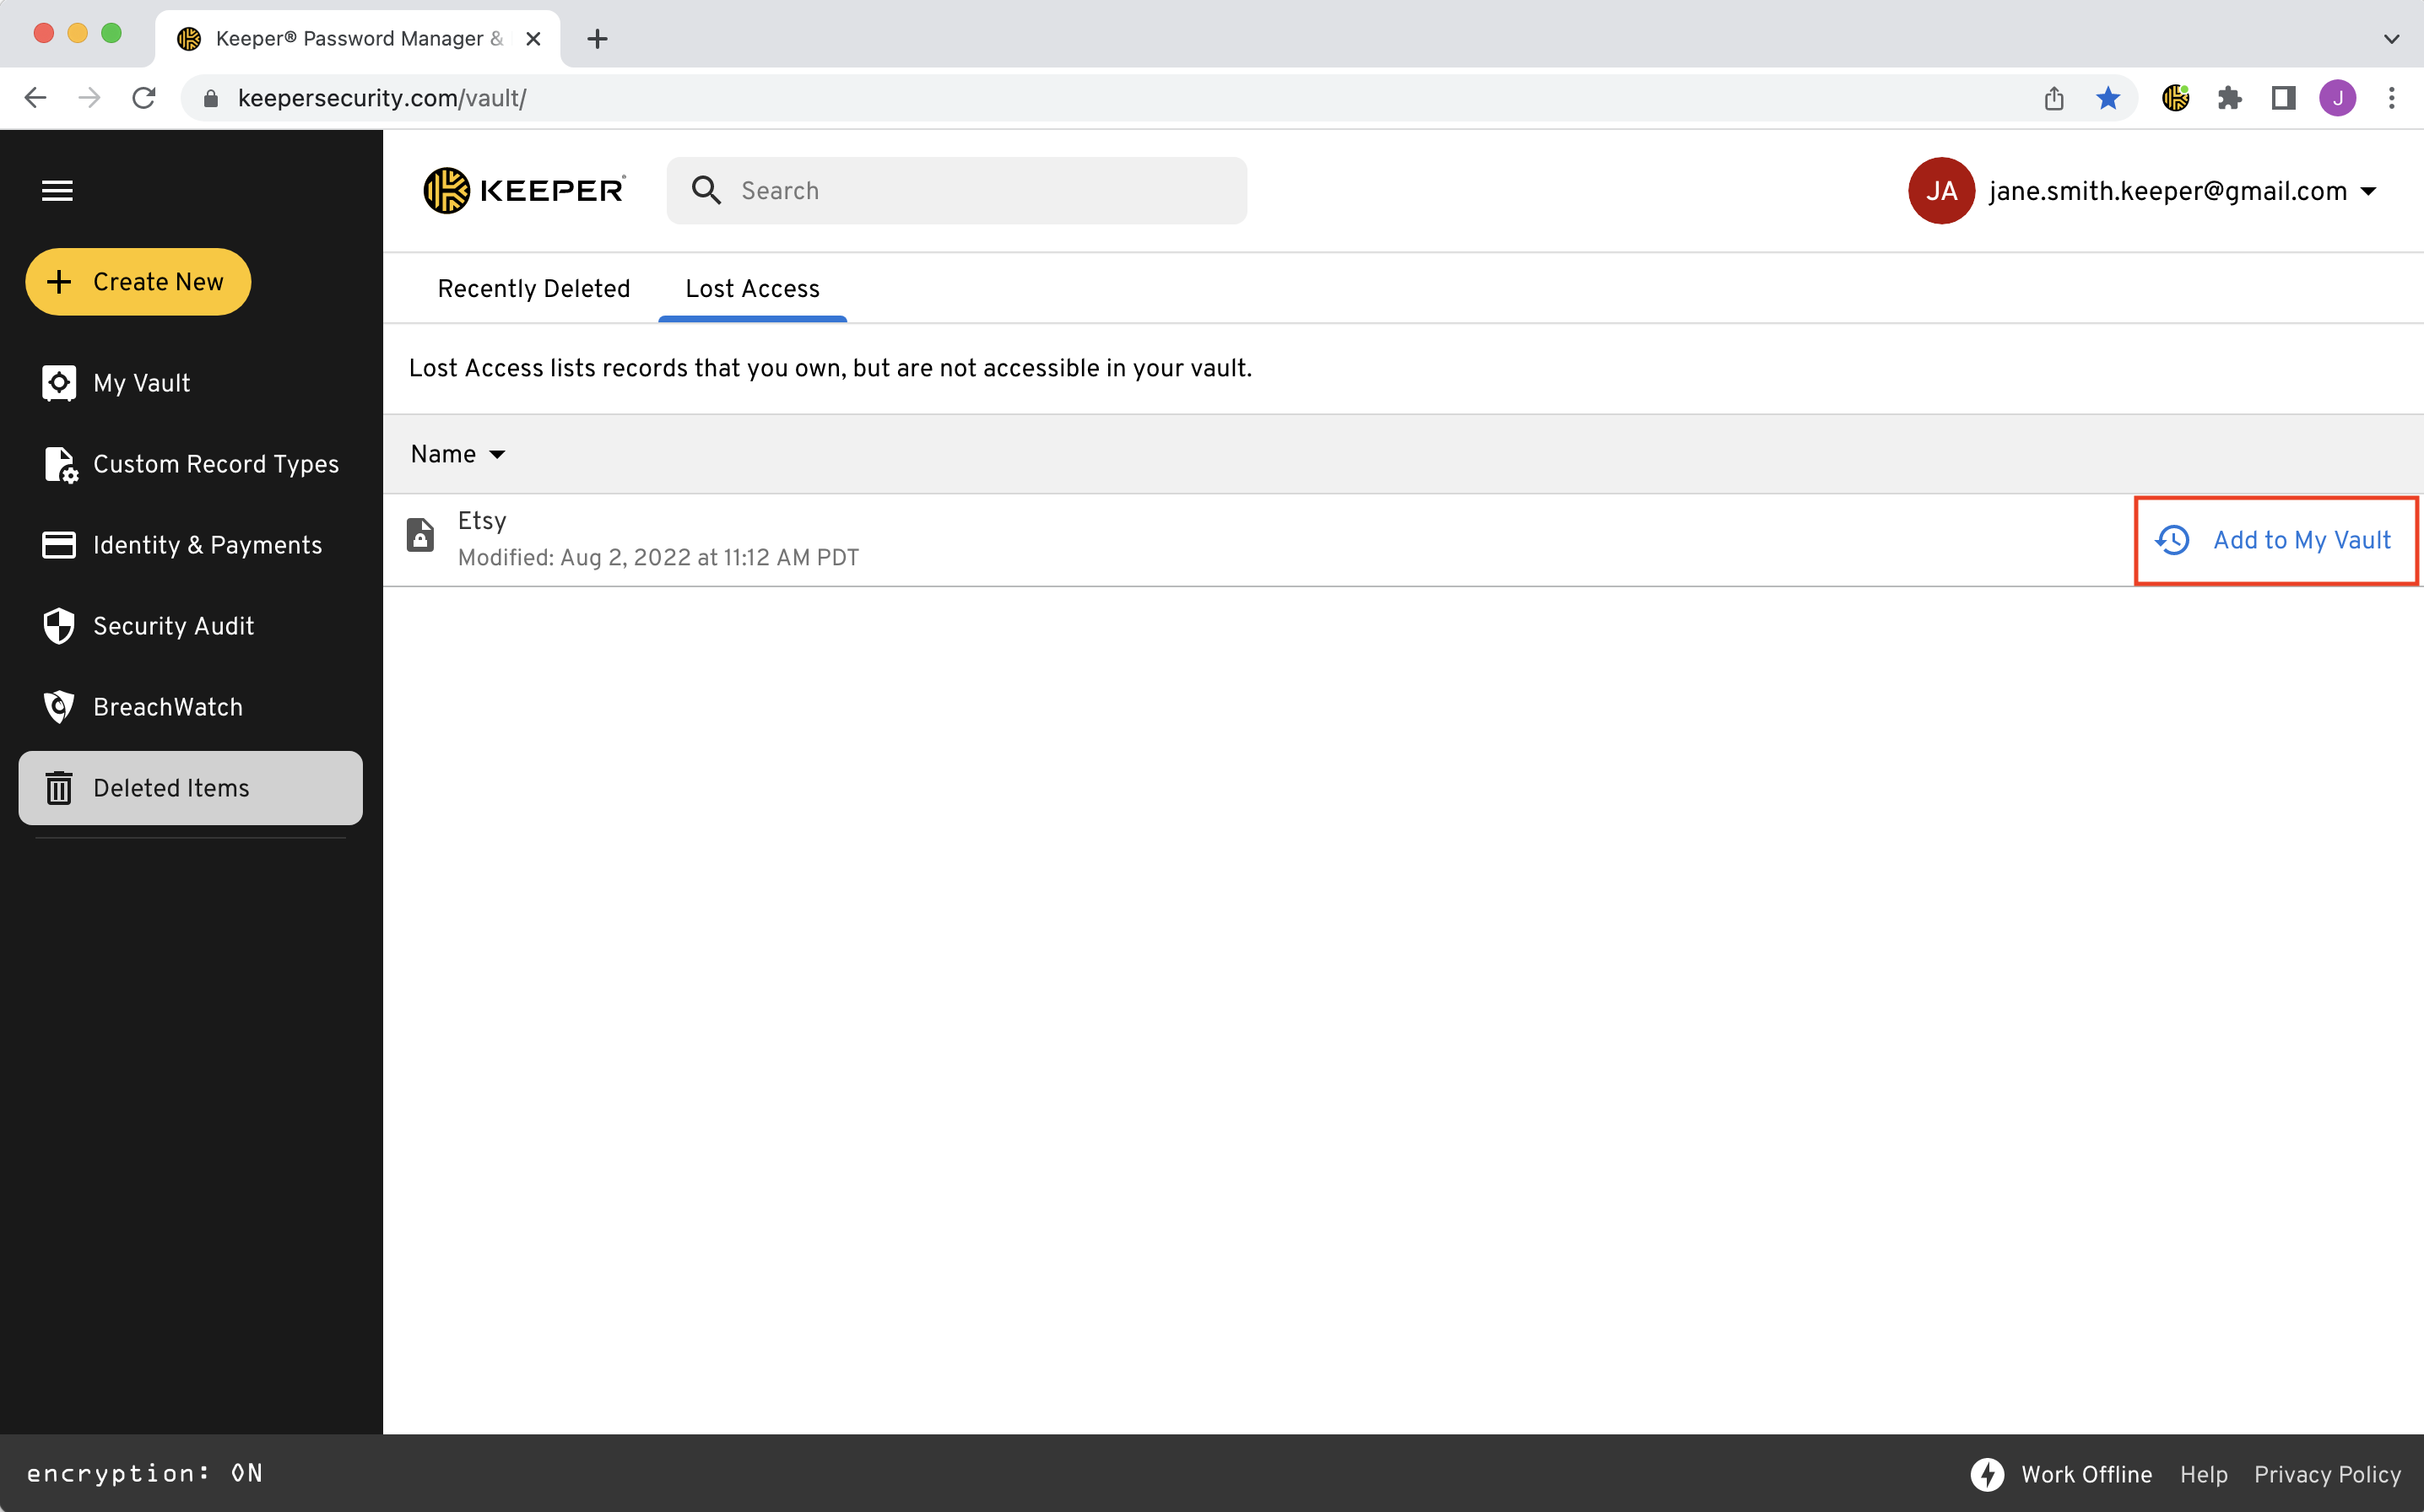
Lost Access

Shared Item Recovery

Add Two-Factor Code to a Record

Store 2FA Code in a Record

Advanced Account Settings > Search

Keeper ForceField

Two-Factor Authentication


Two-Factor Authentication Sign Up

Security Key Setup

Registration of Security Key

Require PIN if set on security key

Upload QR Code or Manual Entry Setup
Settings > Security > Biometric Login

Windows Hello Login

Export Options